天在做項目中遇到一個問題,項目中需要開發一個PC工具(要求是Windows),其中需要將一些文件打包成gz文件,gz文件是UNIX系統中的壓縮文件,後來找了找網上的資源,只有解壓的C++源碼,沒有告訴你如何進行GZ格式的壓縮,當然了,你還可以使用7Z軟件對文件進行GZ解壓縮。而本篇文章將用另外一個思路去實現GZ格式的解壓縮。
首先,創建一個C++的工程項目,這裡使用MFC窗體項目。
功能很簡單,先看下整個窗體設計:
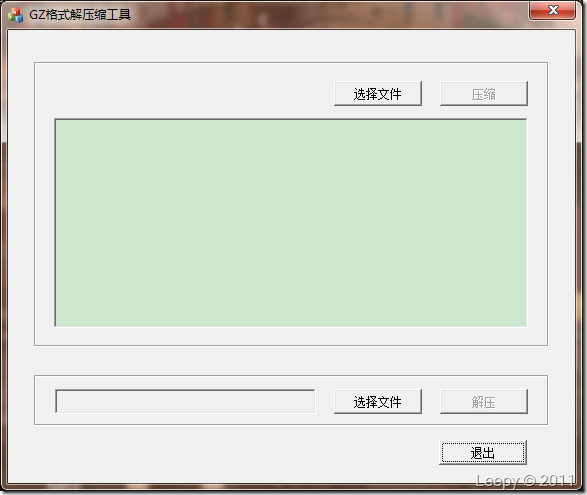
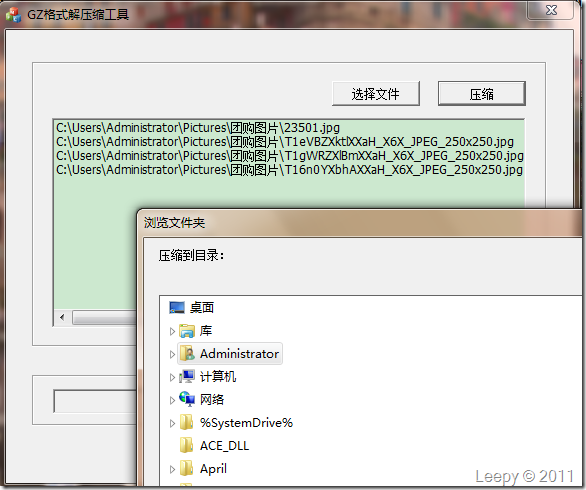
上面一排通過“選擇文件”在下面的列表中顯示文件路徑,然後通過“壓縮”按鈕,保存到指定的目錄中。
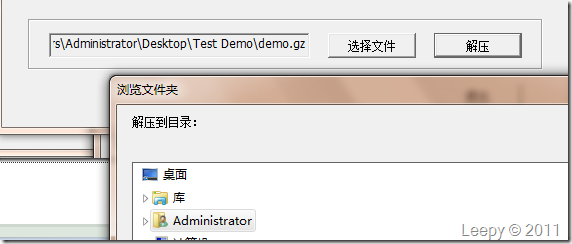
下面一排通過”選擇文件”選擇gz格式的壓縮包,然後通過“解壓”按鈕,保存到指定的目錄中。、
界面的功能就是這樣,下面我來介紹下一些主要核心的功能。
首先,來看GZ的一個處理類:
GZHelper.h 頭文件
//GZ解壓縮類(配合tar.exe的可執行文件)
class GZHelper
{
public:
GZHelper();
virtual ~GZHelper();
static void Compress(char* gzFilePath, int fileNum, char* file, ...); //壓縮,(壓縮包路徑,文件個數,可變參數的文件列表)
static void Compress(char* gzFilePath, int fileNum, char** files); //壓縮,(壓縮包路徑,文件個數,文件列表)
static void Decompress(char* folderPath, char* gzFilePath); //解壓,(解壓目錄, 壓縮包路徑)
private:
static CString ConvertToUnix(CString winFile); //將Window上的路徑格式轉換為UNIX路徑格式
static void FindFile(CString path, CString outPath); //遍歷目錄,並將目錄中的所有文件移動到outPath中
};GZHelper.cpp
void GZHelper::Compress(char* gzFilePath, int fileNum, char* file, ...)
{
va_list argptr;
va_start(argptr, gzFilePath);
va_arg(argptr, int);
char** files;
files = new char*[fileNum];
for(int index = 0; index < fileNum; index++)
{
char* file = va_arg(argptr, char*);
CString str_file;
str_file = file;
files[index] = new char[str_file.GetLength()];
memcpy(files[index], file, str_file.GetLength());
files[index][str_file.GetLength()] = 0;
}
va_end(argptr);
Compress(gzFilePath, fileNum, files);
}
void GZHelper::Compress(char* gzFilePath, int fileNum, char** files)
{
CString str_gzFilePath(gzFilePath);
CString folderPath = str_gzFilePath.Left(str_gzFilePath.ReverseFind(\) + 1);
CString command = "cd ";
command = command + Path::StartupPath() + "tar && " + Path::GetDrive() + " && tar.exe zcPf ";
CString unix_str_gzfile = ConvertToUnix(str_gzFilePath);
command = command + """ + unix_str_gzfile + "" ";
for(int index = 0; index < fileNum; index++)
{
char* file = files[index];
CString str_file;
str_file = file;
CString unix_str_file = ConvertToUnix(str_file);
command = command + """ + unix_str_file + "" ";
}
//執行命令
system(command);
}
void GZHelper::Decompress(char* folderPath, char* gzFilePath)
{
CString str_folderPath(folderPath);
CString str_gzFilePath(gzFilePath);
CString command = "cd ";
command = command + Path::StartupPath() + "tar && " + Path::GetDrive() + " && tar.exe zxvf ";
CString unix_str_gzfile = ConvertToUnix(str_gzFilePath);
command = command + """ + unix_str_gzfile + "" ";
system(command);
CString outPath = str_folderPath + "\demo";
CreateDirectory(outPath, NULL);
CString inPath = Path::StartupPath() + "tar\cygdrive";
GZHelper::FindFile(inPath, outPath);
RemoveDirectory(inPath);
}
// 將Windows下的路徑轉換為UNIX路徑
CString GZHelper::ConvertToUnix(CString winFile)
{
CString unixFile;
unixFile = winFile;
unixFile.Replace("\", "/");
unixFile = "/cygdrive/" + unixFile.Mid(0, 1) + unixFile.Mid(2, unixFile.GetLength() - 2);
return unixFile;
}
void GZHelper::FindFile(CString path, CString outPath)
{
CString szDir = path + "\*.*";
CFileFind fileFind;
BOOL result = fileFind.FindFile(szDir);
while(result)
{
result = fileFind.FindNextFile();
if(fileFind.IsDots())
continue;
if(fileFind.IsDirectory())
{
GZHelper::FindFile(fileFind.GetFilePath(), outPath);
}
else
{
//移動文件
MoveFile(fileFind.GetFilePath(), outPath + "\" + fileFind.GetFileName());
}
}
fileFind.Close();
}通過代碼中,我們看到兩個方法Compress和Decompress,這裡就是作為最核心的函數。
實際上,原理就是通過windows上的命令提示符cmd去調用一個tar的在Windows下編譯好的一個命令包,這個包的目錄內容如下:
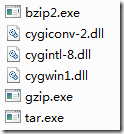
實際上它是利用cygwin1.dll組件,將UNIX上的tar命令轉換到Windows平台上運行。
這個包我會在連同工具和源碼稍後在文章末尾一起奉上。
我們看到,在Compress中我們使用到"cd”命令符,這裡是需要將cmd當前的路徑設置到應用程序裡面的一個tar包的路徑上。
“&&”符號可以在單條指令中復合執行。
注意這裡的command,在字符串路徑中最好需要用"""將字符串隔開,這是為了防止字符串中的路徑包括空格字符。
system函數執行cmd命令。
另外,我們看到ConverToUnix函數,它是用來表示將Windows下的路徑轉換為cygwin下的虛擬UNIX路徑:
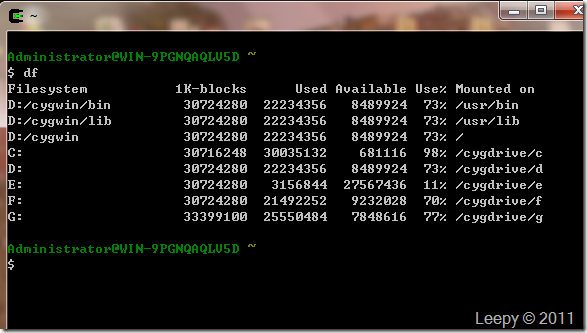
這是什麼意思呢?現在我打開一個cygwin.exe工具,執行df命令:
