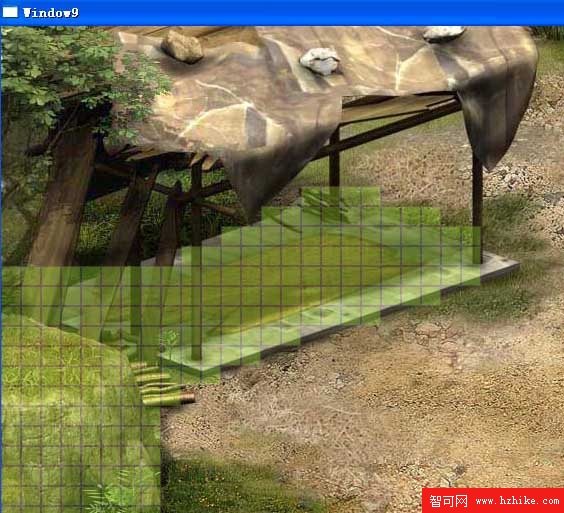
從上圖可以看到,每個綠色格子代表一個20*20像素的障礙物,只能說勉強達到描繪障礙物的效果吧。從而又驗證了我們上一節所講到的GridSize越小,定位將越精確,難道不是至理名言嗎!
有了這個思路,接下來我用了3個循環算法實現了左部分的障礙物設定:
//構建障礙物
for (int y = 12; y <= 27; y++) {
 for (int x = 0; x <= 7; x++) {
  //障礙物在矩陣中用0表示
  Matrix[x, y] = 0;
  rect = new Rectangle();
  rect.Fill = new SolidColorBrush(Colors.GreenYellow);
  rect.Opacity = 0.3;
  rect.Stroke = new SolidColorBrush(Colors.Gray);
  rect.Width = GridSize;
  rect.Height = GridSize;
  CarrIEr.Children.Add(rect);
  Canvas.SetLeft(rect, x * GridSize);
  Canvas.SetTop(rect, y * GridSize);
 }
}
int move = 0;
for (int x = 8; x <= 15; x++) {
 for (int y = 12; y <= 18; y++) {
  Matrix[x, y - move] = 0;
  rect = new Rectangle();
  rect.Fill = new SolidColorBrush(Colors.GreenYellow);
  rect.Opacity = 0.3;
  rect.Stroke = new SolidColorBrush(Colors.Gray);
  rect.Width = GridSize;
  rect.Height = GridSize;
  CarrIEr.Children.Add(rect);
  Canvas.SetLeft(rect, x * GridSize);
  Canvas.SetTop(rect, (y - move) * GridSize);
 }
 move = x % 2 == 0 ? move + 1 : move;
}
int start_y = 4;
int end_y = 10;
for (int x = 16; x <= 23; x++) {
 for (int y = start_y; y <= end_y; y++) {
  Matrix[x, y + move] = 0;
  rect = new Rectangle();
  rect.Fill = new SolidColorBrush(Colors.GreenYellow);
  rect.Opacity = 0.3;
  rect.Stroke = new SolidColorBrush(Colors.Gray);
  rect.Width = GridSize;
  rect.Height = GridSize;
  CarrIEr.Children.Add(rect);
  Canvas.SetLeft(rect, x * GridSize);
  Canvas.SetTop(rect, (y + move) * GridSize);
 }
 start_y = x % 3 == 0 ? start_y + 1 : start_y;
 end_y = x % 3 == 0 ? end_y - 1 : end_y;
}
構建好障礙物後運行程序測試的效果如下圖:
