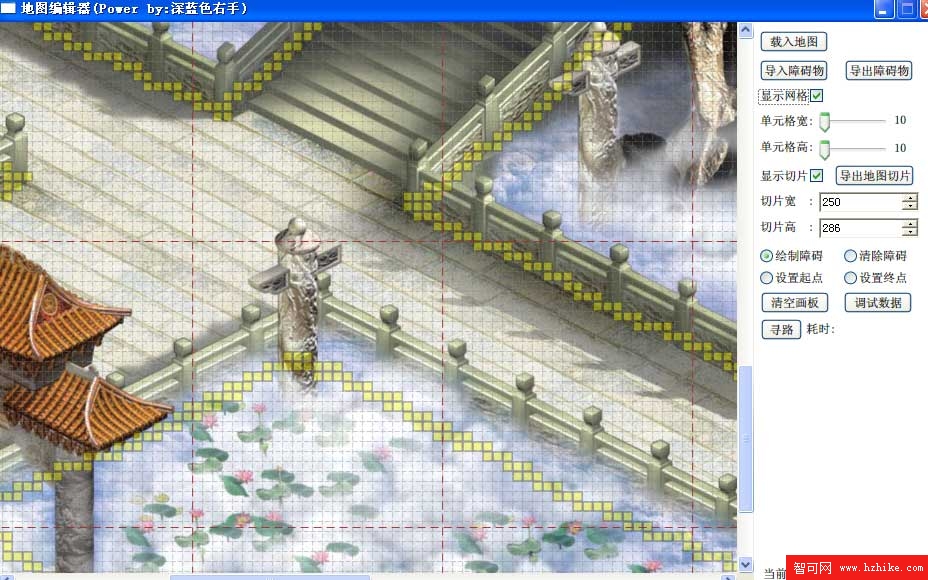
那麼接下來同樣的我們通過繪制Line的方式來繪制切片邊線,具體方法與繪制障礙物邊線非常相似,額外再通過一些簡單的事件即可實現自定義地圖切片設計:

上圖中灰色虛線為10*10像素單位的障礙物單元格邊線,棕紅色虛線為250*286像素單位的切片邊線,通過NumericUpDown可以非常方便的定義最大值、最小值、有效值及跨越值,並且通過它的ValueChanged事件實現輕松的所見即所得。
設定完切片邊線的顯示後,最後將根據此切片預覽實現真正的地圖片導出功能。這裡我們可以使FolderBrowserDialog文件夾選擇對話框,並配合如下方法來實現此功能:
int sectionXNum = (int)(mapWidth / (double)SectionWidth.Value);
int sectionYNum = (int)(mapHeight / (double)SectionHeight.Value);
for (int x = 0; x < sectionXNum; x++) {
 for (int y = 0; y < sectionYNum; y++) {
  CroppedBitmap croppedBitmap =
new CroppedBitmap(mapSource, new Int32Rect(x * (int)SectionWidth.Value, y * (int)SectionHeight.Value, (int)SectionWidth.Value, (int)SectionHeight.Value));
 System.IO.FileStream fileStream =
  new System.IO.FileStream(string.Format(@"{0}/{1}_{2}.jpg", outputSection.SelectedPath, x, y), System.IO.FileMode.Create);
         JpegBitmapEncoder encoder = new JpegBitmapEncoder();
         encoder.Frames.Add(BitmapFrame.Create(croppedBitmap));
         encoder.Save(fileStream);
         fileStream.Close();
    }
}
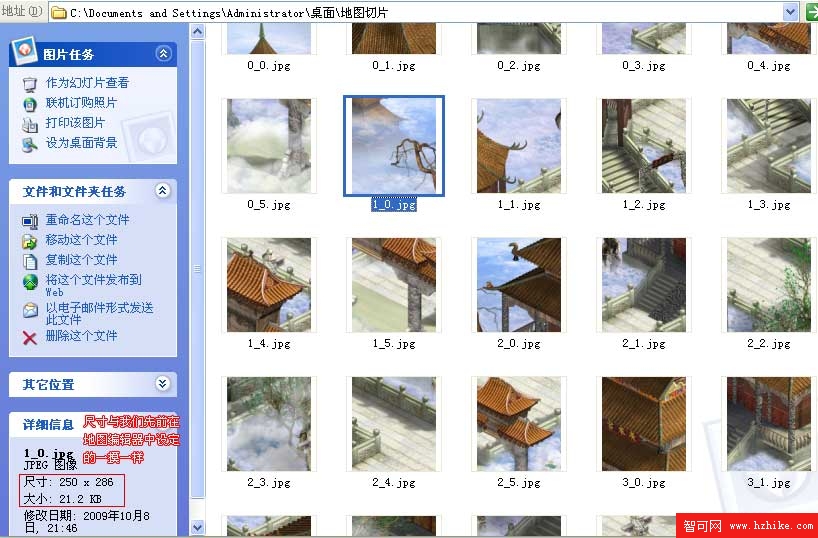
通過前面章節的學習,大家對CroppedBitmap再熟悉不過了,它應該算是WPF中最受寵愛的對象之一。此方法根據地圖切片數量(sectionXNum,sectionYNum),利用FileStream和JpegBitmapEncoder循環導出jpg圖片到FolderBrowserDialog指定的文件夾(SelectedPath)中。最後得到的是類似如下若干被自動切割得整整齊齊的地圖切片:
