為Web Part部件創建Events是生成Web Parts部件的核心部分。本文主要講解如何使用Visual Studio在標准Web Part 部件中創建事件處理器。
1. 打開Visual Studio 創建新的空白SharePoint項目SPWebPartEvent,點擊確定。部署為場解決方案。
2. 右擊項目添加新Web部件SampleEventWebPart。點擊確定。
3. 打開SampleEventWebPart.webpart,修改它的標題和描述屬性。
<?xml version="1.0" encoding="utf-8"?>
<webParts>
<webPart xmlns="http://schemas.microsoft.com/WebPart/v3">
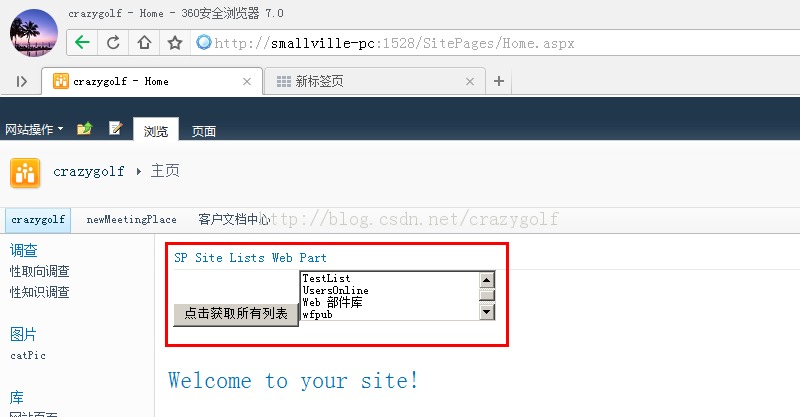
<metaData>
<type name="SPWebPartEvent.SampleEventWebPart.SampleEventWebPart, $SharePoint.Project.AssemblyFullName$"  />
<importErrorMessage>$Resources:core,ImportErrorMessage;</importErrorMessage>
</metaData>
<data>
<properties>
<property name="Title" type="string">SP Site Lists Web Part</property>
<property name="Description" type="string">List of Lists from SharePoint site.</property>
</properties>
</data>
</webPart>
</webParts>
本欄目
4. 打開SampleEventWebPart.cs,修改代碼。
using System;
using System.ComponentModel;
using System.Web;
using System.Web.UI;
using System.Web.UI.WebControls;
using System.Web.UI.WebControls.WebParts;
using Microsoft.SharePoint;
using Microsoft.SharePoint.WebControls;

namespace SPWebPartEvent.SampleEventWebPart
{
[ToolboxItemAttribute(false)]
public class SampleEventWebPart : WebPart
{
//Be sure to replace mySiteURL with your server URL.
//確保用自己服務器的URL代替這裡的mySiteURL。
string mySiteURL = "http://smallville-pc:1528/";
ListBox mySPLists = new ListBox();
string listInfo = "";
Button getLists = new Button();
protected override void OnPreRender(EventArgs e)
{
getLists.Text = "點擊獲取所有列表";
}
protected override void CreateChildControls()
{
this.Controls.Add(getLists);
this.Controls.Add(mySPLists);
getLists.Click += new EventHandler(getLists_Click);
}
void getLists_Click(object sender, EventArgs e)
{
using (SPSite mySiteCollection = new SPSite(mySiteURL))
{
using (SPWeb mySPSite = mySiteCollection.RootWeb)
{
foreach (SPList myList in mySPSite.Lists)
{
listInfo = myList.Title.ToString();
mySPLists.Items.Add(listInfo);
}
}
}
}
}
}
5. 現在點擊生成--部署解決方案。
6. 在SharePoint站點,點擊網站操作--編輯頁面--添加Web部件,在Custom類中選擇SP Site Lists Web Part,點擊添加。
7. 嘗試點擊按鈕“點擊獲取所有列表”,可以看到:
