上周在pedramr blog上看到有人問是否能夠異步調用Restful的WCF服務,下面便是具體實現異步調用Restful的WCF實現細節。通過本文的學習,有助於如下知識的掌握:
如何設定WCF的Restful支持
如何異步調用Restful的WCF服務
第一步:創建一個解決方案:AsyCallRestfulWcf,該解決方案包含下面四個項目:
項目名稱 備注 AsyCallRestfulWcf.Contracts WCF服務的契約項目,包含服務契約和數據契約的定義 AsyCallRestfulWcf.Service WCF服務的具體實現 AsyCallRestfulWcf.Host WCF服務的承載 AsyCallRestfulWcf.HttpClient 用Http 的方式異步調用WCF服務客戶端
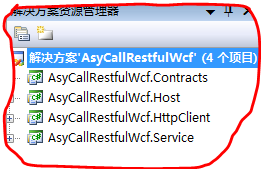
第二步:在項目AsyCallRestfulWcf.Contracts中創建服務契約IService.cs和數據契約Person.cs

Person.cs
Person.cs

using System;

using System.Collections.Generic;

using System.Text;

using System.Xml.Serialization;

using System.Runtime.Serialization;


namespace AsyCallRestfulWcf.Contracts

{

[DataContract]

public class Person

{

[DataMember]

public string ID

{

get;

set;

}

[DataMember]

public string Name

{

get;

set;

}

[DataMember]

public int Age

{

get;

set;

}

}

}
IService.cs
IService.cs

using System;

using System.Collections.Generic;

using System.Text;

using System.ServiceModel;


namespace AsyCallRestfulWcf.Contracts

{

[ServiceContract]

public interface IService

{

[OperationContract]

Person GetPerson(string id);

}

}
第三步:在項目AsyCallRestfulWcf.Service中創建服務實現類Service.cs

Service.cs
Service.cs

using System;

using System.Collections.Generic;

using System.Text;

using System.ServiceModel.Web;


namespace AsyCallRestfulWcf.Service

{

public class Service:Contracts.IService

{

[WebInvoke(Method = "*", UriTemplate = "GetPerson?id={id}")]

public Contracts.Person GetPerson(string id)

{

System.Threading.Thread.Sleep(5000);

Contracts.Person p = new AsyCallRestfulWcf.Contracts.Person();

p.ID = id;

p.Name = "jillzhang";

p.Age = 25;

return p;

}

}

}
在服務方法中,用System.Threading.Thread.Sleep(5000);模擬一個比較耗時的操作
第四步 實現WCF服務的承載項目:AsyCallRestfulWcf.Host
添加一個應用程序配置文件app.config和代碼文件Programe.cs
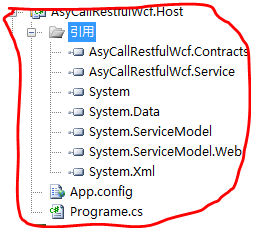
App.config
App.config

<?xml version="1.0" encoding="utf-8" ?>

<configuration>

<system.serviceModel>

<services>

<service name="AsyCallRestfulWcf.Service.Service">

<host>

<baseAddresses>

<add baseAddress=">

</baseAddresses>

</host>

<endpoint address="" binding="webHttpBinding" contract="AsyCallRestfulWcf.Contracts.IService"

behaviorConfiguration="RestfulBehavior" name="webHttpBinding">

</endpoint>

</service>

</services>

<behaviors>

<endpointBehaviors>

<behavior name="RestfulBehavior">

<webHttp/>

<synchronousReceive/>

</behavior>

</endpointBehaviors>

</behaviors>

</system.serviceModel>

</configuration>
Programe.cs
Programe.cs

using System;

using System.Collections.Generic;

using System.Text;

using System.ServiceModel;


namespace AsyCallRestfulWcf.Host

{

public class Programe

{

protected static void Main()

{

using (ServiceHost host = new ServiceHost(typeof(Service.Service)))

{

host.Open();

Console.WriteLine("服務已經啟動!");

Console.Read();

}


}

}

}
在App.config中,要使WCF支持Restful,要使用的binding是webHttpBinding
第五步:實現異步調用的客戶端:AsyCallRestfulWcf.HttpClient
添加windows窗體Form1.
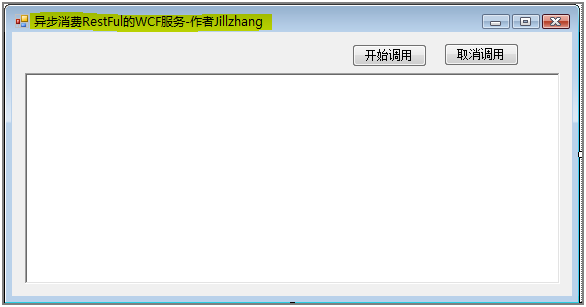
後台代碼為:
Form1.cs

using System;

using System.Collections.Generic;

using System.ComponentModel;

using System.Data;

using System.Drawing;

using System.Linq;

using System.Text;

using System.Windows.Forms;


namespace AsyCallRestfulWcf.HttpClient

{

public partial class Form1 : Form

{

public Form1()

{

InitializeComponent();

}

System.Net.WebClient wc;

private void button1_Click(object sender, EventArgs e)

{

wc = new System.Net.WebClient();

wc.DownloadStringAsync(new Uri(""));

wc.DownloadStringCompleted += new System.Net.DownloadStringCompletedEventHandler(wc_DownloadStringCompleted);

button1.Enabled = false;

button2.Enabled = true;

}


void wc_DownloadStringCompleted(object sender, System.Net.DownloadStringCompletedEventArgs e)

{

if (!e.Cancelled)

{

string content = e.Result;

richTextBox1.Text = content;

button1.Enabled = true;

button2.Enabled = false;

}

}


private void button2_Click(object sender, EventArgs e)

{

wc.CancelAsync();

button1.Enabled = true;

button2.Enabled = false;

richTextBox1.Text = "請求已經取消!";

}

}

}
現在就可以調試浏覽了,將解決方案設置成多啟動的、

然後F5,出現下面的界面

和
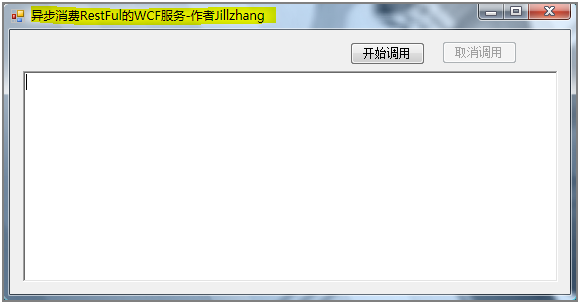
表明運行正常
點擊開始調用,等待幾秒後,下面的文本框便出現文字
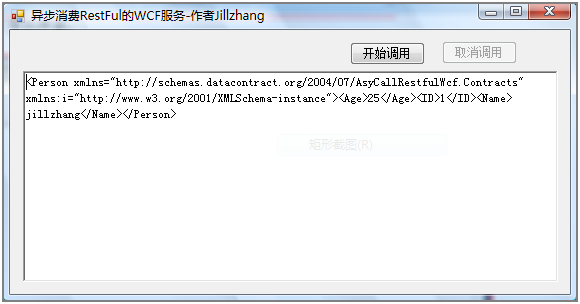
在開始調用之後,點擊取消調用可以取消請求