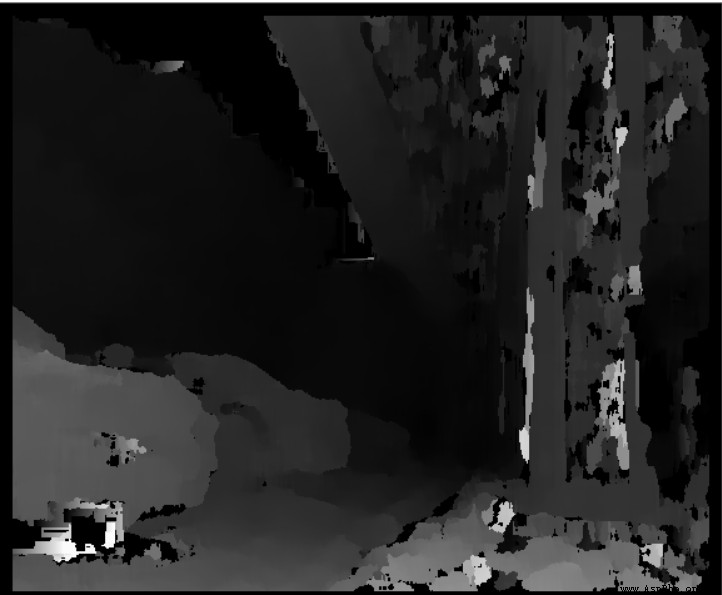
BM算法和SGBM算法大同小異,基本流程為:
我們只需要關注blockSize、numDisparities這兩個參數即可
/* 雙目測距 */
#include <opencv2/opencv.hpp>
#include <iostream>
#include <math.h>
using namespace std;
using namespace cv;
const int imageWidth = 640; //攝像頭的分辨率
const int imageHeight = 480;
Vec3f point3;
float d;
Size imageSize = Size(imageWidth, imageHeight);
Mat img;
Mat rgbImageL, grayImageL;
Mat rgbImageR, grayImageR;
Mat rectifyImageL, rectifyImageR;
Rect m_l_select;
Rect m_r_select;
Rect validROIL;//圖像校正之後,會對圖像進行裁剪,這裡的validROI就是指裁剪之後的區域
Rect validROIR;
Mat mapLx, mapLy, mapRx, mapRy; //映射表
Mat Rl, Rr, Pl, Pr, Q; //校正旋轉矩陣R,投影矩陣P 重投影矩陣Q
Mat xyz; //三維坐標
Point origin; //鼠標按下的起始點
Rect selection; //定義矩形選框
bool selectObject = false; //是否選擇對象
int blockSize = 8, uniquenessRatio = 0, numDisparities = 3;
Ptr<StereoBM> bm = StereoBM::create(16, 9);
/*事先標定好的左相機的內參矩陣
fx 0 cx
0 fy cy
0 0 1
*/
Mat cameraMatrixL = (Mat_<double>(3, 3) << 516.5066236, -1.444673028, 320.2950423, 0, 516.5816117, 270.7881873, 0, 0, 1.);
//獲得的畸變參數
Mat distCoeffL = (Mat_<double>(5, 1) << -0.046645194, 0.077595167, 0.012476819, -0.000711358, 0);
/*事先標定好的右相機的內參矩陣
fx 0 cx
0 fy cy
0 0 1
*/
Mat cameraMatrixR = (Mat_<double>(3, 3) << 511.8428182, 1.295112628, 317.310253, 0, 513.0748795, 269.5885026,0, 0, 1);
Mat distCoeffR = (Mat_<double>(5, 1) << -0.061588946, 0.122384376, 0.011081232, -0.000750439, 0);
//[-0.038407383078874,0.236392800301615] [0.004121779274885,0.002296129959664]
//對應Matlab所得T參數
Mat T = (Mat_<double>(3, 1) <<-120.3559901,-0.188953775,-0.662073075);//T平移向量
//Mat rec = (Mat_<double>(3, 1) << -0.00306, -0.03207, 0.00206);//rec旋轉向量,對應matlab om參數 我
Mat rec = (Mat_<double>(3, 3) << 0.999911333, -0.004351508, 0.012585312,
0.004184066, 0.999902792, 0.013300386,
-0.012641965, -0.013246549, 0.999832341); //rec旋轉向量,對應matlab om參數 我
Mat R;//R 旋轉矩陣
/*****立體匹配*****/
void stereo_match(int, void*)
{
bm->setBlockSize(2 * blockSize + 5); //SAD窗口大小,5~21之間為宜
bm->setROI1(validROIL);
bm->setROI2(validROIR);
bm->setPreFilterCap(31);
bm->setMinDisparity(0); //最小視差,默認值為0, 可以是負值,int型
bm->setNumDisparities(numDisparities * 16 + 16);//視差窗口,即最大視差值與最小視差值之差,窗口大小必須是16的整數倍,int型
bm->setTextureThreshold(10);
bm->setUniquenessRatio(uniquenessRatio);//uniquenessRatio主要可以防止誤匹配
bm->setSpeckleWindowSize(100);
bm->setSpeckleRange(32);
bm->setDisp12MaxDiff(-1);
Mat disp, disp8;
bm->compute(rectifyImageL, rectifyImageR, disp);//輸入圖像必須為灰度圖
disp.convertTo(disp8, CV_8U, 255 / ((numDisparities * 16 + 16)*16.));//計算出的視差是CV_16S格式
reprojectImageTo3D(disp, xyz, Q, true); //在實際求距離時,ReprojectTo3D出來的X / W, Y / W, Z / W都要乘以16(也就是W除以16),才能得到正確的三維坐標信息。
xyz = xyz * 16;
imshow("disparity", disp8);
}
/*****描述:鼠標操作回調*****/
static void onMouse(int event, int x, int y, int, void*)
{
if (selectObject)
{
selection.x = MIN(x, origin.x);
selection.y = MIN(y, origin.y);
selection.width = std::abs(x - origin.x);
selection.height = std::abs(y - origin.y);
}
switch (event)
{
case EVENT_LBUTTONDOWN: //鼠標左按鈕按下的事件
origin = Point(x, y);
selection = Rect(x, y, 0, 0);
selectObject = true;
//cout << origin << "in world coordinate is: " << xyz.at<Vec3f>(origin) << endl;
point3 = xyz.at<Vec3f>(origin);
point3[0];
//cout << "point3[0]:" << point3[0] << "point3[1]:" << point3[1] << "point3[2]:" << point3[2]<<endl;
cout << "世界坐標:" << endl;
cout << "x: " << point3[0] << " y: " << point3[1] << " z: " << point3[2] << endl;
d = point3[0] * point3[0] + point3[1] * point3[1] + point3[2] * point3[2];
d = sqrt(d); //mm
// cout << "距離是:" << d << "mm" << endl;
d = d / 10.0; //cm
cout << "距離是:" << d << "cm" << endl;
// d = d/1000.0; //m
// cout << "距離是:" << d << "m" << endl;
break;
case EVENT_LBUTTONUP: //鼠標左按鈕釋放的事件
selectObject = false;
if (selection.width > 0 && selection.height > 0)
break;
}
}
/*****主函數*****/
int main()
{
/*
立體校正
*/
Rodrigues(rec, R); //Rodrigues變換
stereoRectify(cameraMatrixL, distCoeffL, cameraMatrixR, distCoeffR, imageSize, R, T, Rl, Rr, Pl, Pr, Q, CALIB_ZERO_DISPARITY,
0, imageSize, &validROIL, &validROIR);
initUndistortRectifyMap(cameraMatrixL, distCoeffL, Rl, Pr, imageSize, CV_32FC1, mapLx, mapLy);
initUndistortRectifyMap(cameraMatrixR, distCoeffR, Rr, Pr, imageSize, CV_32FC1, mapRx, mapRy);
/*讀取圖片*/
m_l_select = Rect(0, 0, 640, 480);
img = imread("car.jpg", IMREAD_COLOR);
//imshow("Image", img);
rgbImageL = img(m_l_select);
cvtColor(rgbImageL, grayImageL, COLOR_BGR2GRAY);
m_r_select = Rect(640, 0, 640, 480);
rgbImageR = img(m_r_select);
cvtColor(rgbImageR, grayImageR, COLOR_BGR2GRAY);
/*經過remap之後,左右相機的圖像已經共面並且行對准了*/
remap(grayImageL, rectifyImageL, mapLx, mapLy, INTER_LINEAR);
remap(grayImageR, rectifyImageR, mapRx, mapRy, INTER_LINEAR);
/*把校正結果顯示出來*/
Mat rgbRectifyImageL, rgbRectifyImageR;
cvtColor(rectifyImageL, rgbRectifyImageL, COLOR_GRAY2BGR); //偽彩色圖
cvtColor(rectifyImageR, rgbRectifyImageR, COLOR_GRAY2BGR);
//顯示在同一張圖上
Mat canvas;
double sf;
int w, h;
sf = 600. / MAX(imageSize.width, imageSize.height);
w = cvRound(imageSize.width * sf);
h = cvRound(imageSize.height * sf);
canvas.create(h, w * 2, CV_8UC3); //注意通道
//左圖像畫到畫布上
Mat canvasPart = canvas(Rect(w * 0, 0, w, h)); //得到畫布的一部分
resize(rgbRectifyImageL, canvasPart, canvasPart.size(), 0, 0, INTER_AREA); //把圖像縮放到跟canvasPart一樣大小
Rect vroiL(cvRound(validROIL.x*sf), cvRound(validROIL.y*sf), //獲得被截取的區域
cvRound(validROIL.width*sf), cvRound(validROIL.height*sf));
//rectangle(canvasPart, vroiL, Scalar(0, 0, 255), 3, 8); //畫上一個矩形
cout << "Painted ImageL" << endl;
//右圖像畫到畫布上
canvasPart = canvas(Rect(w, 0, w, h)); //獲得畫布的另一部分
resize(rgbRectifyImageR, canvasPart, canvasPart.size(), 0, 0, INTER_LINEAR);
Rect vroiR(cvRound(validROIR.x * sf), cvRound(validROIR.y*sf),
cvRound(validROIR.width * sf), cvRound(validROIR.height * sf));
//rectangle(canvasPart, vroiR, Scalar(0, 0, 255), 3, 8);
cout << "Painted ImageR" << endl;
//畫上對應的線條
for (int i = 0; i < canvas.rows; i += 16)
line(canvas, Point(0, i), Point(canvas.cols, i), Scalar(0, 255, 0), 1, 8);
imshow("rectified", canvas);
namedWindow("disparity", WINDOW_AUTOSIZE);
//鼠標響應函數setMouseCallback(窗口名稱, 鼠標回調函數, 傳給回調函數的參數,一般取0)
setMouseCallback("disparity", onMouse, 0);
stereo_match(0, 0);
waitKey();
return 0;
}
import cv2
import camera_configs
import math
import os
# 引入函數庫
import datetime as dt
floder = os.getcwd()
cap = cv2.VideoCapture(0)
cap.set(3, 2560)
cap.set(4, 720) #打開並設置攝像頭
# 鼠標回調函數
def onmouse_pick_points(event, x, y, flags, param):
if event == cv2.EVENT_LBUTTONDOWN:
threeD = param
print('\n像素坐標 x = %d, y = %d' % (x, y))
# print("世界坐標是:", threeD[y][x][0], threeD[y][x][1], threeD[y][x][2], "mm")
print("世界坐標xyz 是:", threeD[y][x][0]/ 1000.0 , threeD[y][x][1]/ 1000.0 , threeD[y][x][2]/ 1000.0 , "m")
distance = math.sqrt( threeD[y][x][0] **2 + threeD[y][x][1] **2 + threeD[y][x][2] **2 )
distance = distance / 1000.0 # mm -> m
print("距離是:", distance, "m")
WIN_NAME = 'Deep disp'
cv2.namedWindow(WIN_NAME, cv2.WINDOW_AUTOSIZE)
while True:
ret, frame = cap.read()
frame1 = frame[0:720, 0:1280]
frame2 = frame[0:720, 1280:2560] #割開雙目圖像
imgL = cv2.cvtColor(frame1, cv2.COLOR_BGR2GRAY) # 將BGR格式轉換成灰度圖片
imgR = cv2.cvtColor(frame2, cv2.COLOR_BGR2GRAY)
# cv2.remap 重映射,就是把一幅圖像中某位置的像素放置到另一個圖片指定位置的過程。
# 依據MATLAB測量數據重建無畸變圖片
img1_rectified = cv2.remap(imgL, camera_configs.left_map1, camera_configs.left_map2, cv2.INTER_LINEAR)
img2_rectified = cv2.remap(imgR, camera_configs.right_map1, camera_configs.right_map2, cv2.INTER_LINEAR)
imageL = cv2.cvtColor(img1_rectified, cv2.COLOR_GRAY2BGR)
imageR = cv2.cvtColor(img2_rectified, cv2.COLOR_GRAY2BGR)
# -------------------------BM算法的應用-----------------------------------
numberOfDisparities = ((1280 // 8) + 15) & -16
stereo = cv2.StereoBM_create(numDisparities=16, blockSize=9) #立體匹配
stereo.setROI1(camera_configs.validPixROI1)
stereo.setROI2(camera_configs.validPixROI2)
stereo.setPreFilterCap(31)
stereo.setBlockSize(15)
stereo.setMinDisparity(0)
stereo.setNumDisparities(numberOfDisparities)
stereo.setTextureThreshold(10)
stereo.setUniquenessRatio(15)
stereo.setSpeckleWindowSize(100)
stereo.setSpeckleRange(32)
stereo.setDisp12MaxDiff(1)
# ------------------------------------------------------------------------
disparity = stereo.compute(img1_rectified, img2_rectified) # 計算視差
disp = cv2.normalize(disparity, disparity, alpha=0, beta=255, norm_type=cv2.NORM_MINMAX, dtype=cv2.CV_8U) #歸一化函數算法
threeD = cv2.reprojectImageTo3D(disparity, camera_configs.Q, handleMissingValues=True) #計算三維坐標數據值
threeD = threeD * 16
# threeD[y][x] x:0~640; y:0~480; !!!!!!!!!!
cv2.setMouseCallback(WIN_NAME, onmouse_pick_points, threeD)
cv2.imshow("left", frame1)
cv2.imshow(WIN_NAME, disp) #顯示深度圖的雙目畫面
key = cv2.waitKey(1)
if key == ord("s"):
# 獲取當前時間
now_time = dt.datetime.now().strftime('%X')
path = folder + "\img_" + str(counter) + ".jpg"
cv2.imwrite(path, frame)
print("snapshot saved into: " + path)
if key == ord("q"):
break
cap.release()
cv2.destroyAllWindows()
