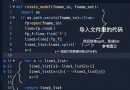
ps:各位好久不見,我回家了!終於有時間把之前的一些東西整理一下了(好吧,之前是我太懶了),今天分享一個功能簡單的python web實戰項目,後期功能可自行豐富。
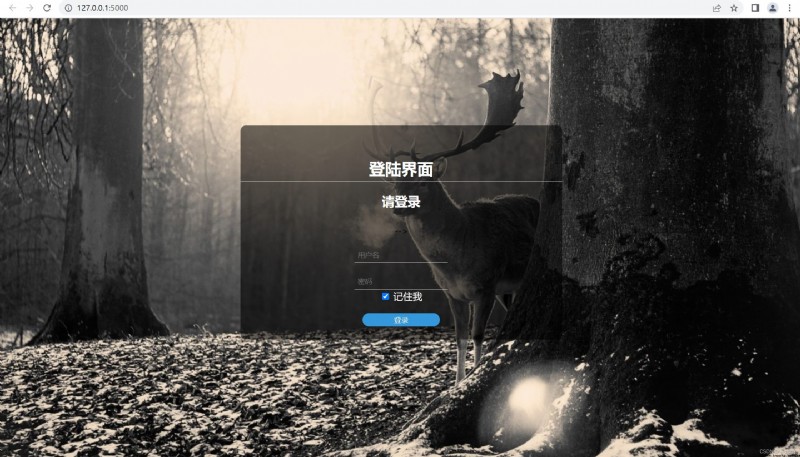
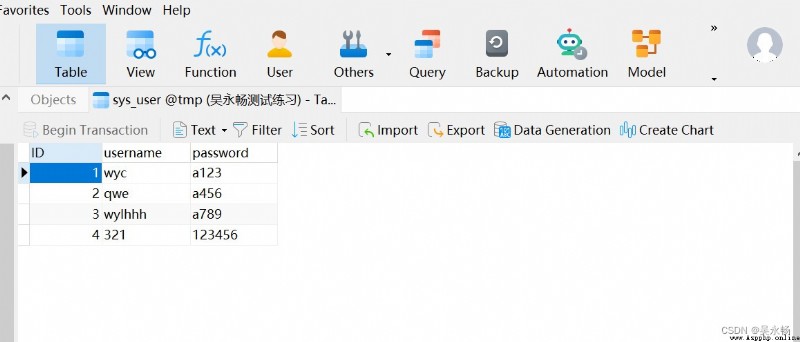
輸入正確用戶名和密碼即可登錄成功(下圖為存放數據的表單)
from flask import Flask, render_template, request
import pymysqlapp = Flask(__name__)
def get_conn():
# 建立與mysql連接
conn = pymysql.connect(host="localhost", user="root", password="root", db="tmp", charset="utf8")
# c創建游標A
cursor = conn.cursor()
return conn, cursorlocalhost: 本機數據庫。
user:設置的數據庫用戶名。
password:數據庫密碼,,默認情況下是root,如果後期自己修改了則改為相應的即可。
db:所要連接的數據庫名稱。
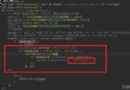
代碼如下:
def close_conn(conn, cursor): # 關閉模塊
if cursor:
cursor.close()
if conn:
conn.close()代碼如下:
def query(sql, *args): # 查詢模塊
conn, cursor = get_conn()
cursor.execute(sql, args)
res = cursor.fetchall()
conn.commit()
close_conn(conn, cursor)
return res
def get_user(username, password): # 從數據庫中查詢用戶名和密碼
sql = "select id from sys_user where username= '" + username + "' and password= '" + password + "'"
res = query(sql)
return ressys_user:存放用戶名和密碼的表。
@app.route('/') # 必須加上路由,否則訪問和函數沒有關聯,當訪問到127.0.0.1:5000/,執行函數
def index():
return render_template('login.html')
@app.route('/login', methods=['post'])
def login():
username = request.form.get('username') # 接收form表單傳參
password = request.form.get('password')
res = get_user(username, password)
if res:
return render_template('xxx.html',msg='登陸成功')
else:
return render_template('login.html', msg='登錄失敗')登陸成功後進入xxx頁面,登陸失敗留在本頁面並給出提示。
登陸界面為表單傳參,這裡用到POST請求。
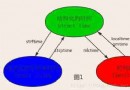
在HTTP協議的請求類型裡:
GET:從服務器端獲取資源或數據
POST:向服務器端提交數據
GET請求發送數據的時候,一般會將請求數據放在url字符串中發送給服務器端,所以從安全性角度來看相對沒有POST請求安全性高,所以GET請求一般不會用於比較隱私數據的傳輸,而POST請求是將請求數據放在請求body裡面,所以一般用於表單數據,登陸數據等數據的傳輸。
if __name__ == '__main__': # 固定的寫法,程序的入口
app.run() # 啟動應用程序,from flask import Flask, render_template, request
import pymysql
# 創建web應用程序
app = Flask(__name__)
def get_conn():
# 建立與mysql連接
conn = pymysql.connect(host="localhost", user="root", password="root", db="tmp", charset="utf8")
# c創建游標A
cursor = conn.cursor()
return conn, cursor
def close_conn(conn, cursor): # 關閉模塊
if cursor:
cursor.close()
if conn:
conn.close()
def query(sql, *args): # 查詢模塊
conn, cursor = get_conn()
cursor.execute(sql, args)
res = cursor.fetchall()
conn.commit()
close_conn(conn, cursor)
return res
def get_user(username, password): # 從數據庫中查詢用戶名和密碼
sql = "select id from sys_user where username= '" + username + "' and password= '" + password + "'"
res = query(sql)
return res
# 寫一個函數來處理浏覽器發送過的請求,請求到/是自動執行這個函數
@app.route('/') # 必須加上路由,否則訪問和函數沒有關聯,當訪問到127.0.0.1:5000/,執行函數
def index():
return render_template('login.html')
@app.route('/login', methods=['post'])
def login():
username = request.form.get('username') # 接收form表單傳參
password = request.form.get('password')
res = get_user(username, password)
if res:
return render_template('game.html',msg='登陸成功')
else:
return render_template('login.html', msg='登錄失敗')
if __name__ == '__main__': # 固定的寫法,程序的入口
app.run() # 啟動應用程序,
<!DOCTYPE html>
<html>
<head>
<meta charset="utf-8" />
<title>登陸界面</title>
<link rel="icon" href="http://v3.bootcss.com/favicon.ico">
<style>
li {
list-style: none;
}
body {
margin: 0;
padding: 0;
box-sizing: border-box;
background-image: url(static/img/鹿3.jpg);
/* background-image: url(/static/img/1.jpg); */
background-repeat: no-repeat;
/*這裡的100% auto 表示將背景圖片的長度100%顯示,高度自適應*/
background-size: 100% auto;
}
#maxbox {
margin: 0 auto;
margin-top: 200px;
padding: 20px, 50px;
/*這裡的90表示以不透明度90%顯示*/
background-color: #00000090;
text-align: center;
width: 600px;
height: 400px;
border-radius: 10px;
}
#maxbox h1 {
padding: 0;
padding-top: 60px;
color: white;
font-size: 30px;
padding-bottom: 4px;
border-bottom: solid 1px white;
}
#maxbox h2 {
font-weight: 700;
color:white;
}
#maxbox .inputbox {
margin-top: 30px;
}
#maxbox .inputText {
margin-top: 20px;
}
#maxbox .inputText span {
color: white;
font-size: 18px;
}
#maxbox .inputText input {
border: 0;
padding: 6px;
border-bottom: 1px solid white;
/*這裡的00表示不透明度為0,即透明顯示*/
background-color: #FFFFFF00;
color: white;
}
#maxbox .inputbox .inputButton {
margin: 0;
border: 0;
margin-top: 20px;
width: 145px;
height: 25px;
/*給這個按鈕變為圓角邊角*/
border-radius: 25px;
color: white;
background-color: #3498db;
}
#sign_up {
margin-top: 50px;
color: white;
font-size: 17px;
}
#sign_up a {
color: #3498db;
}
</style>
</head>
<body>
<div id="maxbox">
<h1>登陸界面</h1>
<h2>請登錄</h2>
<div class="inputbox">
<!-- <form name="frm" action="" method="post">-->
<form action="/login" method="post">-->
<div class="inputText">
<span class="iconfont icon-mine"></span>
<input class="username" type="text" placeholder="用戶名" name="username"  />
</div>
<div class="inputText">
<span class="iconfont icon-lock"></span>
<input type="password" placeholder="密碼" name="password"  />
<br>
<input class="remember" name="remember" type="checkbox" value="" checked="checked">
<span >記住我</span>
</div>
<input class="inputButton" type="submit" value="登錄" />
{
{msg}}
</form>
</div>
</div>
</body>
</html>以上就是今天要分享的內容,python+web+flask輕量級框架的實戰小項目。後續功能可以自行豐富,原理都是類似的。