網上文檔多為使用IPic、uPic、PicG等軟件的方式,我們需要下載軟件,比較繁瑣。所以我自定義了一個腳本,讓工作變得更加簡單。
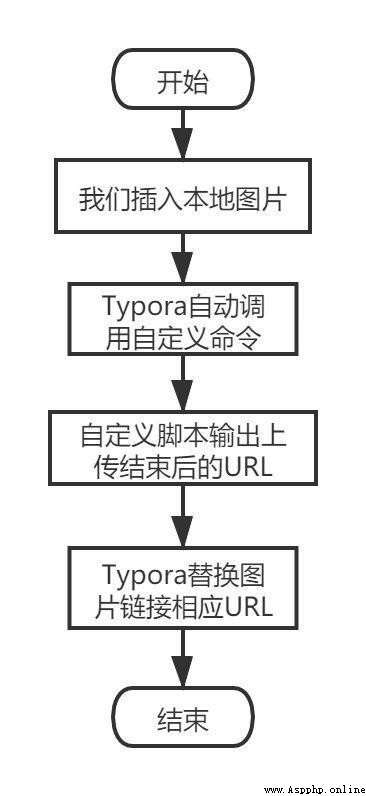
將本地圖片上傳至圖床,這個過程本質上來說就是一條HTTP請求,具體流程如下

所以,我們只需要使用一個雲服務器當服務端,本地當客戶端就能夠很簡單的搭建我們自己的圖床
服務端項目運行與一個文件夾中,我的文件夾為/usr/local/gao/typora

其中img為圖片存儲地址,img_server.log為服務端地址,img_server.py為服務端代碼
需要環境:
python3
#base64
pip3 install pybase64
#flask
pip3 install flask
具體代碼如下:
import base64
from flask import Flask, request,make_response
app = Flask(__name__)
BASE_URL = '/'
IMG_PATH="/usr/local/gao/typora/img/" #圖片實際存儲地址
@app.route(BASE_URL,methods=['GET', 'POST'])
def test_post():
#圖片上傳功能實現
filename = request.form.get("filename")
message = request.form.get("message")
content = request.form.get("content")
app.logger.info(message+filename)
img = base64.urlsafe_b64decode(content)
file = IMG_PATH+filename
with open(file, "wb") as f:
f.write(img)
return "http://服務器IP:999/img/"+filename #服務器返回數據(圖片訪問地址)
@app.route('/img/<string:filename>', methods=['GET'])
def display_img(filename):
#圖片訪問功能實現
if request.method == 'GET':
if filename is None:
pass
else:
image_data = open(IMG_PATH+ filename, "rb").read()
response = make_response(image_data)
response.headers['Content-Type'] = 'image/jpg'
return response
if __name__ == '__main__':
app.run(debug=True, host='0.0.0.0', port=999)
需要更改內容為:
圖片實際存儲位置:第6行
IMG_PATH="/usr/local/gao/typora/img/" #圖片實際存儲地址
圖片返回信息
return "http://服務器IP:999/img/"+filename #服務器返回數據(圖片訪問地址)
部署運行:
到達自己的部署路徑
cd /usr/local/gao/typora
運行代碼
nohup python3 img_server.py > img_server.log 2>&1 &
客戶端項目也運行與本地的一個文件夾中,我的文件夾為D:\softare\myScript

其中temp為圖片中間文件,用於圖片壓縮(占很小磁盤內存),upload_image.py為客戶端代碼
需要環境:
python3
#base64
pip3 install pybase64
#requests
pip3 install requests
#PTL
pip3 install pillow
#其他估計系統自帶
具體代碼如下:
import sys
import base64
import hashlib
import time
import requests
import urllib.parse
import os
from PIL import Image
from PIL import ImageFile
def compress_image(in_file, mb=1000000, quality=85, k=0.9):
"""不改變圖片尺寸壓縮到指定大小 :param in_file: 壓縮文件保存地址 :param mb: 壓縮目標,默認1000000byte :param k: 每次調整的壓縮比率 :param quality: 初始壓縮比率 :return: 壓縮文件地址,壓縮文件大小 """
o_size = os.path.getsize(in_file) # 函數返回為字節數目
# print('before_size:{} after_size:{}'.format(o_size, mb))
if o_size <= mb:
return in_file
ImageFile.LOAD_TRUNCATED_IMAGES = True # 防止圖像被截斷而報錯
temp_file="D:/softare/myScript/temp/temp."+in_file.split(".")[-1] #中間文件路徑
im = Image.open(in_file)
try:
im.save(temp_file)
except Exception as e:
print(e)
while o_size > mb:
im = Image.open(temp_file)
x, y = im.size
out = im.resize((int(x*k), int(y*k)), Image.ANTIALIAS) # 最後一個參數設置可以提高圖片轉換後的質量
try:
out.save(temp_file, quality=quality) # quality為保存的質量,從1(最差)到95(最好),此時為85
except Exception as e:
print(e)
break
o_size = os.path.getsize(temp_file) ##1024
return temp_file
def main():
target = " http://服務器IP:999"
message = 'typora上傳圖片 ' #自定義上傳的信息,使服務端日志更清晰
param = [urllib.parse.unquote(par, 'utf8') for par in sys.argv] # 把url編碼轉換成中文
param.__delitem__(0) # 第一個參數是腳本文件本身
if len(param) > 0:
if not os.path.exists(param[0]): # 通過判斷第一個參數是不是文件來判斷是否加了參數 ${filename}
param.__delitem__(0)
for i in range(0, len(param)):
file=compress_image(param[i])#壓縮圖片,使其保持在1mb一下,防止訪問過慢
# file=param[i] #不壓縮圖片
with open(file, "rb") as f:
content = base64.b64encode(f.read())
filename=str(int(time.time()))+"_"+hashlib.md5(content).hexdigest() + param[i][param[i].rfind('.'):]
data = {
 'message': message, 'content': content,'filename':filename}
res = requests.post(target, data)
print(res.status_code)
if res.status_code == 200:
print(res.text)
else:
print('Error uploading Gitee, please check')
if __name__ == '__main__':
main()
需要更改內容為:
自己服務器的IP:第46行
target = " http://服務器IP:999"
中間文件的路徑:第25行
temp_file="D:/softare/myScript/temp/temp."+in_file.split(".")[-1]#中間文件路徑
部署運行:
移動到自己的文件夾中
建temp文件夾
測試:
python D:\softare\myScript\upload_image.py "C:\\WINDOWS\\Temp/typora-icon2.png"
如果結果類似如下則可行:
200
http://服務器IP:999/img/1657853679_484e0d9f4c08f524f8a9fd5892f622ff.png
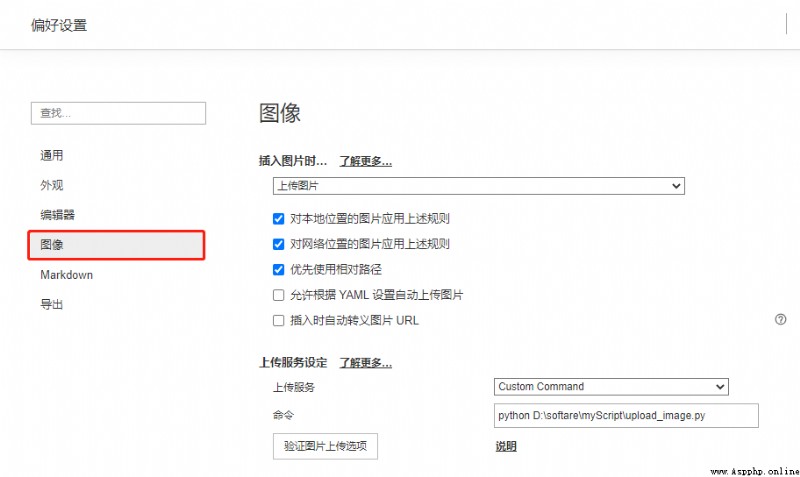
打開typora,點擊 文件-偏好設置,進入設置
點擊圖像,進入圖像設置

點擊上傳服務選擇 Custom Command
在下面命令添加
python D:\softare\myScript\upload_image.py
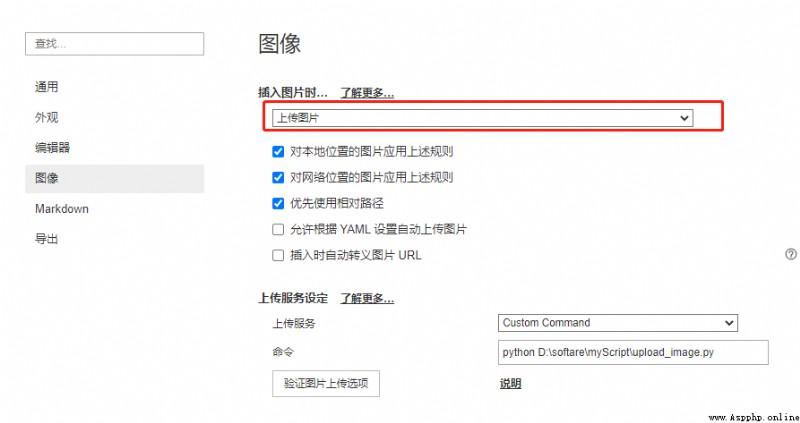
配置圖片自動上傳
點擊插入圖片時,選擇上傳圖片

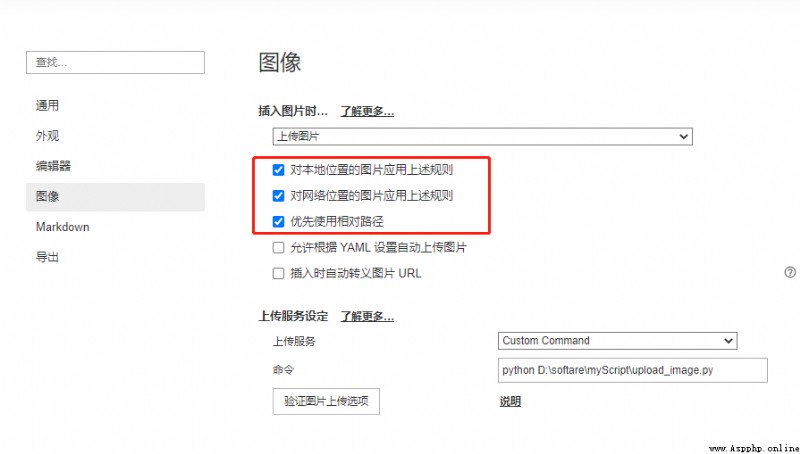
勾選如下選項
