


# 01_mnist_demo.py
# 利用神經網絡實現手寫體識別(10分類的圖像分類問題)
import tensorflow as tf
from tensorflow.examples.tutorials.mnist import input_data
import pylab
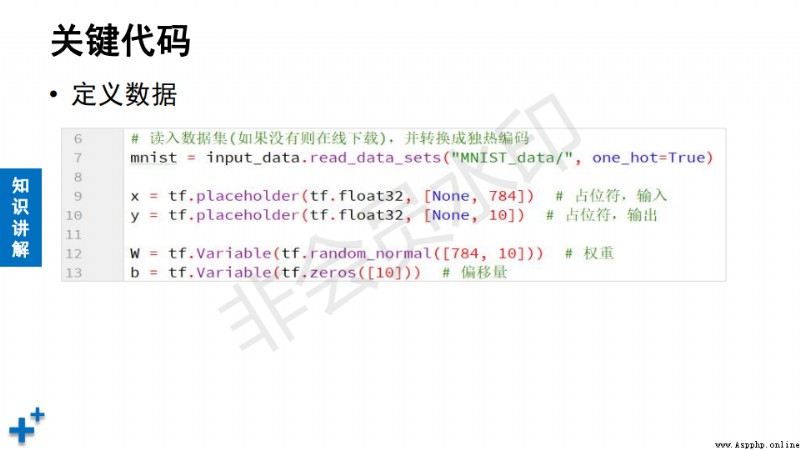
# 第一步:數據准備(從數據集中讀取)
mnist = input_data.read_data_sets("MNIST_data/", # 數據集路徑
one_hot=True) # 標簽獨熱編碼
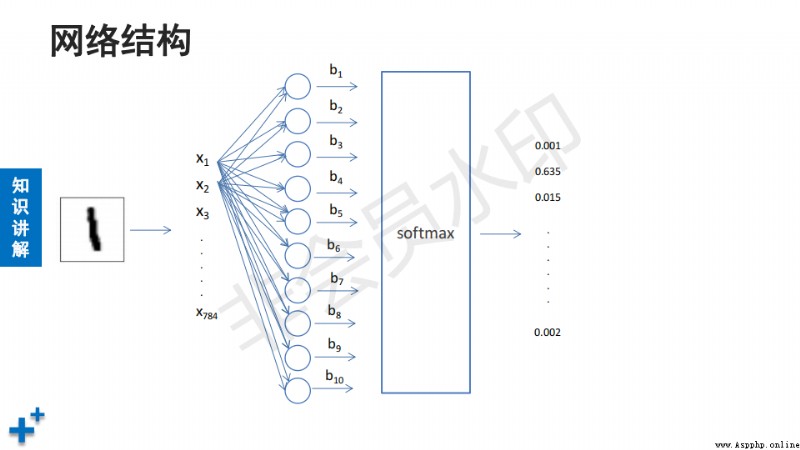
x = tf.placeholder(tf.float32, [None, 784]) # 圖像數據,N行784列
y = tf.placeholder(tf.float32, [None, 10]) # 標簽,N行10列
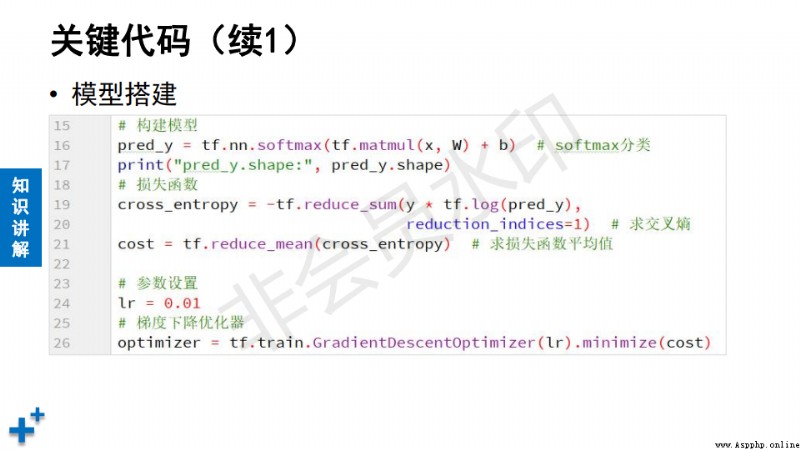
# 第二步:定義模型(神經網絡)
w = tf.Variable(tf.random_normal([784, 10])) # 權重,隨機值
b = tf.Variable(tf.zeros([10])) # 偏置, 初始值為0
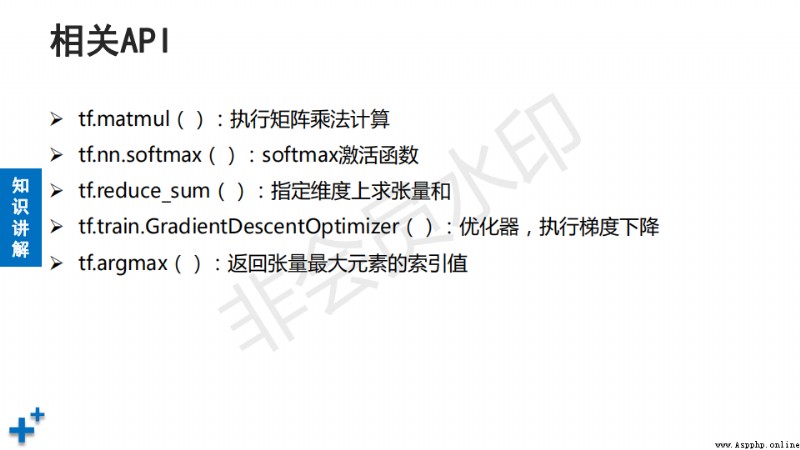
pred_y = tf.nn.softmax(tf.matmul(x, w) + b) # 神經網絡
# 第三步:定義損失函數、優化器
cross_entropy = -tf.reduce_sum(y * tf.log(pred_y),
reduction_indices=1) # 指定維度
cost = tf.reduce_mean(cross_entropy) # 求均值
lr = 0.01 # 學習率
optimizer = tf.train.GradientDescentOptimizer(lr).minimize(cost)
# 第四步:模型訓練、評估、保存
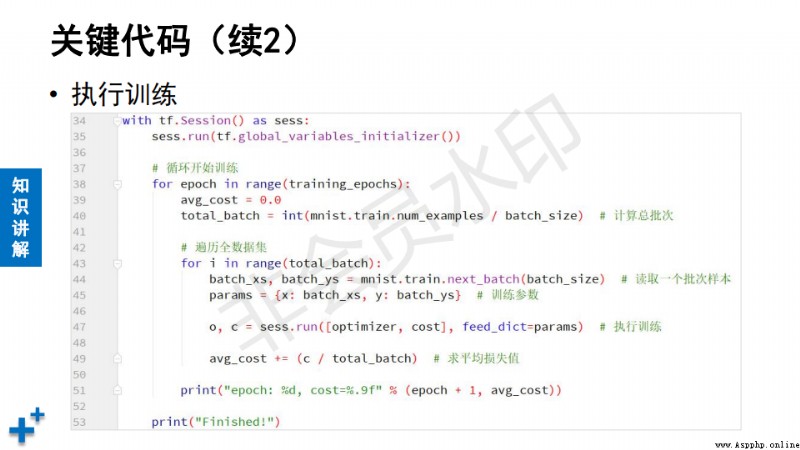
batch_size = 100 # 批次大小
saver = tf.train.Saver() # 模型保存、加載對象
model_path = "model/mnist/mnist_model.ckpt" # 模型前綴
with tf.Session() as sess:
sess.run(tf.global_variables_initializer()) # 初始化
batches = int(mnist.train.num_examples / batch_size) # 訓練批次
for epoch in range(200): # 外層循環控制訓練輪次
avg_cost = 0.0 # 損失值臨時變量
for i in range(batches): # 內層循環控制訓練批次
# 取一個批次樣本 xs-圖像數據 ys-標簽
xs, ys = mnist.train.next_batch(batch_size)
params = {x: xs, y: ys} # 參數字典(給占位符傳參)
# 執行梯度下降優化操作、損失值操作
o, c = sess.run([optimizer, cost], feed_dict=params)
avg_cost += (c / batches) # 計算損失函數平均值
print("ecoch:%d, cost:%f" % (epoch, avg_cost))
print("訓練結束.")
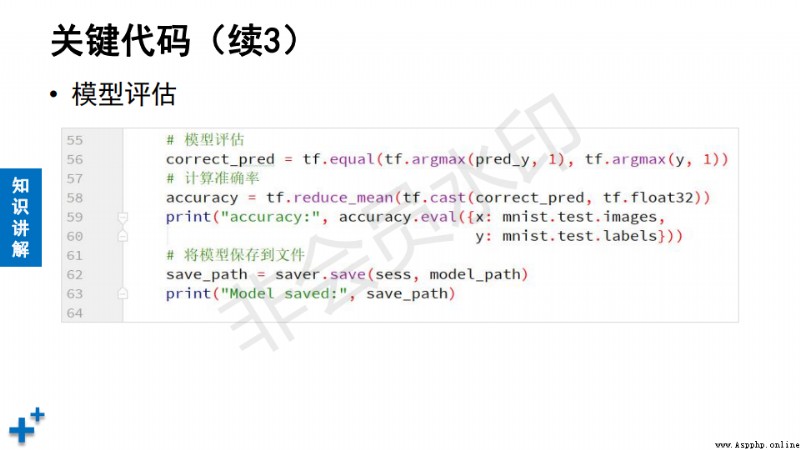
# 模型評估(使用測試集預測,計算准確率)
## 取真實值、預測值最大值的索引進行比較,返回布爾類型張量
correct_pred = tf.equal(tf.argmax(pred_y, 1),
tf.argmax(y, 1))
## 布爾類型轉浮點數,再累加除以元素個數
accuracy = tf.reduce_mean(tf.cast(correct_pred, tf.float32))
params = {x: mnist.test.images, y: mnist.test.labels} # 參數字典
acc = sess.run(accuracy, feed_dict=params) # 執行准確率計算
print("Test Accuracy:", acc)
save_path = saver.save(sess, model_path) # 保存模型
print("保存模型成功:", save_path)
# 第五步:模型加載、預測
with tf.Session() as sess:
sess.run(tf.global_variables_initializer())
saver.restore(sess, model_path) # 加載模型
xs, ys = mnist.test.next_batch(2) # 讀取兩個測試樣本
output = tf.argmax(pred_y, 1) # 返回最大概率索引(最終識別結果)
params = {x: xs, y: ys}
output_val, predv = sess.run([output, pred_y],
feed_dict=params)
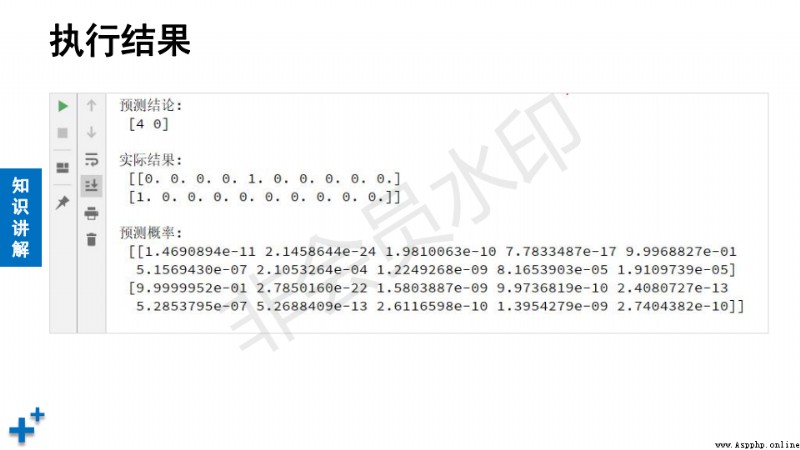
print("預測結論:", output_val, "\n")
print("實際結果:", ys, "\n") # 實際結果是標簽
print("預測概率:", predv, "\n")
# 顯示圖像
im = xs[0] # 第1個圖像
im = im.reshape(28, 28) # 還原成二維
pylab.imshow(im) # 設置要顯示的圖像
pylab.show() # 顯示
im = xs[1] # 第2個圖像
im = im.reshape(28, 28) # 還原成二維
pylab.imshow(im) # 設置要顯示的圖像
pylab.show() # 顯示


# 02_fashion_mnist_demo.py
# 利用CNN實現服飾識別
import tensorflow as tf
from tensorflow.contrib.learn.python.learn.datasets.mnist import read_data_sets
class FashionMnist():
flt_num1 = 12 # 第一個卷積層卷積核數量
flt_num2 = 24 # 第二個卷積層卷積核數量
con_neurons = 512 # 第一個全連接層神經元數量
def __init__(self, path):
"""
構造方法
:param path: 數據集路徑
"""
self.sess = tf.Session() # Session對象
self.data = read_data_sets(path,
one_hot=True) # 數據讀取對象
def init_weight(self, shape):
"""
根據指定形狀,初始化權重
:param shape: 形狀
:return: 經過初始化後的權重變量
"""
# 截尾正態分布(正態分布的變種)
inital = tf.truncated_normal(shape, stddev=0.1)
return tf.Variable(inital)
def init_bias(self, shape):
"""
根據指定形狀,初始化偏置
:param shape: 形狀
:return: 經過初始化後的偏置變量
"""
inital = tf.constant(1.0, shape=shape)
return tf.Variable(inital)
def conv2d(self, x, w):
"""
二維卷積
:param x: 輸入
:param w: 卷積核
:return: 卷積運算結果
"""
return tf.nn.conv2d(x, # 輸入
w, # 卷積核
strides=[1, 1, 1, 1], # 各個維度上的步幅
padding="SAME") # 輸入輸出矩陣一樣大
def max_pool_2x2(self, x):
"""
池化
:param x: 輸入
:return: 池化計算結果
"""
return tf.nn.max_pool(x, # 輸入
ksize=[1, 2, 2, 1], # 池化區域
strides=[1, 2, 2, 1], # 步長
padding="SAME")
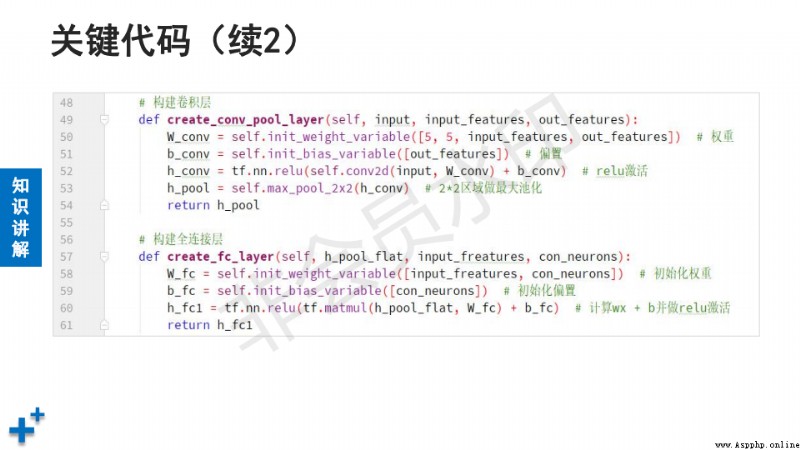
def create_conv_pool(self, input,
input_features, out_features):
"""
卷積、激活、池化層
:param input: 輸入
:param input_features: 輸入通道數量
:param out_features: 輸出通道數量
:return: 卷積、激活、池化層計算結果
"""
# 創建卷積核,shape表示 [h, w, in_channel, out_channel]
filter = self.init_weight(
[5, 5, input_features, out_features])
# 定義偏置
b_conv = self.init_bias([out_features]) # 數量和輸出通道數一致
# 卷積、激活運算
h_conv = tf.nn.relu(self.conv2d(input, filter) + b_conv)
# 池化
h_pool = self.max_pool_2x2(h_conv)
return h_pool
def create_fc(self, h_pool_flat, input_features, con_neurons):
"""
全連接層
:param h_pool_flat: 輸入數據(經過拉伸的一維張量)
:param input_features: 輸入特征值數量
:param con_neurons: 神經元數量(即輸出值的數量)
:return: 全連接層計算結果
"""
w_fc = self.init_weight([input_features, con_neurons])
b_fc = self.init_bias([con_neurons]) # 偏置
# 全連接層計算
h_fc1 = tf.nn.relu(tf.matmul(h_pool_flat, w_fc) + b_fc)
return h_fc1
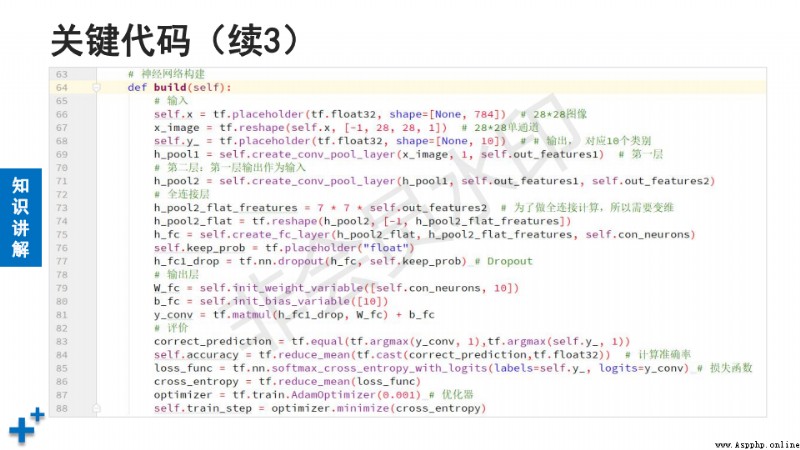
def build(self):
"""
組建CNN
:return: 模型預測結果
"""
# 樣本數據
self.x = tf.placeholder(tf.float32, [None, 784]) # 圖像
x_image = tf.reshape(self.x, [-1, 28, 28, 1]) # 變維
self.y = tf.placeholder(tf.float32, [None, 10]) # 標簽
# 第一層卷積/池化
h_pool1 = self.create_conv_pool(
x_image, # 輸入
1, # 輸入通道數
self.flt_num1) # 輸出通道數
# 第二層卷積/池化
h_pool2 = self.create_conv_pool(
h_pool1, # 輸入(上一層的輸出作為本層輸入)
self.flt_num1, # 輸入通道數(上一層輸出通道數)
self.flt_num2) # 輸出通道數(即本層卷積核數量)
# 全連接層
h_pool2_fetures = 7 * 7 * self.flt_num2
h_pool2_flat = tf.reshape(h_pool2, [-1, h_pool2_fetures])
h_fc = self.create_fc(h_pool2_flat, # 輸入(經過變維的張量)
h_pool2_fetures, # 輸入特征數量
self.con_neurons)# 輸出值數量
# dropout(通過隨機丟棄一定比例神經元,緩解過擬合)
self.keep_prob = tf.placeholder("float") # 保持率
h_drop = tf.nn.dropout(h_fc, # 輸入(上一層的輸出)
self.keep_prob)# 保持率
# 全連接層
w_fc = self.init_weight([self.con_neurons, 10])
b_fc = self.init_bias([10])
y_conv = tf.matmul(h_drop, w_fc) + b_fc # 全連接計算
# 定義損失函數
loss_func = tf.nn.softmax_cross_entropy_with_logits(
labels=self.y, # 真實值
logits=y_conv) # 預測值
cross_entropy = tf.reduce_mean(loss_func)
# 優化器
optimizer = tf.train.AdamOptimizer(0.001)
self.train_step = optimizer.minimize(cross_entropy)
# 准確率
correct_pred = tf.equal(tf.argmax(y_conv, 1),
tf.argmax(self.y, 1))
self.accuracy = tf.reduce_mean(
tf.cast(correct_pred, tf.float32)) # 計算准確率
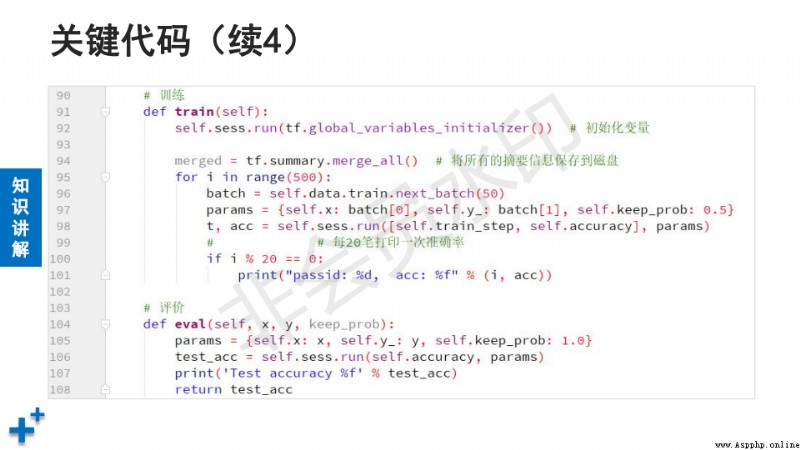
def train(self): # 訓練
self.sess.run(tf.global_variables_initializer())
batch_size = 100 # 批次大小
batches = int(self.data.train.num_examples / batch_size)
for i in range(20): # 外層循環控制訓練輪次
for j in range(batches): # 內層循環控制訓練批次
# 讀取一個批次樣本
xs, ys = self.data.train.next_batch(batch_size)
# 構建參數字典
params = {self.x: xs, # 圖像
self.y: ys, # 標簽
self.keep_prob: 0.5} # 保持率
t, acc = self.sess.run(
[self.train_step, self.accuracy],#執行的操作
feed_dict=params)# 喂入的參數
if j % 100 == 0:
print("i:%d, j:%d, acc:%f" % (i, j, acc))
print("訓練結束.")
def eval(self, x, y, keep_prob): # 模型評價
params = {self.x:x, self.y:y, self.keep_prob:keep_prob}
test_acc = self.sess.run(self.accuracy, params) # 准確率
print("Test Accuracy:", test_acc)
return test_acc
def close(self): # 關閉會話
self.sess.close()
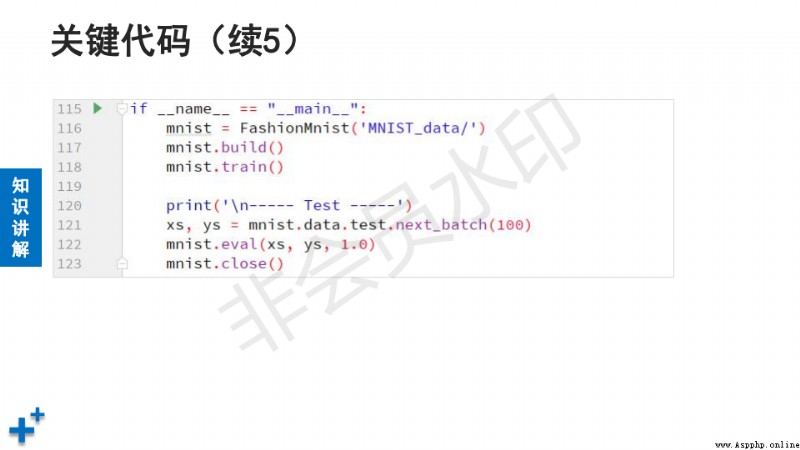
if __name__ == "__main__":
mnist = FashionMnist("FASHION_MNIST_data/") # 實例化對象
mnist.build() # 定義CNN
mnist.train() # 訓練
print("\n --------- Test ---------")
xs, ys = mnist.data.test.next_batch(100) # 讀取100個測試樣本
mnist.eval(xs, ys, 1.0) # 使用測試數據評估
mnist.close()