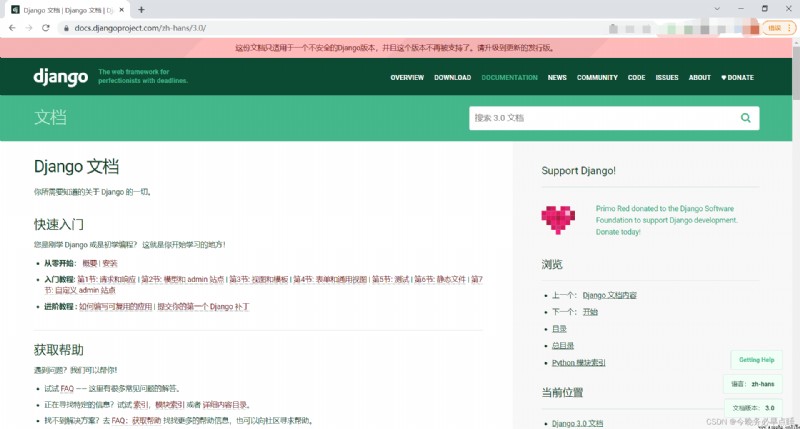
官方文檔:https://docs.djangoproject.com/zh-hans/3.0/
注意:Python WebThere are two major branches of the basic service architecture,WSGI和ASGI.目前來看,所以的Web架構都支持WSGI,對於Django而言,2.x版本沒有ASGI, 3.X有ASGI.(The gateway interface is used forWeb應用與Web服務器進行通訊.其中WSGI、ASGI是專為python設計的網關接口.uwsgi是uWSGIThe server's own transport protocol .)
拓展:
Web服務器網關接口(Python Web Server Gateway Interface),縮寫為WSGI,It is designed forpython定義的接口規范,用於web服務端和web應用(框架)The connection between the popular understanding,WSGIIt is also a normative agreement,
異步網關接口(Asynchronous Server Gateway Interface),是WSGI的擴展版本,旨在為Python Web服務、A standard asynchronous interface is provided between the framework and the application.It itself can provide synchronous and asynchronous applications,並且可以並行處理.It can also handle a variety of common protocols,包括HTTP,HTTP2和WebSocket.
點擊“Create"
[外鏈圖
拓展:
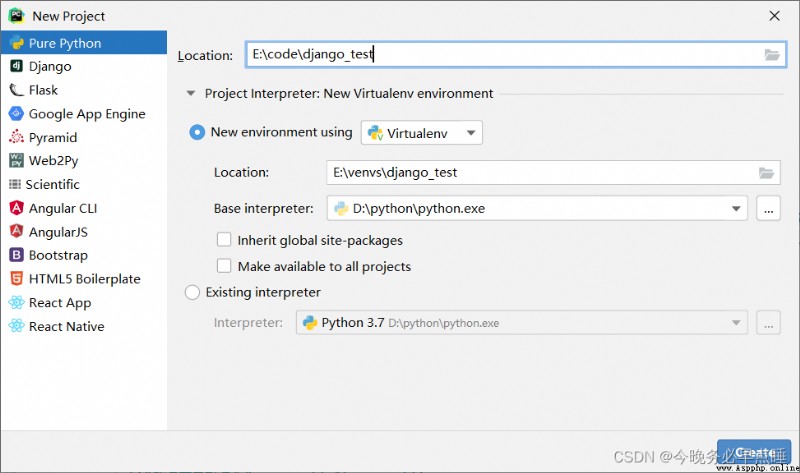
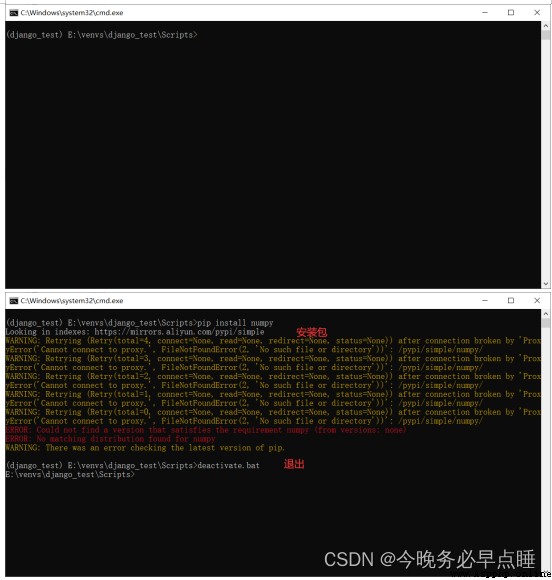
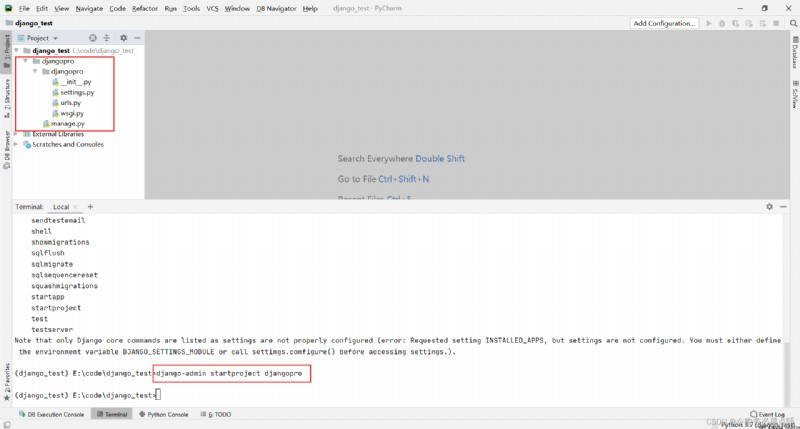
激活Django環境

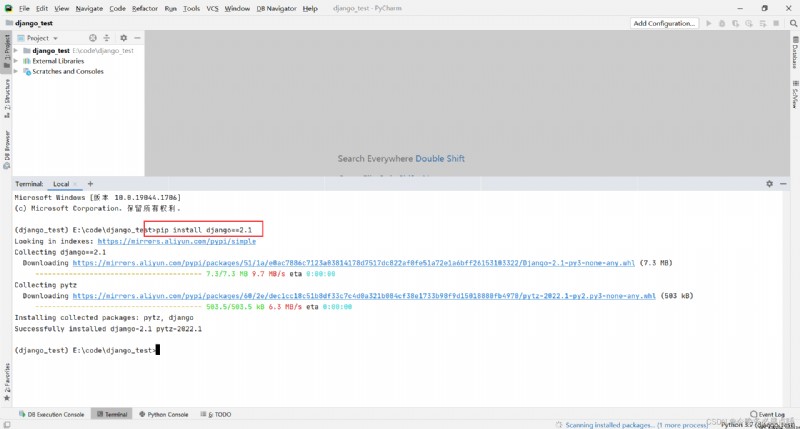
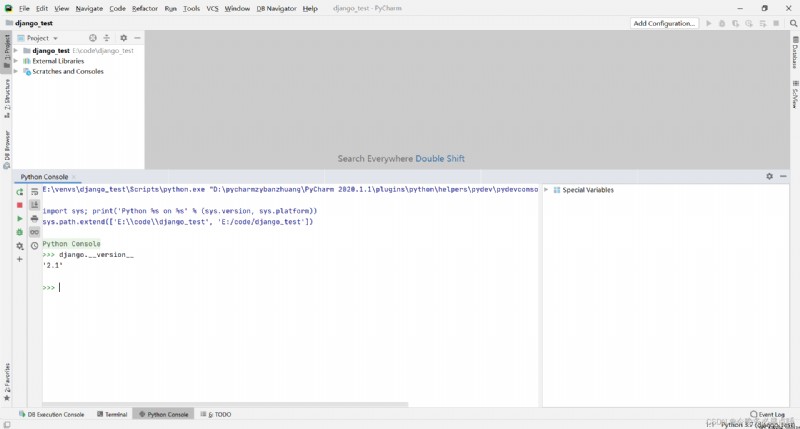
[拓展]:在djangoView the version in the interactive environment
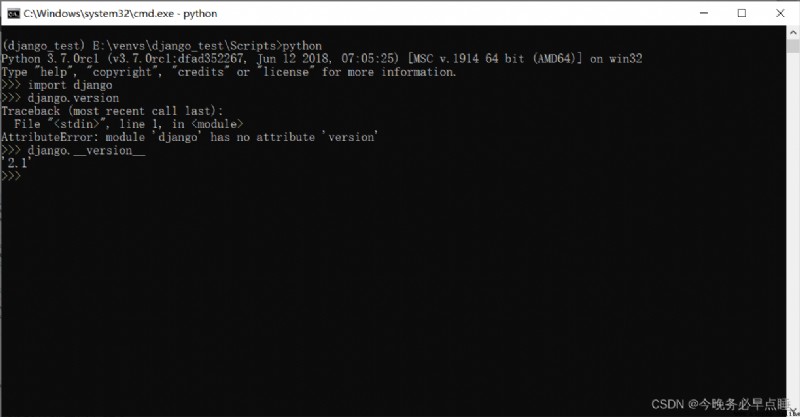
在python.consoleIt can also be verified inside

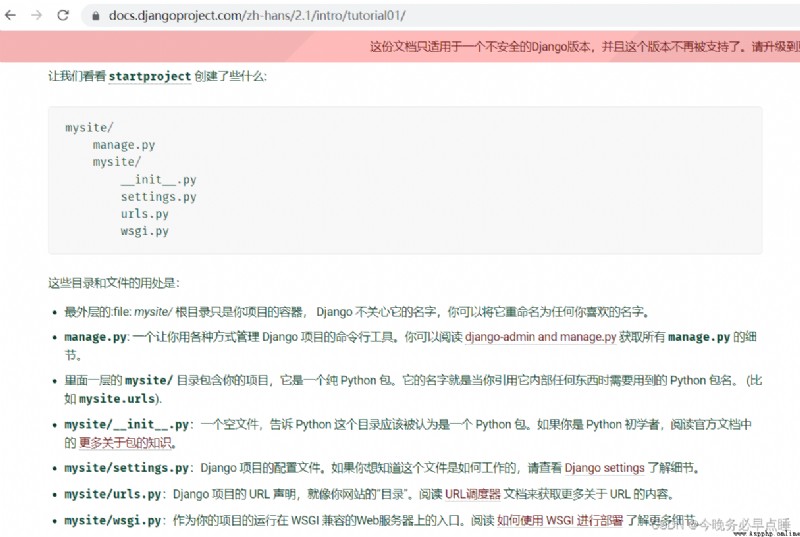
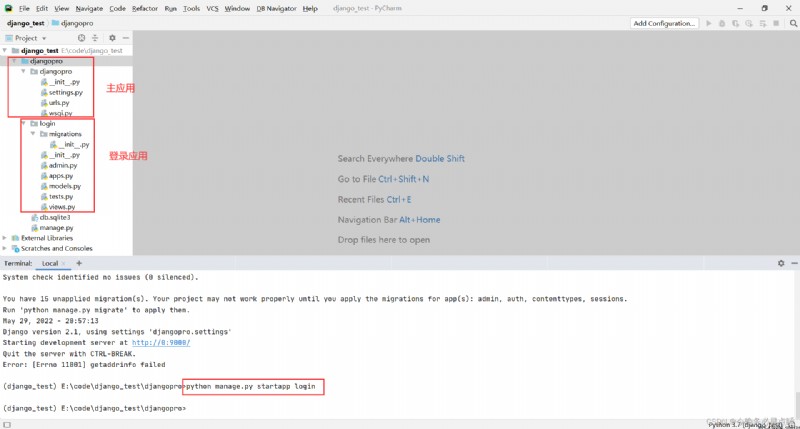
manage.py:一個讓你用各種方式管理Django項目的命令行工具
# original construction
django-admin startapp
# 當用manage.py腳本後
python manage.py startapp
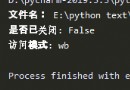
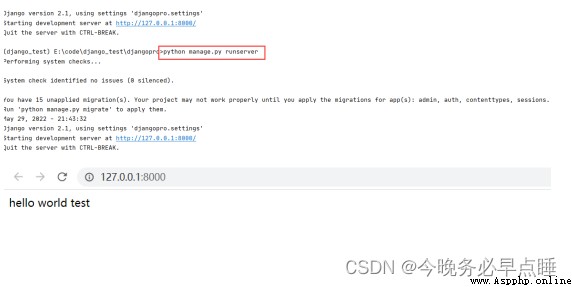
4.啟動項目

Ports can also be customized

也可以指定IP的綁定的host:
python manage.py runserver 0:9000
0:表示0.0.0.0,綁定當前host主機的實際IP地址
在浏覽器中,If you want to access the localIP地址,可以訪問:
- http://localhost:9000
- http://127.0.0.1:9000
- http://(Query through the terminalip地址):9000
[注意]
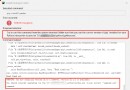
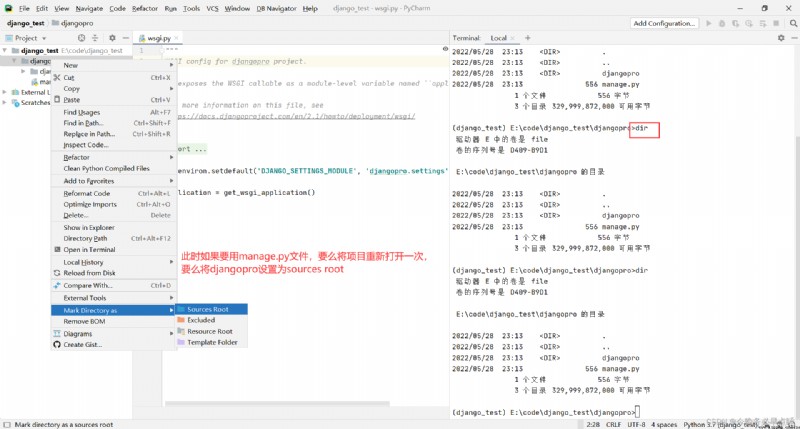
修改主工程目錄下的settings.py文件
ALLOWED_HOSTS = ['*'] # 白名單

python manage.py startapp login
- Django采用 MVC設計思想,設計出自己的MTV,The letters correspond one by one.m對m,v對t,c對v
- 在views中,角色是Controller控制器,通過Models將數據加載出來,再通過T(emplate)模板Render the data out,最後將渲染後的HTML封裝成Response響應對象返回給Django框架
- models數據模型,采用了ORM框架,實現數據的CURD操作.同時支持模型之間的外鍵關聯操作
- template Render the data out
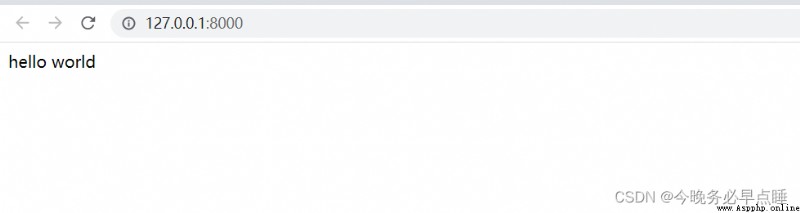
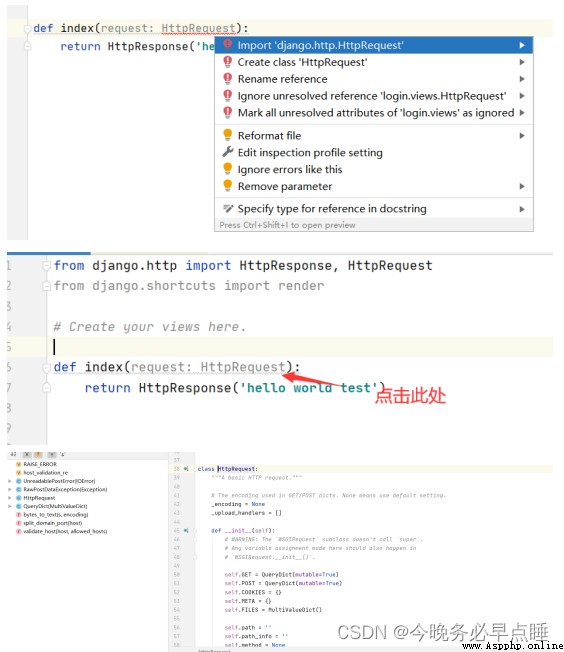
在login應用中的views.py裡,寫如下代碼
from django.http import HttpResponse
from django.shortcuts import render
# Create your views here.
def index(request):
return HttpResponse('hello world')
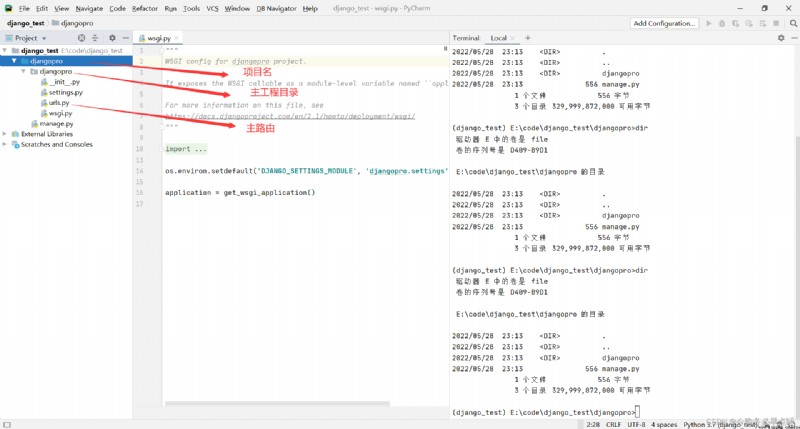
Inside the main route of the main project,添加如下代碼,並啟動

效果展示:
You can also create sub-routes to accessWeb
- 使用子路由時,Add the sub-route to the main route
Main route modification:
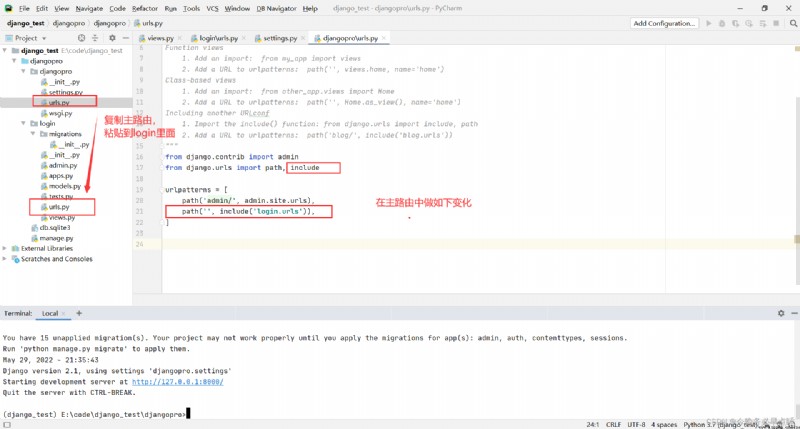
Sub-route modification
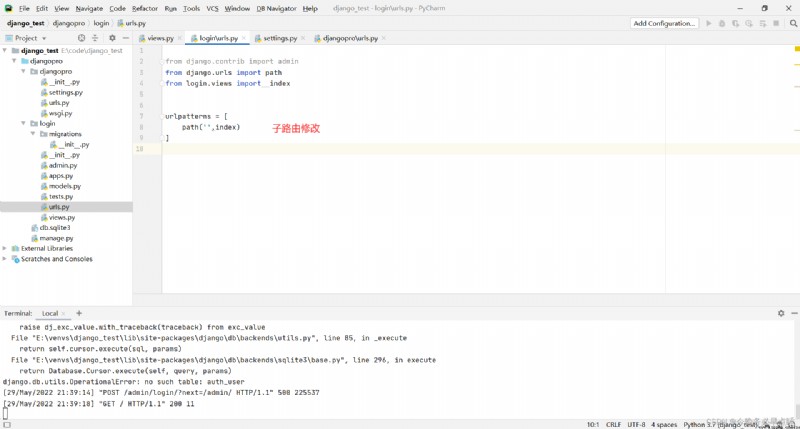
login裡viewsinterface modification:

重寫啟動項目,效果如下:

[注意] view處理函數的參數必須包含request,它是WSGIRequest類的實例,也是HttpRequest的子類.可以從request對象中獲取客戶端請求的路徑以及請求頭和body數據.
需要注意的點:
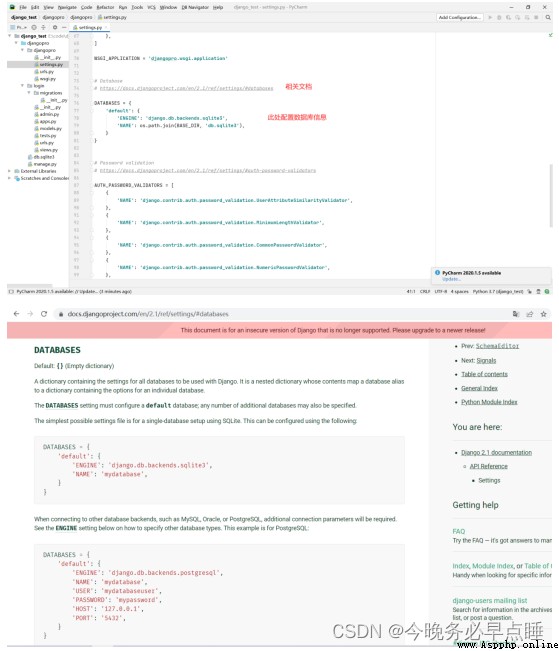
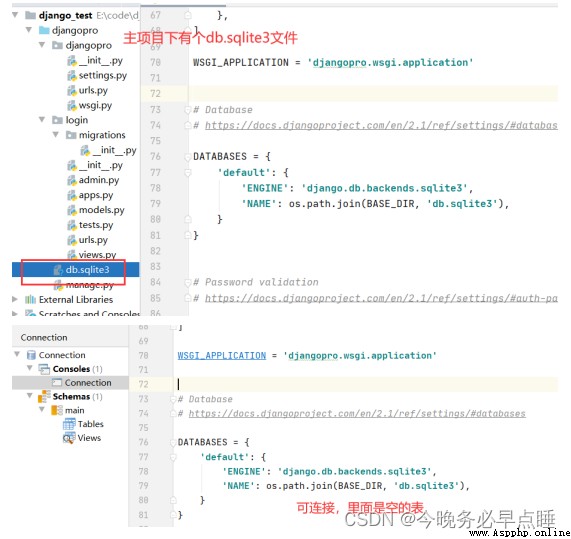
第一步,配置數據庫,采用默認的數據庫sqlite3(It can be replaced with other databases later)
DATABASES = {

'default': {

'ENGINE': 'django.db.backends.sqlite3',
'NAME': os.path.join(BASE_DIR, 'db.sqlite3'),
}
}
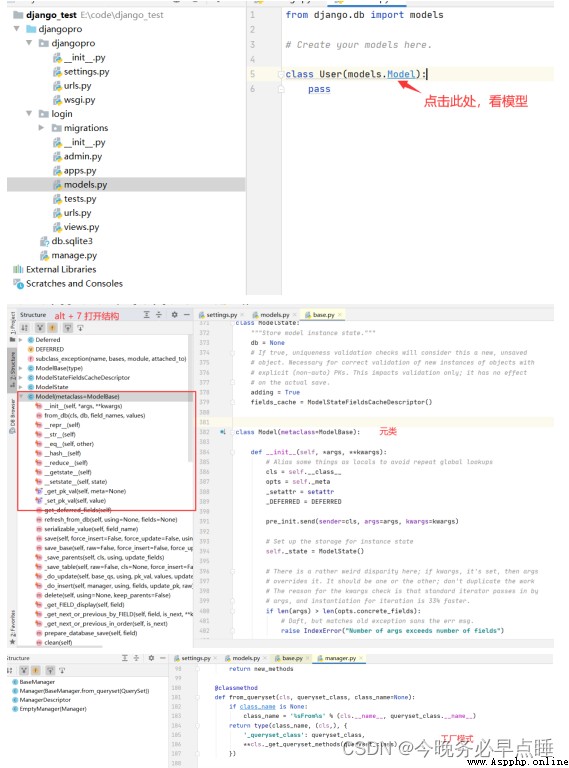
第二步,創建模型類,在login模塊的models.py添加如下代碼:
class User(models.Model):
# 默認情況下,存在id字段
# That is to say, no primary key is set,It will add one by itselfid字段,The primary key is set in the lower row,The default will not appear in the data tableid字段了
user_id = models.IntegerField(primary_key=True)
# 最大20個字符,不重復
name = models.CharField(max_length=20,unique=True)
pwd = models.CharField(max_length=100)
第三步,Configured in the main settings
INSTALLED_APPS = [
'django.contrib.admin',
'django.contrib.auth',
'django.contrib.contenttypes',
'django.contrib.sessions',
'django.contrib.messages',
'django.contrib.staticfiles',
'login',
]

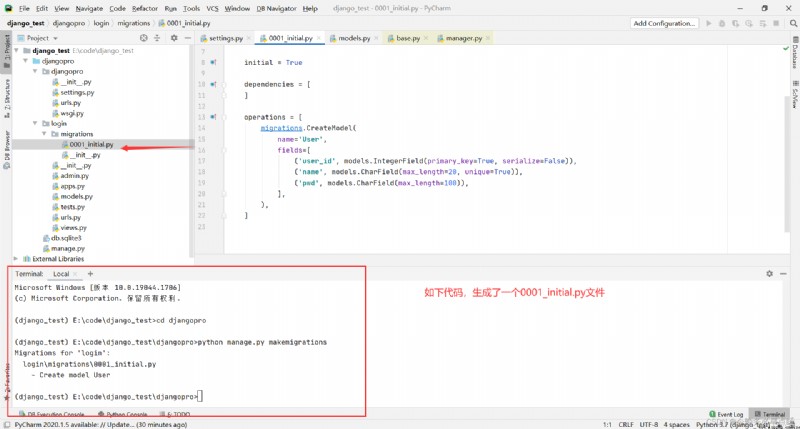
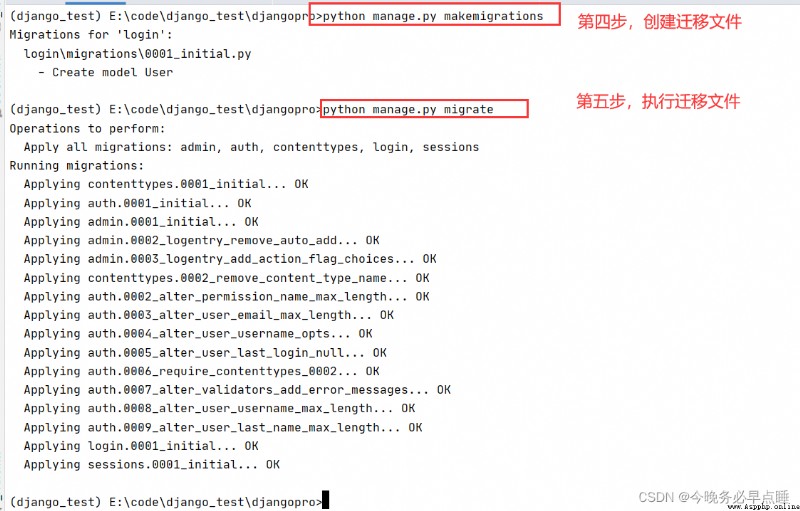
第四步,生成數據表(模型類)的遷移文件
python manage.py makemigrations
[注意] 確認模型類所在的app是否添加到settings.py的INSTALLED_APPS列表中.(That is, when you do the fourth step, you have to complete the third step)
第五步,執行數據模型類的遷移文件
python manage.py migrate
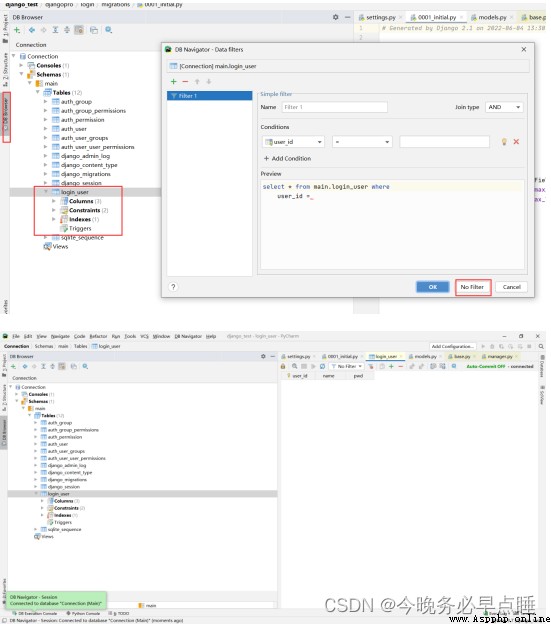
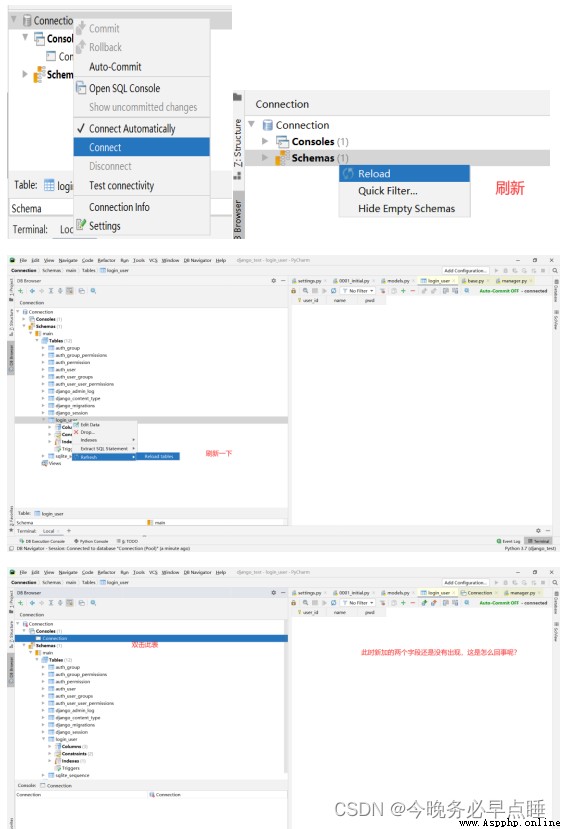
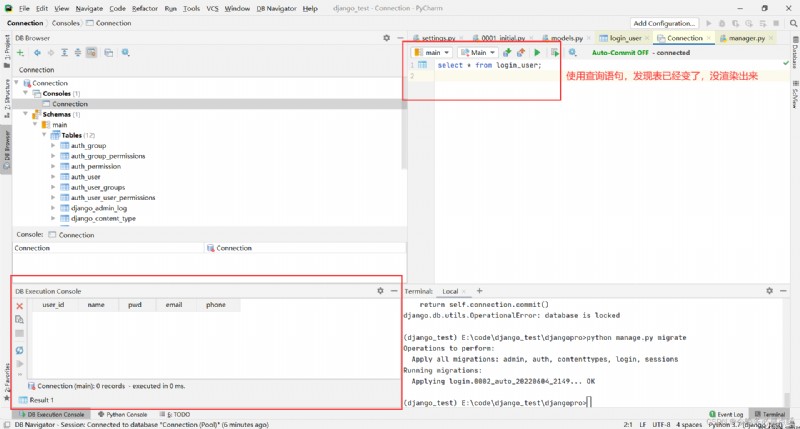
[注意]:1.打開表的時候,需要reload刷新一下
2.At this time the table name starts with "模塊名_類名"命名的
【注意1】 第一次遷移時,會自動遷移django自帶app下的遷移文件
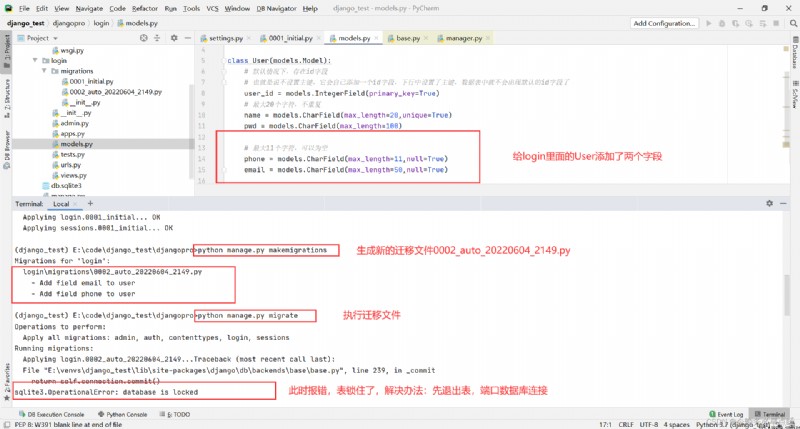
【注意2】 如果修改了模型類,必須要’makemigrations’和’migrate’操作
python manage.py makemigrations
python manage.py migrate
phone = models.CharField(max_length=11,null=True)
email = models.CharField(max_length=50,null=True)

拓展一下:
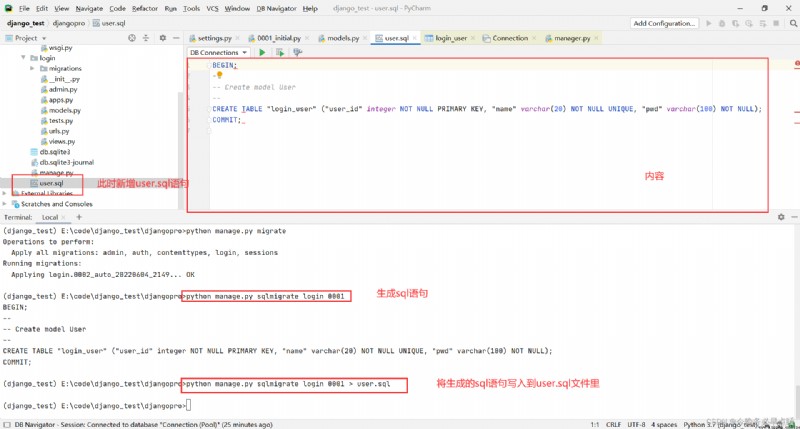
python manage.py sqlmigrate 應用名 編號

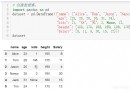
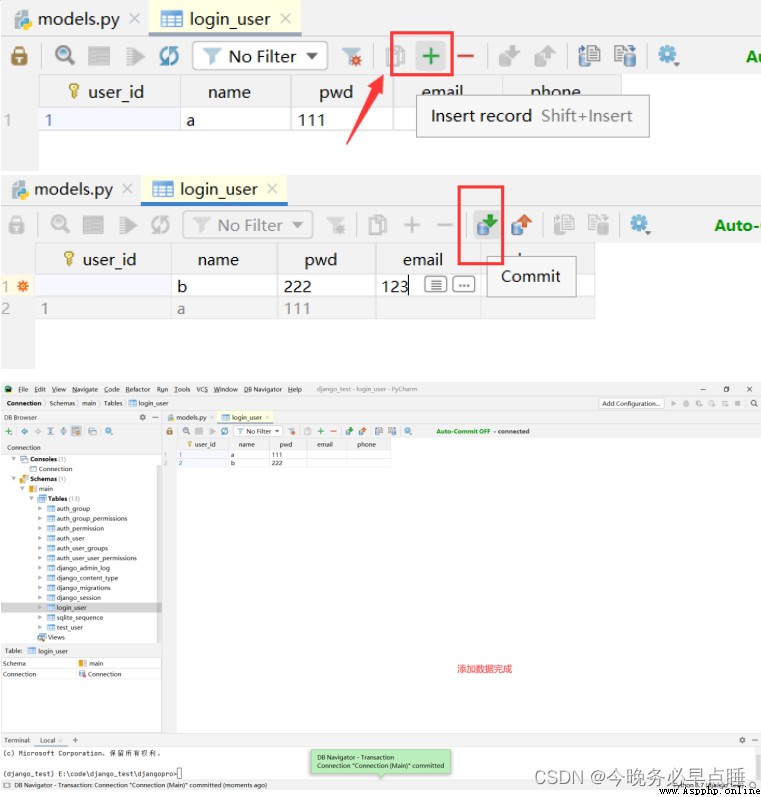
添加兩條數據,進行測試
拓展:
命令:
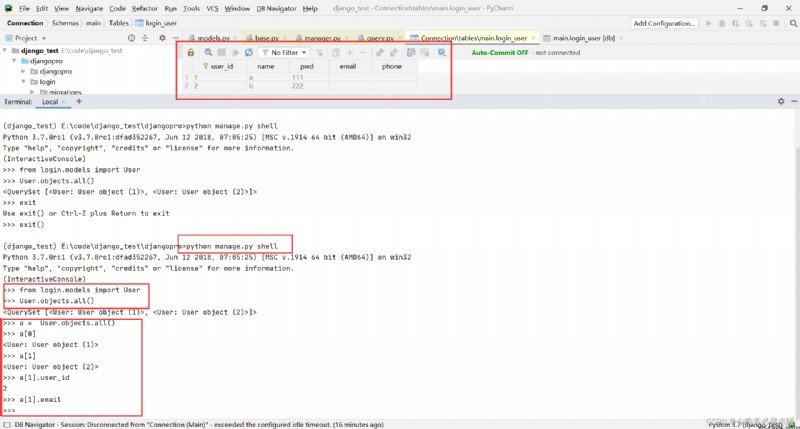
python manage.py shell
>>> from login.models import User
>>> User.objects.all()
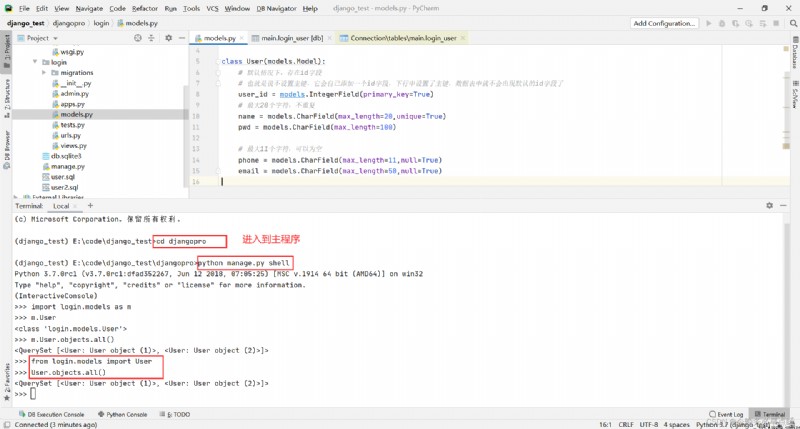
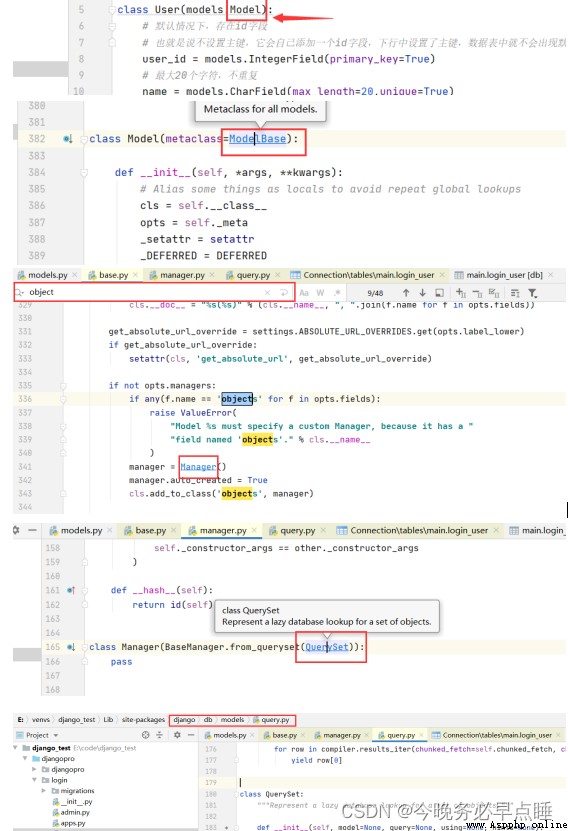
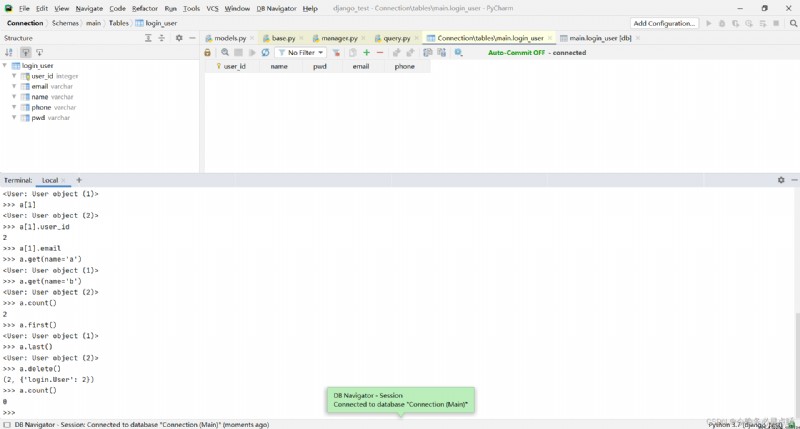
【注意】objects是什麼?
- objects是Model的元類中創建Manage類的實例,也是QuerySet查詢結果類實例
- objects提供了對模型的查詢相關方法
查詢數據
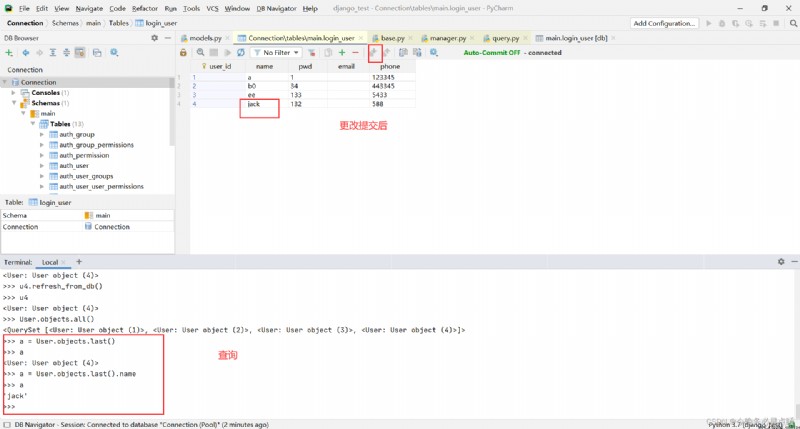
User.objects.all()查詢所有的數據,返回可迭代的對象(QuerySet實例),元素是模型類的實例對象.
issubclass() 方法用於判斷參數 class 是否是類型參數 classinfo 的子類.
查看QuerySet的方法
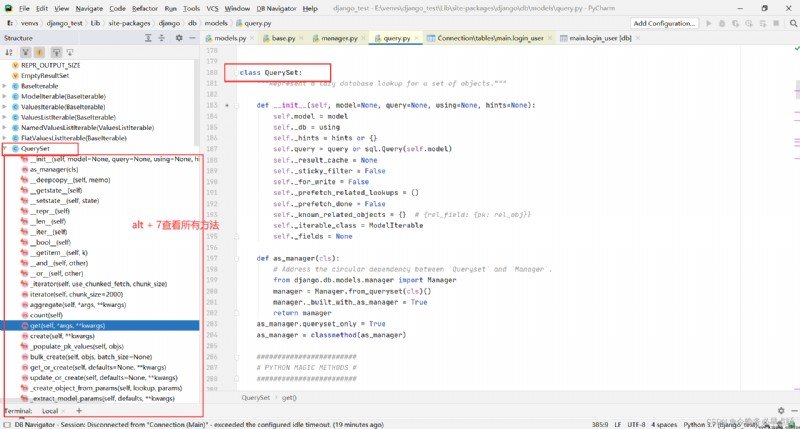

QuerySet常用的實例方法
- all() 全部查詢
- first() 查第一個
- last() Check the last one
- get(屬性名=屬性值) 查指定的 # pk主鍵列名屬性
- delete() 刪除
- filter(屬性名=屬性值) 過濾查詢
- count() 統計記錄個數
# 方式一
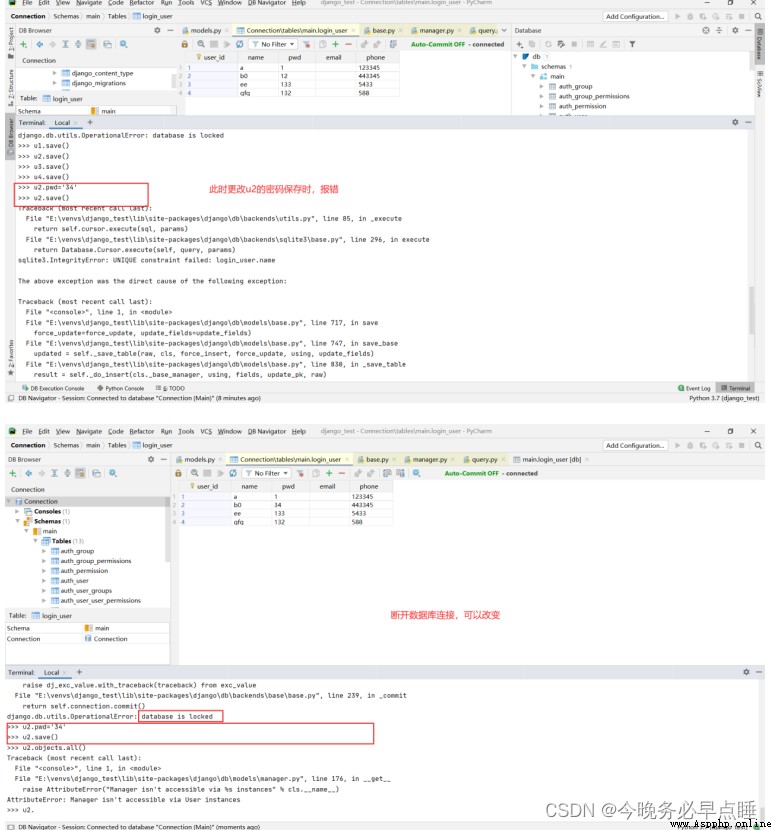
>>> u1 = User(name='a',pwd='1',phone='123345')
>>> u1.save()
# 方式二
>>> u3 = User()
>>> u3.name='ee'
>>> u3.pwd='133'
>>> u3.phone='5433'
>>> u3.save()
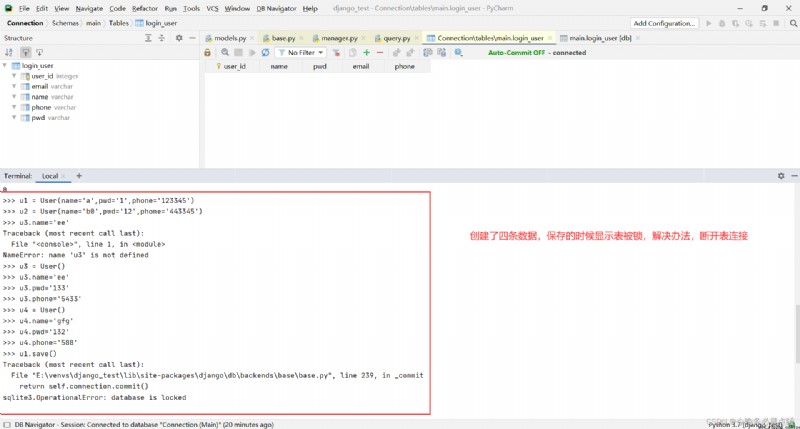
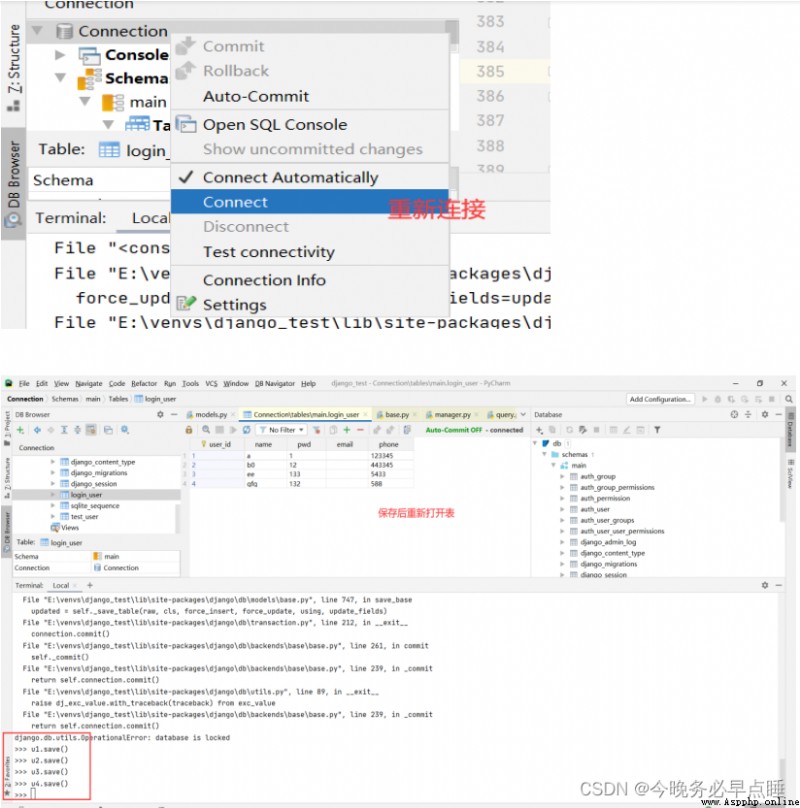
模型類實例方法:
- save() 保存數據
- delete() 刪除數據
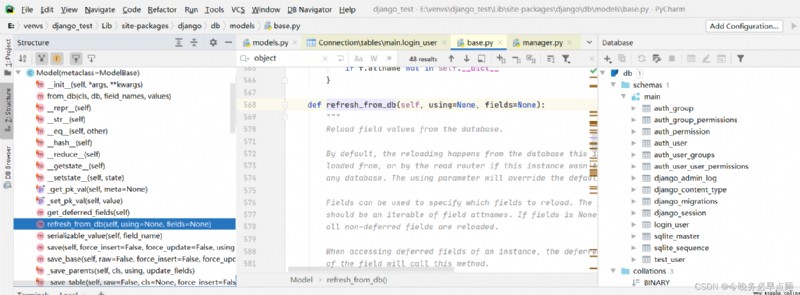
- refresh_from_db() 同步數據 (從數據庫的表中更新當前實例的屬性)