爬蟲看多了,對身體不好,我們來點現實的,學學表白找個女朋友他不香嗎,對吧~
文章最後教你們怎麼打包成exe,如果你懶得搞懂代碼怎麼回事,直接復制代碼打包成exe運行就好了.這樣不管你發給別人也好,以後方便直接用也好,都很方便.
咱就不整什麼雞皮疙瘩掉一地的情話啥的了,有需要的自行百度.
我想了一下,要是一個個介紹,那不得寫到天昏地暗去了,算了我直接放代碼吧.
還有什麼是比發個筆芯更不容易尴尬的呢,對吧.即使對方不認,我們也能從容退走.
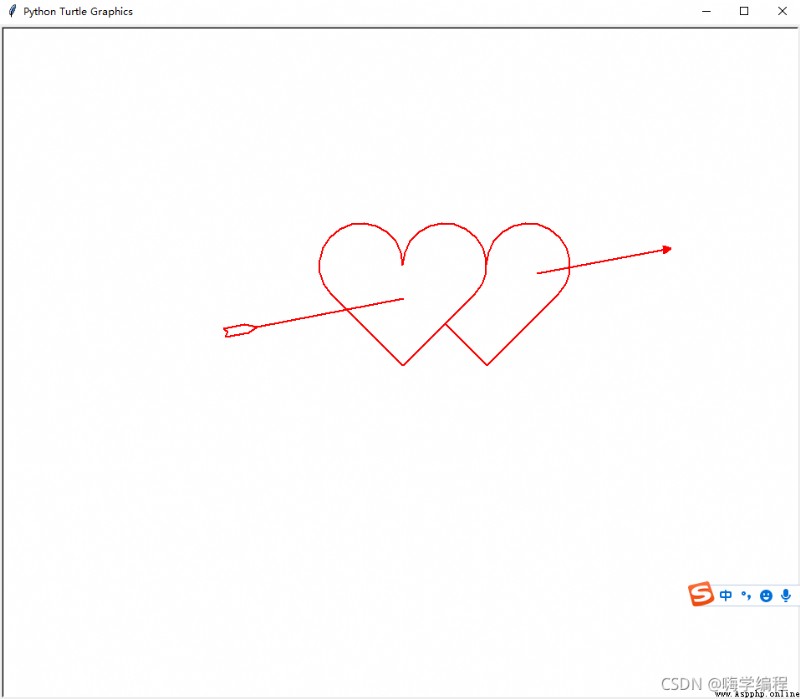
1) 代碼
import turtle as t
def init():
t.speed(2)
t.pensize(2)
t.screensize(480, 360)
t.color('red', 'red')
def draw_heart_right():
t.up()
t.goto(50, 50)
t.pendown()
t.right(45)
t.goto(100, 0)
t.seth(45)
t.fd(120)
t.circle(50, 225)
def draw_heart_left():
t.up()
t.goto(0, 0)
t.down()
t.seth(45)
t.fd(120)
t.circle(50, 225)
t.seth(90)
t.circle(50, 225)
t.fd(120)
def draw_arrow():
t.up()
t.seth(0)
# 羽毛
t.goto(-210, 40)
t.pendown()
t.goto(-215, 44)
t.goto(-190, 49)
t.goto(-175, 46)
t.up()
t.goto(-210, 40)
t.pendown()
t.goto(-213, 34)
t.goto(-185, 39)
t.goto(-175, 46)
t.up()
# 箭桿
t.pendown()
t.goto(0, 80)
t.penup()
t.goto(160, 110)
t.pendown()
t.goto(320, 140)
# 箭羽
t.left(160)
t.begin_fill()
t.fd(10)
t.left(120)
t.fd(10)
t.left(120)
t.fd(10)
t.end_fill()
if __name__ == '__main__':
init()
draw_heart_right()
draw_heart_left()
draw_arrow()
t.hideturtle()
t.done()
2) 效果
有沒有被筆芯騙到的,哈哈,其實這個才是效果.
這個是一個作死的彈窗的小玩意,你想彈到死機的話,把數值改成 成千上萬就好了,當然正常人不會這麼干~
1) 代碼
import tkinter as tk
import random
import threading
import time
def dow():
window = tk.Tk()
width=window.winfo_screenwidth()
height=window.winfo_screenheight()
a=random.randrange(0,width)
b=random.randrange(0,height)
window.title('520快樂')#彈窗的名字,都可以修改的
window.geometry("200x50"+"+"+str(a)+"+"+str(b))#彈窗大小,不建議修改
tk.Label(window,
text='520快樂!', # 標簽的文字,隨便改
bg='Red', # 背景顏色
font=('楷體', 17), # 字體和字體大小
width=15, height=2 # 標簽長寬
).pack() # 固定窗口位置
window.mainloop()
threads = []
for i in range(100):#需要的彈框數量,別太多了,電腦不好的話怕你死機
t = threading.Thread(target=dow)
threads.append(t)
time.sleep(0.1)
threads[i].start()
效果就不展示了,大家自己去試試.
有沒有直接從目錄點到這的,不老實~
既然你們都看到這了,我就額外加點東西,當做福利了,至於代碼是什麼內容,大家自行運行,不要過於關注代碼裡的網站.
1) 代碼展示
import requests
import parsel
import time
'''
https://www.tupianzj.com/meinv/20200728/214746.html
'''
url = 'https://www.tupianzj.com/meinv/mm/meizitu/'
headers = {
'user-agent': 'Mozilla/5.0 (Windows NT 10.0; WOW64) AppleWebKit/537.36 (KHTML, like Gecko) Chrome/84.0.4147.105 Safari/537.36'
}
response = requests.get(url, headers=headers)
response.encoding = response.apparent_encoding
selector = parsel.Selector(response.text)
lis = selector.css('.zt_con_img ul li a::attr(href)').getall()
for li in lis:
index = 'https://www.tupianzj.com' + li
list_url = index.split('.')
a = list_url[0:3]
new_url = '.'.join(a)
for page in range(2, 9):
time.sleep(1)
url = '{new_url}_{page}.html'.format(new_url=new_url, page=page)
headers = {
'user-agent': 'Mozilla/5.0 (Windows NT 10.0; WOW64) AppleWebKit/537.36 (KHTML, like Gecko) Chrome/84.0.4147.105 Safari/537.36'
}
print(url)
try:
response = requests.get(url, headers=headers)
response.encoding = response.apparent_encoding
# print(response.text)
selector = parsel.Selector(response.text)
img_name = selector.css('#container > div > div > div:nth-child(3) > h1::text').get()
img_url = selector.css('#bigpic img::attr(src)').get()
print(img_name)
print(img_url)
response_img = requests.get(img_url)
with open(img_name + '.jpg', mode='wb') as f:
f.write(response_img.content)
except Exception as e:
print(e)
觀眾:本來好好的來看表白的,結果你加這麼一個爬蟲代碼進來,加的好,下次多加點.
嗨,醒醒,繼續表白,別回味上一條了.
這是一個悲傷的代碼,80%的人估計都實現不了,第一個要求就是要女神的照片,不過大家不怕被打的話,可以當面光明正大的拍幾張~

1) 准備工作
本回對於零基礎來說有點復雜,不慌,我們慢慢來.
我們創建一個文件夾命名為lyf,把准備好的女神照片放進去,照片都改成.jpg格式的,序號排序一下.
創建一個520樣式的模板文件,新建txt文件把下面這個放進去.
# 520
0,0,0,0,0,0,0,0,0,0,0,0,0,0,0,0,0,0,0,0,0
0,1,1,1,1,1,0,0,1,1,1,1,1,0,0,1,1,1,1,1,0
0,1,0,0,0,0,0,0,0,0,0,0,1,0,0,1,0,0,0,1,0
0,1,0,0,0,0,0,0,0,0,0,0,1,0,0,1,0,0,0,1,0
0,1,1,1,1,1,0,0,1,1,1,1,1,0,0,1,0,0,0,1,0
0,0,0,0,0,1,0,0,1,0,0,0,0,0,0,1,0,0,0,1,0
0,0,0,0,0,1,0,0,1,0,0,0,0,0,0,1,0,0,0,1,0
0,1,1,1,1,1,0,0,1,1,1,1,1,0,0,1,1,1,1,1,0
0,0,0,0,0,0,0,0,0,0,0,0,0,0,0,0,0,0,0,0,0
0,0,0,0,0,0,0,0,0,0,0,0,0,0,0,0,0,0,0,0,0
0,0,0,0,0,0,0,0,0,0,0,0,0,0,0,0,0,0,0,0,0
# name
0,0,1,0,0,0,0,0,1,0,0,0,1,0,0,1,1,1,1,0,0
0,0,1,0,0,0,0,0,0,1,0,1,0,0,0,1,0,0,0,0,0
0,0,1,0,0,0,0,0,0,0,1,0,0,0,0,1,1,1,1,0,0
0,0,1,0,0,0,0,0,0,0,1,0,0,0,0,1,0,0,0,0,0
0,0,1,0,0,0,0,0,0,0,1,0,0,0,0,1,0,0,0,0,0
0,0,1,1,1,1,0,0,0,0,1,0,0,0,0,1,0,0,0,0,0
0,0,0,0,0,0,0,0,0,0,0,0,0,0,0,0,0,0,0,0,0
然後改名為1.tmp,再新建一個文件夾命名為 templates ,把保存好的模板放進去.
2) 代碼展示
主程序代碼
'''
'''
import os
import argparse
from PIL import Image
'''一些超參'''
CELLSIZE = 64
'''圖片讀取'''
def readImage(img_path, target_size=(64, 64)):
img = Image.open(img_path)
img = img.resize(target_size)
return img
'''圖片生成器'''
def yieldImage(target_dir, idx, target_size):
img_paths = sorted([os.path.join(target_dir, imgname) for imgname in os.listdir(target_dir)])
idx = (idx + 1) % len(img_paths)
return readImage(img_paths[idx], target_size), idx
'''解析模板'''
def parseTemplate(template_path):
template = []
with open(template_path, 'r') as f:
for line in f.readlines():
if line.startswith('#'):
continue
template.append(line.strip('
').split(','))
return template
'''主函數'''
def main(pictures_dir, template_path):
template = parseTemplate(template_path)
w = len(template[0])
h = len(template)
image_new = Image.new('RGBA', (CELLSIZE*w, CELLSIZE*h))
img_idx = -1
for y in range(h):
for x in range(w):
if template[y][x] == '1':
img, img_idx = yieldImage(pictures_dir, img_idx, (CELLSIZE, CELLSIZE))
image_new.paste(img, (x*CELLSIZE, y*CELLSIZE))
image_new.show()
image_new.save('picturewall.png')
'''run'''
if __name__ == '__main__':
parser = argparse.ArgumentParser(description="Picture Wall Generator.")
parser.add_argument('-t', dest='template_path', help='Template path.', default='templates/1.tmp')
parser.add_argument('-p', dest='pictures_dir', help='Pictures dir.', default='lyf')
args = parser.parse_args()
template_path = args.template_path
pictures_dir = args.pictures_dir
main(pictures_dir, template_path)
再創建一個py文件,名字改成 rename.py
這一步是讀取我們准備好的照片
import os
target_path = 'lyf'
for idx, each in enumerate(os.listdir(target_path)):
os.rename(os.path.join(target_path, each), os.path.join(target_path, '%s.jpg' % idx))
不給你們看效果,自己去運行,除非你們把寫好的女神都運行給我看看,哈哈~
這玩意抖音發的挺多的,感覺你們都看過,不過沒關系,我還是要分享給你們.
1) 准備工作
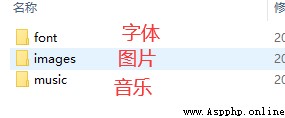
首先得准備好這些文件
你要什麼內容都可以自己隨便整一個,名字命名跟我一樣就行了,免得後面還得改代碼.
這是我的字體
這是我的圖片
音樂的話我也展示不了,這個是最隨便的,你只要把名字改成bgm.mp3 就行了.
2) 代碼
配置文件
新建一個py文件命名為cfg.py
import os
# 窗口大小(width, height)
SCREENSIZE = (500, 260)
# 定義一些顏色
RED = (255, 0, 0)
BLACK = (0, 0, 0)
AZURE = (240, 255, 255)
WHITE = (255, 255, 255)
MISTYROSE = (255, 228, 225)
PALETURQUOISE = (175, 238, 238)
PAPAYAWHIP = (255, 239, 213)
LIGHTGRAY = (211, 211, 211)
GAINSBORO = (230, 230, 230)
WHITESMOKE = (245, 245, 245)
DARKGRAY = (169, 169, 169)
BLUE = (0, 0, 255)
DEEPSKYBLUE = (0, 191, 255)
SKYBLUE = (135, 206, 235)
LIGHTSKYBLUE = (135, 206, 250)
# 背景音樂路徑
BGM_PATH = os.path.join(os.getcwd(), 'resources/music/bgm.mp3')
# 字體路徑
FONT_PATH = os.path.join(os.getcwd(), 'resources/font/STXINGKA.TTF')
# 背景圖片路徑
BG_IMAGE_PATH = os.path.join(os.getcwd(), 'resources/images/bg.png')
# ICON路徑
ICON_IMAGE_PATH = os.path.join(os.getcwd(), 'resources/images/icon.png')
主程序代碼
import sys
import cfg
import random
import pygame
from tkinter import Tk, messagebox
'''
Function:
按鈕類
Initial Args:
--x, y: 按鈕左上角坐標
--width, height: 按鈕寬高
--text: 按鈕顯示的文字
--fontpath: 字體路徑
--fontsize: 字體大小
--fontcolor: 字體顏色
--bgcolors: 按鈕背景顏色
--is_want_to_be_selected: 按鈕是否想被玩家選中
--screensize: 軟件屏幕大小
'''
class Button(pygame.sprite.Sprite):
def __init__(self, x, y, width, height, text, fontpath, fontsize, fontcolor, bgcolors, edgecolor, edgesize=1, is_want_to_be_selected=True, screensize=None, **kwargs):
pygame.sprite.Sprite.__init__(self)
self.rect = pygame.Rect(x, y, width, height)
self.text = text
self.font = pygame.font.Font(fontpath, fontsize)
self.fontcolor = fontcolor
self.bgcolors = bgcolors
self.edgecolor = edgecolor
self.edgesize = edgesize
self.is_want_tobe_selected = is_want_to_be_selected
self.screensize = screensize
'''自動根據各種情況將按鈕綁定到屏幕'''
def draw(self, screen, mouse_pos):
# 鼠標在按鈕范圍內
if self.rect.collidepoint(mouse_pos):
# --不想被選中
if not self.is_want_tobe_selected:
while self.rect.collidepoint(mouse_pos):
self.rect.left, self.rect.top = random.randint(0, self.screensize[0]-self.rect.width), random.randint(0, self.screensize[1]-self.rect.height)
pygame.draw.rect(screen, self.bgcolors[0], self.rect, 0)
pygame.draw.rect(screen, self.edgecolor, self.rect, self.edgesize)
# 鼠標不在按鈕范圍內
else:
pygame.draw.rect(screen, self.bgcolors[1], self.rect, 0)
pygame.draw.rect(screen, self.edgecolor, self.rect, self.edgesize)
text_render = self.font.render(self.text, True, self.fontcolor)
fontsize = self.font.size(self.text)
screen.blit(text_render, (self.rect.x+(self.rect.width-fontsize[0])/2, self.rect.y+(self.rect.height-fontsize[1])/2))
'''在指定位置顯示文字'''
def showText(screen, text, position, fontpath, fontsize, fontcolor, is_bold=False):
font = pygame.font.Font(fontpath, fontsize)
font.set_bold(is_bold)
text_render = font.render(text, True, fontcolor)
screen.blit(text_render, position)
'''主函數'''
def main():
# 初始化
pygame.init()
screen = pygame.display.set_mode(cfg.SCREENSIZE, 0, 32)
pygame.display.set_icon(pygame.image.load(cfg.ICON_IMAGE_PATH))
pygame.display.set_caption('來自一位喜歡你的小哥哥')
# 背景音樂
pygame.mixer.music.load(cfg.BGM_PATH)
pygame.mixer.music.play(-1, 30.0)
# biu愛心那個背景圖片
bg_image = pygame.image.load(cfg.BG_IMAGE_PATH)
bg_image = pygame.transform.smoothscale(bg_image, (150, 150))
# 實例化兩個按鈕
button_yes = Button(x=20, y=cfg.SCREENSIZE[1]-70, width=120, height=35,
text='好呀', fontpath=cfg.FONT_PATH, fontsize=15, fontcolor=cfg.BLACK, edgecolor=cfg.SKYBLUE,
edgesize=2, bgcolors=[cfg.DARKGRAY, cfg.GAINSBORO], is_want_to_be_selected=True, screensize=cfg.SCREENSIZE)
button_no = Button(x=cfg.SCREENSIZE[0]-140, y=cfg.SCREENSIZE[1]-70, width=120, height=35,
text='算了吧', fontpath=cfg.FONT_PATH, fontsize=15, fontcolor=cfg.BLACK, edgecolor=cfg.DARKGRAY,
edgesize=1, bgcolors=[cfg.DARKGRAY, cfg.GAINSBORO], is_want_to_be_selected=False, screensize=cfg.SCREENSIZE)
# 是否點擊了好呀按鈕
is_agree = False
# 主循環
clock = pygame.time.Clock()
while True:
# --背景圖片
screen.fill(cfg.WHITE)
screen.blit(bg_image, (cfg.SCREENSIZE[0]-bg_image.get_height(), 0))
# --鼠標事件捕獲
for event in pygame.event.get():
if event.type == pygame.QUIT:
# ----沒有點擊好呀按鈕之前不許退出程序
if is_agree:
pygame.quit()
sys.exit()
elif event.type == pygame.MOUSEBUTTONDOWN and event.button:
if button_yes.rect.collidepoint(pygame.mouse.get_pos()):
button_yes.is_selected = True
root = Tk()
root.withdraw()
messagebox.showinfo('', '???麼麼哒???')
root.destroy()
is_agree = True
# --顯示文字
showText(screen=screen, text='小姐姐, 我觀察你很久了', position=(40, 50),
fontpath=cfg.FONT_PATH, fontsize=25, fontcolor=cfg.BLACK, is_bold=False)
showText(screen=screen, text='做我女朋友好不好?', position=(40, 100),
fontpath=cfg.FONT_PATH, fontsize=25, fontcolor=cfg.BLACK, is_bold=True)
# --顯示按鈕
button_yes.draw(screen, pygame.mouse.get_pos())
button_no.draw(screen, pygame.mouse.get_pos())
# --刷新
pygame.display.update()
clock.tick(60)
'''run'''
if __name__ == '__main__':
main()
3)運行效果
沒有效果,自己運行
這是一個簡單的表白程序
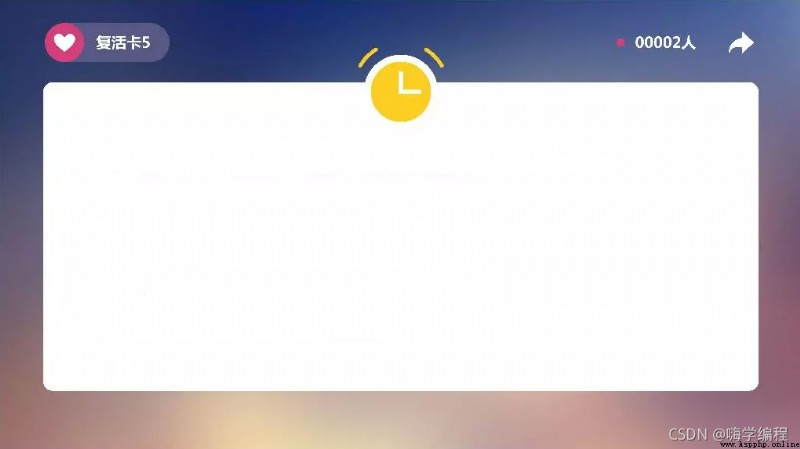
背景圖
再准備一首女神最喜歡的音樂
所有代碼
import pygame
import random
import sys
# 根據背景圖大小,設置游戲屏幕大小
WIDTH, HEIGHT = 1024, 576
# 不全屏
screen = pygame.display.set_mode((WIDTH, HEIGHT), 0, 32)
# 全屏
# screen = pygame.display.set_mode((WIDTH, HEIGHT), pygame.FULLSCREEN, 32)
pygame.display.set_caption('小姐姐,你的快遞到了.')
# 添加文本信息
def title(text, screen, scale, color=(0, 0, 0)):
font = pygame.font.SysFont('SimHei', 27)
textRender = font.render(text, True, color)
# 初始化文本的坐標
screen.blit(textRender, (WIDTH / scale[0], HEIGHT / scale[1]))
# 按鈕
def button(text, x, y, w, h, color, screen):
pygame.draw.rect(screen, color, (x, y, w, h))
font = pygame.font.SysFont('SimHei', 20)
textRender = font.render(text, True, (255, 255, 255))
textRect = textRender.get_rect()
textRect.center = ((x+w/2), (y+h/2))
screen.blit(textRender, textRect)
# 生成隨機的位置坐標
def get_random_pos():
x, y = random.randint(10, 600), random.randint(20, 500)
return x, y
# 點擊答應按鈕後顯示的頁面
def show_like_interface(screen):
screen.fill((255, 255, 255))
background1 = pygame.image.load('2.png').convert()
screen.blit(background1, (0, 0))
pygame.display.update()
while True:
for event in pygame.event.get():
if event.type == pygame.QUIT:
sys.exit()
def main():
pygame.init()
clock = pygame.time.Clock()
# 添加背景音樂
pygame.mixer.music.load('手寫的從前-周傑倫.mp3')#把這個音樂名字改成你自己准備的音樂名字
pygame.mixer.music.play(-1, 20)
pygame.mixer.music.set_volume(0.5)
# 設置不同意按鈕屬性
unlike_pos_x = 130
unlike_pos_y = 375
unlike_pos_width = 450
unlike_pos_height = 55
unlike_color = (115, 76, 243)
# 設置同意按鈕屬性
like_pos_x = 130
like_pos_y = 280
like_pos_width = 450
like_pos_height = 55
like_color = (115, 76, 243)
running = True
while running:
# 填充窗口
screen.fill((255, 255, 255))
# 添加背景圖
background = pygame.image.load('1.png').convert()
screen.blit(background, (0, 0))
# 獲取鼠標坐標
pos = pygame.mouse.get_pos()
# 判斷鼠標位置,不同意時,按鈕不斷變化
if pos[0] < unlike_pos_x + unlike_pos_width + 5 and pos[0] > unlike_pos_x - 5 and pos[1] < unlike_pos_y + unlike_pos_height + 5 and pos[1] > unlike_pos_y - 5:
while True:
unlike_pos_x, unlike_pos_y = get_random_pos()
if pos[0] < unlike_pos_x + unlike_pos_width + 5 and pos[0] > unlike_pos_x - 5 and pos[1] < unlike_pos_y + unlike_pos_height + 5 and pos[1] > unlike_pos_y - 5:
continue
break
# 設置標題及按鈕文本信息
title('1.如果有一天我向你表白,你會怎麼樣?', screen, scale=[8, 3])
button('A.你小子終於開竅了,你敢表白我就敢答應!', like_pos_x, like_pos_y, like_pos_width, like_pos_height, like_color, screen)
button('B.我拿你當閨蜜,你居然想睡我!果斷拒絕!', unlike_pos_x, unlike_pos_y, unlike_pos_width, unlike_pos_height, unlike_color, screen)
# 設置關閉選項屬性
for event in pygame.event.get():
if event.type == pygame.QUIT:
sys.exit()
# 當鼠標點擊同意按鈕後,跳轉結束頁面
if pos[0] < like_pos_x + like_pos_width + 5 and pos[0] > like_pos_x - 5 and pos[1] < like_pos_y + like_pos_height + 5 and pos[1] > like_pos_y - 5:
if event.type == pygame.MOUSEBUTTONDOWN:
show_like_interface(screen)
pygame.display.flip()
pygame.display.update()
clock.tick(60)
main()
效果是不可能發效果的,萬一你們試都沒試就罵我咋辦,對不對,還是要等你們先自己去運行完了,就不會罵我了~
既然你都堅持看完了,那你肯定是全場最靓的那個仔,像你這麼帥德人,肯定是表白一次成功一次.
要是沒成的話
先自我介紹一下,小編13年上師交大畢業,曾經在小公司待過,去過華為OPPO等大廠,18年進入阿裡,直到現在.深知大多數初中級java工程師,想要升技能,往往是需要自己摸索成長或是報班學習,但對於培訓機構動則近萬元的學費,著實壓力不小.自己不成體系的自學效率很低又漫長,而且容易碰到天花板技術停止不前.因此我收集了一份《java開發全套學習資料》送給大家,初衷也很簡單,就是希望幫助到想自學又不知道該從何學起的朋友,同時減輕大家的負擔.添加下方名片,即可獲取全套學習資料哦