建議在構建 Web 應用程序時在 WSL 上安裝 Python. 有關 Python Web Many of the tutorials and instructions developed are geared towards Linux 用戶編寫的,並使用基於 Linux 的打包和安裝工具. 大多數 Web 應用也部署在 Linux 上,So this ensures consistency between development and production.
如果是將 Python 用於 Web work other than development,則建議使用 Microsoft Store 直接在 Windows 上安裝 Python. WSL 不支持 GUI 桌面或應用程序(例如 PyGame、Gnome、KDE 等). 對於這些情況,請直接在 Windows 上安裝並使用 Python. 如果不熟悉 Python,請參閱我們的指南:開始在 Windows 上使用 Python(初學者). If interested in automating common tasks on the operating system,請參閱我們的指南:開始在 Windows 上將 Python for scripting and automation. 對於某些高級方案,可能需要考慮直接從 python.org 下載特定 Python 版本或考慮安裝替代實現,如 Anaconda、Jython、PyPy、WinPython、IronPython 等.建議僅當你是更高級的 Python 程序員並且有特定原因需要選擇替代實現時才使用此方法.
通過 WSL,可運行與 Windows and your favorite tools(如 Visual Studio Code 和 Outlook 等)直接集成的 GNU/Linux 命令行環境.We generally recommend using WSL 2 來進行 Python Web 開發工作.
To enable and install WSL 2,請參閱 WSL 安裝文檔. These steps will include choosing Linux 發行版(例如 Ubuntu).
安裝 WSL 和 Linux 發行版後,打開 Linux 發行版(可在 Windows found in the start menu of),並使用命令 lsb_release -dc View version and code name.
建議定期更新 Linux 發行版,Include updates immediately after installation,to ensure you have the latest packages. Windows 不會自動處理此更新. To update the distribution,請使用命令:sudo apt update && sudo apt upgrade.
提示
請考慮從 Microsoft Store 安裝新的 Windows 終端,To enable multiple tabs(在多個 Linux 命令行、Windows 命令提示符、PowerShell 和 Azure CLI 等之間快速切換)、創建鍵綁定(用於打開或關閉選項卡、復制粘貼等的快捷方式鍵)、使用搜索功能,and setting custom themes(配色方案、字體樣式和大小、背景圖像/模糊/透明度). 了解詳細信息.
通過 VS Code 可利用 IntelliSense、Linting、調試支持、代碼片段和單元測試. VS Code 與適用於 Linux 的 Windows 子系統完美集成,可提供一個內置終端,For creating a seamless workflow between the code editor and the command line,In addition, through the direct built-in UI 中的常用 Git 命令(添加、提交、推送、拉取)支持 Git 進行版本控制.
Download and install for Windows 的 VS Code. VS Code 也適用於 Linux,但適用於 Linux 的 Windows 子系統不支持 GUI 應用,因此需要在 Windows 上安裝它. 不必擔心,仍可以使用 Remote - WSL 擴展與 Linux 命令行和工具集成.
在 VS Code 上安裝 Remote - WSL 擴展. 這使你可以將 WSL 用作集成開發環境,and will handle compatibility and paths for you. 了解詳細信息.
重要
如果已安裝 VS Code,you need to ensure that you have 1.35 5 月版本或更高版本,以便安裝 Remote - WSL 擴展. It is recommended not to Remote - WSL in the extended case VS Code 中使用 WSL,because will lose the autocomplete、調試、linting 等的支持.趣味事實:此 WSL 擴展安裝在 $HOME/.vscode-server/extensions 中.
讓我們在 Linux (Ubuntu) Create a new project directory on the filesystem,we will then use VS Code 處理 Linux 應用和工具.
關閉 VS Code,然後轉到“開始”菜單(左下方 Windows 圖標)並輸入以下內容,以便打開 Ubuntu 18.04(WSL 命令行):“Ubuntu 18.04”.
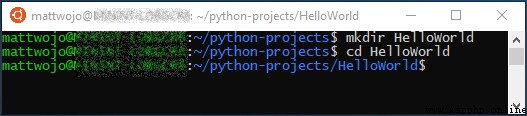
在 Ubuntu 命令行中,導航到要在其中放置項目的位置,and create a directory for the project:mkdir HelloWorld.
提示
使用適用於 Linux 的 Windows 子系統 (WSL) An important thing to keep in mind when,is now working between two different filesystems:1) Windows 文件系統,以及 2) Linux 文件系統 (WSL)(For our example it is Ubuntu). 需要注意安裝包和存儲文件的位置. 可以在 Windows Install a version of a tool or package on the filesystem,並在 Linux 文件系統中安裝完全不同的版本. 在 Windows Update tools in the file system will not affect Linux Tools in the file system,反之亦然. WSL will mount the fixed drive to the computer Linux 發行版本中的 /mnt/<drive> 文件夾下. 例如,Windows C: 驅動器裝載在 /mnt/c/ 下. 可以從 Ubuntu 終端訪問 Windows 文件,並對這些文件使用 Linux 應用和工具,反之亦然. 考慮到許多 Web The tool was originally aimed at Linux 所編寫的,並部署在 Linux 生產環境中,因此建議在 Linux The file system Python Web 開發. This also avoids mixing filesystem semantics(如 Windows Case insensitive with respect to filenames). 也就是說,WSL 現在支持在 Linux 與 Windows 文件系統之間跳轉,So the file can be hosted on one of the systems. 了解詳細信息.
Ubuntu 18.04 LTS 已安裝了 Python 3.6,but doesn't come with what you might expect with other Python Install some modules obtained with. 我們仍需要安裝 pip、Python 的標准包管理器和 venv(Standard modules for creating and managing lightweight virtual environments). 請記住,你可能需要使用 sudo apt update && sudo apt upgrade 更新你的 Linux 發行版,make it the latest version.
打開 Ubuntu 終端並輸入 python3 --version,to confirm that it is installed Python3. 這應該返回 Python 版本號. 如果需要更新 Python 版本,Please update first by entering Ubuntu 版本:sudo apt update && sudo apt upgrade,然後使用 sudo apt upgrade python3 更新 Python.
Install by typing pip:sudo apt install python3-pip. 通過 pip 可以安裝和管理不屬於 Python 標准庫的其他包.
Install by typing venv:sudo apt install python3-venv.
對於 Python 開發項目,Using a virtual environment is a recommended best practice. 通過創建虛擬環境,Project tools can be isolated,Avoid version conflicts with tools from other projects. 例如,you may be maintaining a need Django 1.2 Web 框架的舊 Web 項目,but then a use Django 2.2 exciting new projects. If updated globally outside the virtual environment Django,then you may run into some version control issues later. In addition to preventing accidental version conflicts,Virtual environments allow packages to be installed and managed without administrative privileges.
打開終端,在 HelloWorld 項目文件夾中,使用以下命令創建名為 .venv 的虛擬環境:python3 -m venv .venv.
若要激活虛擬環境,請輸入:source .venv/bin/activate. if it is working,you should see before the command prompt (.venv). A separate environment is now ready for writing code and installing packages. 使用完虛擬環境後,Enter the following command to disable it:deactivate.

提示
It is recommended to create a virtual environment in the directory where you plan to work on the project. 由於每個項目都應具有自己的單獨目錄,Each has its own virtual environment,因此無需唯一命名. 建議使用名稱 .venv 以遵循 Python 約定. 如果安裝在項目目錄中,then some tools(如 pipenv)will also default to this name. you wouldn't want to use .env,as this would conflict with the environment variable definition file. Usually do not recommend the use of something to the beginning of the name,因為不需要 ls Frequent reminders that the directory already exists. 還建議將 .venv 添加到 .gitignore 文件. (此處是GitHub 用於 Python 的默認 gitignore 模板,可供參考.)有關在 VS Code More information on using virtual environments in,請參閱在 VS Code中使用 Python 環境.
VS Code 使用 Remote - WSL 擴展(之前已安裝)將 Linux 子系統視為遠程服務器. 這使你可以使用 WSL 作為集成開發環境. 了解詳細信息.
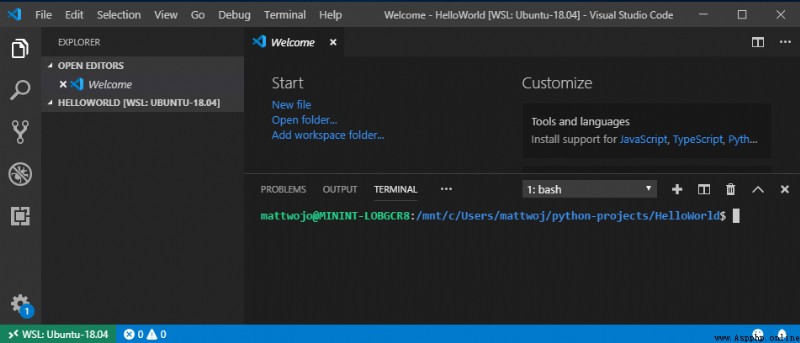
by entering the following from Ubuntu 終端在 VS Code 中打開項目文件夾:code .(“.”告知 VS Code 打開當前文件夾).
A security alert will go from Windows Defender 彈出,選擇“允許訪問”. VS Code 打開後,You should see the remote connection host indicator in the lower left corner,let you know“WSL:Ubuntu-18.04”上進行編輯.
關閉 Ubuntu 終端. Next will be integrated into VS Code 中的 WSL 終端.
通過按 Ctrl+'(使用反撇號字符)或選擇“視圖”>“終端”,在 VS Code 中打開 WSL 終端. This opens a pointer to Ubuntu The path of the project folder created in the terminal bash (WSL) 命令行.
需要安裝 Remote - WSL 的所有 VS Code 擴展. 已在 VS Code Locally installed extensions are not automatically available on. 了解詳細信息.
通過輸入 Ctrl+Shift+X 來打開 VS Code 擴展窗口(或使用菜單導航到“視圖” >“擴展” ).
在頂部的“在市場中搜索擴展”框中,輸入:“Python”.
找到“Python (ms-python.python) by Microsoft”擴展,然後選擇綠色的“安裝”按鈕.
擴展安裝完成後,Need to choose blue“需要重新加載”按鈕. 這會重新加載 VS Code 並在 VS Code 擴展窗口(which shows installed Python 擴展)中顯示“WSL:UBUNTU-18.04 - 已安裝”部分.
Python 是一種解釋型語言,Support for different types of interpreters(Python2、Anaconda、PyPy 等). VS Code 應默認為與項目關聯的解釋器. If there is a reason to change the interpreter,請選擇當前顯示在 VS Code 窗口底部藍色欄中的解釋器,或打開“命令面板”(Ctrl+Shift+P),然後輸入命令“Python:選擇解釋器”. 這會顯示當前已安裝的 Python 解釋器列表. 詳細了解如何配置 Python 環境.
Let's create and run a simple Python 程序作為測試,並確保已選擇正確的 Python 解釋器.
通過輸入 Ctrl+Shift+E 來打開 VS Code 文件資源管理器窗口(或使用菜單導航到“視圖”>“資源管理器”).
如果集成 WSL Terminal is not open,請通過輸入 Ctrl+Shift+' 來打開它,並確保選擇 HelloWorld python 項目文件夾.
Create one by entering python 文件:touch test.py. You should see the file you just created appear in the Explorer window with .venv 和 .vscode 文件夾(already in the project directory)下.
Select the one you just created in the Explorer window test.py 文件以在 VS Code 中打開它. 由於文件名中的 .py 向 VS Code 告知這是 Python 文件,so the previously loaded Python Extensions are automatically selected and loaded Python 解釋器(會顯示在 VS Code 窗口底部).
將此 Python 代碼粘貼到 test.py 文件中,然後保存該文件 (Ctrl+S):
Python復制
print("Hello World")
To run the just created Python“Hello World”程序,請在 VS Code In the Explorer window select“test.py”文件,Then right click on the file to bring up the options menu. 選擇“在終端中運行 Python 文件”. 或者,在集成 WSL 終端窗口中,輸入 python test.py 以運行“Hello World”程序. Python 解釋器會在終端窗口中打印“Hello World”.
祝賀你. all set,Can be created and run Python 程序! 現在,Let's try the most popular Python Web Two creations in the frame Hello World 應用:Flask 和 Django.
Flask 是一種適用於 Python 的 Web 應用程序框架. in this brief tutorial,會使用 VS Code 和 WSL 創建一個小型“Hello World”Flask 應用.
轉到“開始”菜單(左下方 Windows 圖標)並輸入以下內容,以便打開 Ubuntu 18.04(WSL 命令行):“Ubuntu 18.04”.
為項目創建目錄:mkdir HelloWorld-Flask,然後執行 cd HelloWorld-Flask to enter the directory.
創建虛擬環境以安裝項目工具:python3 -m venv .venv
通過輸入以下命令,在 VS Code 中打開 HelloWorld-Flask 項目:code .
在 VS Code 中打開集成 WSL 終端(也稱為 Bash),The specific method is to enter Ctrl+Shift+'(should have been selected HelloWorld-Flask 項目文件夾). 關閉 Ubuntu 命令行,because we will next VS Code 集成的 WSL 終端中工作.
在 VS Code 中使用 Bash 終端激活在步驟 #3 中創建的虛擬環境:source .venv/bin/activate. if it is working,you should see before the command prompt (.venv).
by entering the following,在虛擬環境中安裝 Flask:python3 -m pip install flask. By entering the following to verify whether it is installed:python3 -m flask --version.
為 Python 代碼創建新文件:touch app.py
在 VS Code open in file explorer app.py 文件(Ctrl+Shift+E,然後選擇 app.py 文件). 這會激活 Python 擴展以選擇解釋器. 它應默認為“Python 3.6.8 64 位('.venv': venv)”. 請注意,It also detects virtual environments.

在 app.py 中,添加代碼以導入 Flask 並創建 Flask 對象的實例:
Python復制
from flask import Flask
app = Flask(__name__)
此外在 app.py 中,add a return(在本例中為簡單字符串)的函數. 使用 Flask 的 app.route Decorator will URL 路由“/”映射到該函數:
Python復制
@app.route("/")
def home():
return "Hello World! I'm using Flask."
提示
Can be based on the number of different routes that map to the same function,Use multiple decorators for the same function(每行一個).
保存 app.py 文件 (Ctrl+S).
在終端中,Enter the following command to run the application:
Python復制
python3 -m flask run
這會運行 Flask 開發服務器. 默認情況下,Server looks for development app.py. 運行 Flask 時,應看到類似於以下內容的輸出:
Bash復制
(env) [email protected]:/mnt/c/Projects/HelloWorld$ python3 -m flask run
* Environment: production
WARNING: This is a development server. Do not use it in a production deployment.
Use a production WSGI server instead.
* Debug mode: off
* Running on http://127.0.0.1:5000/ (Press CTRL+C to quit)
打開默認 Web 浏覽器到呈現的頁面,在終端中 Ctrl+單擊 http://127.0.0.1:5000/ URL. You should see the following message in your browser:

請注意,在訪問類似於“/”的 URL 時,A message appears in the debug terminal,其中顯示 HTTP 請求:
Bash復制
127.0.0.1 - - [19/Jun/2019 13:36:56] "GET / HTTP/1.1" 200 -
在終端中使用 Ctrl+C 停止應用.
提示
如果要使用與 app.py 不同的文件名(如 program.py),Please define the name as FLASK_APP 的環境變量,and set its value to the selected file. Flask of the development server will then use FLASK_APP value instead of the default file app.py. 有關更多信息,請參閱 Flask The command line interface documentation for.
恭喜,你已使用 Visual Studio Code 和適用於 Linux 的 Windows The subsystem creates a Flask Web 應用程序! 有關使用 VS Code 和 Flask 的更深入教程,請參閱 Visual Studio Code中的 Flask 教程.
Django 是一種適用於 Python 的 Web 應用程序框架. in this brief tutorial,會使用 VS Code 和 WSL 創建一個小型“Hello World”Django 應用.
轉到“開始”菜單(左下方 Windows 圖標)並輸入以下內容,以便打開 Ubuntu 18.04(WSL 命令行):“Ubuntu 18.04”.
為項目創建目錄:mkdir HelloWorld-Django,然後執行 cd HelloWorld-Django to enter the directory.
創建虛擬環境以安裝項目工具:python3 -m venv .venv
通過輸入以下命令,在 VS Code 中打開 HelloWorld-DJango 項目:code .
在 VS Code 中打開集成 WSL 終端(也稱為 Bash),The specific method is to enter Ctrl+Shift+'(should have been selected HelloWorld-Django 項目文件夾). 關閉 Ubuntu 命令行,because we will next VS Code 集成的 WSL 終端中工作.
在 VS Code 中使用 Bash 終端激活在步驟 #3 中創建的虛擬環境:source .venv/bin/activate. if it is working,you should see before the command prompt (.venv).
Install in a virtual environment using the following Django:python3 -m pip install django. By entering the following to verify whether it is installed:python3 -m django --version.
接下來,運行以下命令來創建 Django 項目:
Bash復制
django-admin startproject web_project .
startproject command assumption(by using at the end .)當前文件夾是項目文件夾,and create the following in it:
manage.py:項目的 Django 命令行管理實用工具. 使用 python manage.py <command> [options] 為項目運行管理命令.
一個名為 web_project 的子文件夾,其中包含以下文件:
__init__.py:一個空文件,向 Python 告知此文件夾是 Python 包.wsgi.py:供與 WSGI 兼容的 Web 服務器為項目提供服務的入口點. 通常將此文件原樣保留,because it produces Web Server provides hooks.settings.py:包含 Django 項目的設置,可以在開發 Web 應用的過程中進行修改.urls.py:包含 Django 項目的目錄,Can also be modified during development.若要驗證 Django 項目,請使用命令 python3 manage.py runserver 啟動 Django 的開發服務器. 服務器在默認端口 8000 上運行,You should see output similar to the following in a terminal window:
輸出復制
Performing system checks...
System check identified no issues (0 silenced).
June 20, 2019 - 22:57:59
Django version 2.2.2, using settings 'web_project.settings'
Starting development server at http://127.0.0.1:8000/
Quit the server with CONTROL-C.
首次運行服務器時,它會在文件 db.sqlite3 Create default in SQLite 數據庫,This database is intended for development,But can be used in production for low volumes Web 應用. 此外,Django 的內置 Web The server is designed to be used for local development only. 但是在部署到 Web 主機時,Django will use the host Web 服務器. Django 項目中的 wsgi.py The module is responsible for hooking into the production server.
If you want to use the default value 8000 不同的端口,請在命令行中指定端口號,如 python3 manage.py runserver 5000.
in the terminal output window Ctrl+clickhttp://127.0.0.1:8000/ URL,to open your default browser to that address. 如果 Django 安裝正確且項目有效,you will see the default page. VS Code The terminal output window also shows the server log.
完成後,關閉浏覽器窗口,並按照終端輸出窗口中的指示使用 Ctrl+C 在 VS Code 中停止服務器.
現在,若要創建 Django 應用,請在項目文件夾(manage.py residency location)run the management utility in startapp 命令:
Bash復制
python3 manage.py startapp hello
This command creates a file named hello 的文件夾,which contains some code files and a subfolder. under these files,會經常使用 views.py (包含用於定義 Web 應用中的頁面的函數)和 models.py(包含用於定義數據對象的類). migrations 文件夾由 Django The administration utility for managing database versions,如本教程後面部分所述. 還有文件 apps.py(應用配置)、admin.py(用於創建管理界面)和 tests.py (用於測試)not described here.
修改 hello/views.py 以匹配以下代碼,This creates a single view for the app's home page:
Python復制
from django.http import HttpResponse
def home(request):
return HttpResponse("Hello, Django!")
使用以下內容創建文件 hello/urls.py. urls.py file to specify the schema,以將不同 URL 路由到相應的視圖. 下面的代碼包含一個路由,Used for root will be applied URL("")map to just added to hello/views.py 的 views.home 函數:
Python復制
from django.urls import path
from hello import views
urlpatterns = [
path("", views.home, name="home"),
]
web_project folder also contains urls.py 文件,This file is the actual processing URL location of the route. 打開 web_project/urls.py and modified to match the following code(如果需要,可以保留指導注釋). 此代碼使用 django.urls.include 拉取應用的 hello/urls.py(This will cause the app's routes to be included in the app). 當項目包含多個應用時,This separation can be very useful.
Python復制
from django.contrib import admin
from django.urls import include, path
urlpatterns = [
path("", include("hello.urls")),
]
保存所有已修改的文件.
在 VS Code 終端中,使用 python3 manage.py runserver 運行開發服務器,and open your browser to http://127.0.0.1:8000/ to view rendering“Hello, Django”的頁面.
恭喜,你已使用 VS Code 和適用於 Linux 的 Windows The subsystem creates a Django Web 應用程序! 有關使用 VS Code 和 Django 的更深入教程,請參閱 Visual Studio Code中的 Django 教程.