In the development process , Database model needs to be modified , And update the database after modification . The most direct way is to delete the old table , But you lose data .
A better solution is to use the database migration framework , It can track database schema changes , Then apply the changes to the database . stay Flask Can be used in Flask-Migrate Expand , For data migration .
Environmental Science :window11+pycharm2020.1+Anaconda4.11.0 +python3.7
Flask-sqlalchemy2.5.1
Flask-Migrate:3.1.0
install Flask-Migrate.pycharm( or Anaconda Prompt) Open console , Input :
pip install flask-migrate
Installation failed , In the import flask_migrate When the package , In case of an error :alembic Installation failed
pip install -i https://pypi.tuna.tsinghua.edu.cn/simple flask_migrate
Collecting alembic>=0.7
Downloading https://pypi.tuna.tsinghua.edu.cn/packages/60/1e/cabc75a189de0fbb2841d0975243e59bde8b7822bacbb95008ac6fe9ad47/alembic-1.4.2.tar.gz (1.1 MB)
solve :
1. Install other historical versions first alembic, open
alembic · PyPI
Click on release history
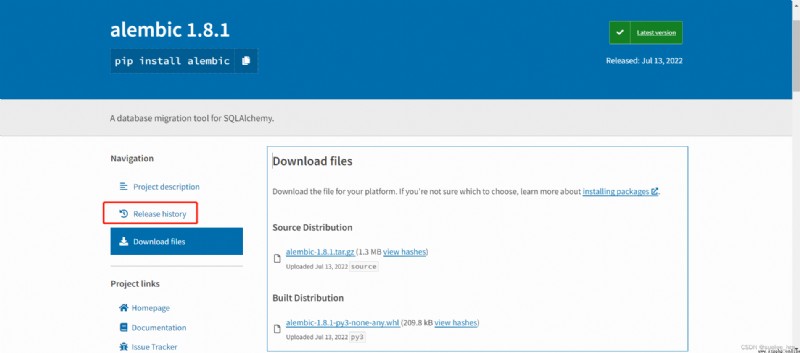
Enter the historical version list , find 1.4.3 edition , Click to enter the download page :
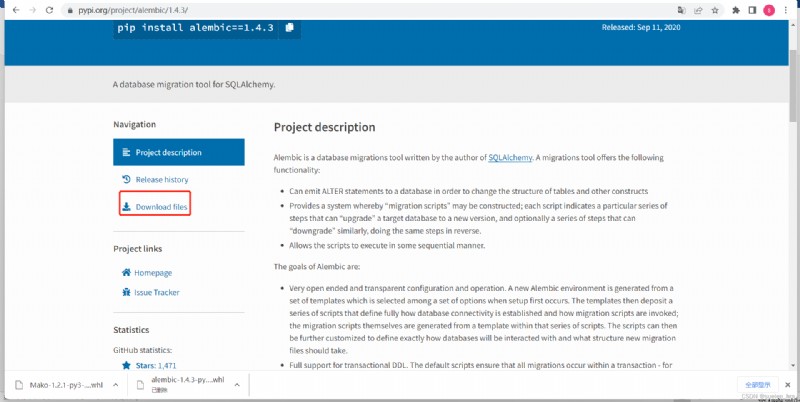
Click on Download files, download alembic-1.4.3-py2.py3-none-any.whl Go to the local folder :
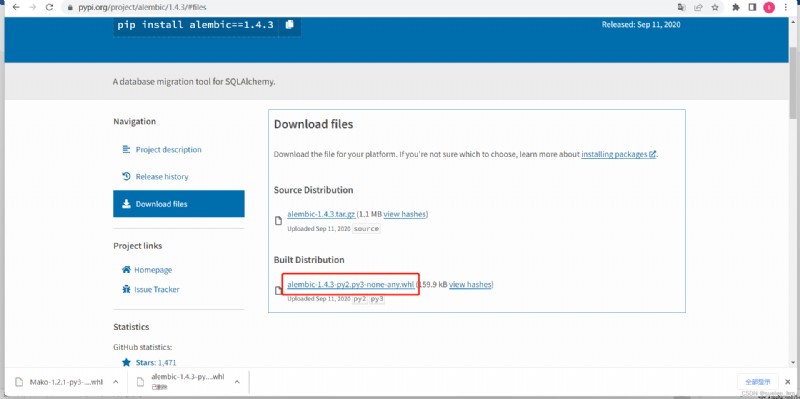
2. Open console ,cd Enter to release alembic-1.4.3-py2.py3-none-any.whl Folder :

Input :
pip install alembic-1.4.3-py2.py3-none-any.whl
3. Prompt to install Mako Failure , open
Mako · PyPI
download Mako-1.2.1-py3-none-any.whl Go to the local folder :
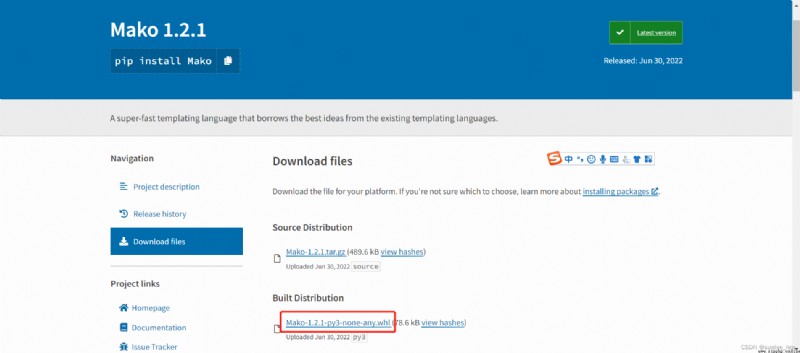
4. Open console ,cd Enter to release Mako-1.2.1-py3-none-any.whl Folder , Input :
pip install Mako-1.2.1-py3-none-any.whl

Mako Installation successful
5. reinstall alembic, Input :
pip install alembic-1.4.3-py2.py3-none-any.whl
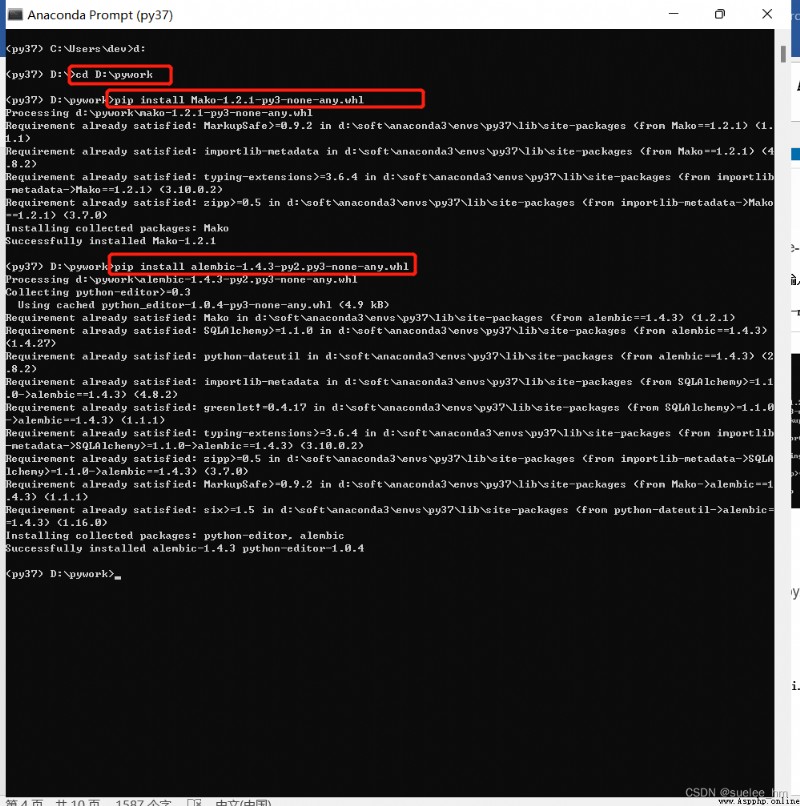
alembic Installation successful .
6. reinstall flask_migrate:
pip install -i https://pypi.tuna.tsinghua.edu.cn/simple flask_migrate
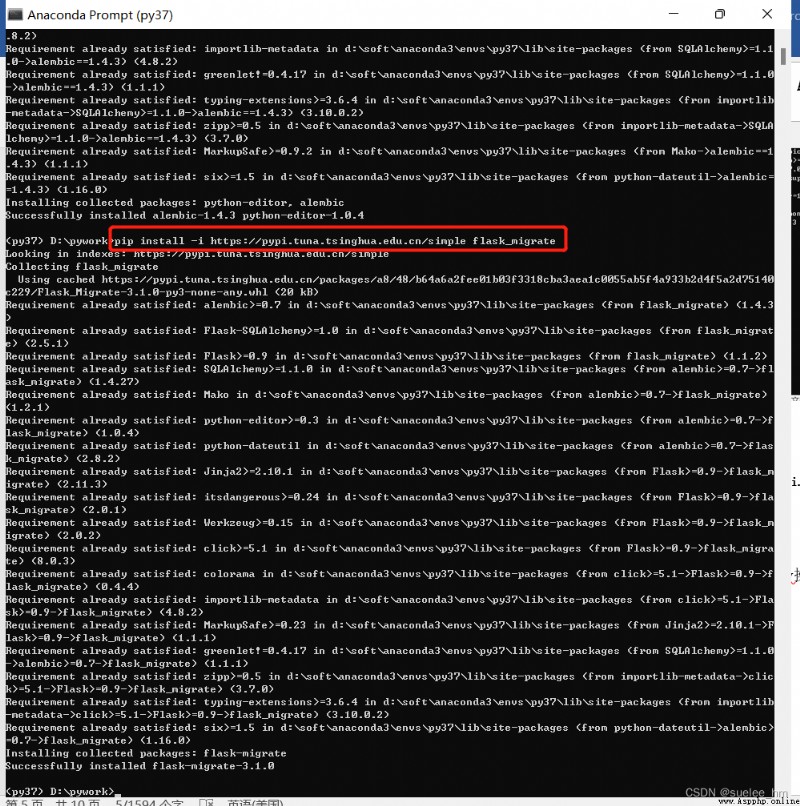
Flask-Migrate Installation successful , The installation version is 3.1.0.
summary :python If the installation of related plug-ins fails , Check the problem in which step , Then go to the official website and directly download the corresponding version to the local , Offline installation .
Use flask-migrate 3.1.0 Migrate database .
flask-migrate 3.0 The following general and flask-script Use it with , But in 3.0 after flask-migrate Removed MigrateCommand This module , according to flaks-migrate Official documents , Use only flask-migrate.
1.Flask-Migrate Common commands :
flask db history # View historical migration information
flask db current # View the current database version
flask db init # Initialize database
flask db migrate -m "init_database" # Database migration
flask db upgrade # Update the database to the latest version
flask db upgrade revision_id # Update the database to a certain version revision_id
flask db downgrade # Back off a version
flask db downgrade revision_id # Back to a version revision_id
2. Synchronization table structure , Execute commands in the console
a. init initialization , Only once .
perform init command , Initialize a migration folder :
flask db init
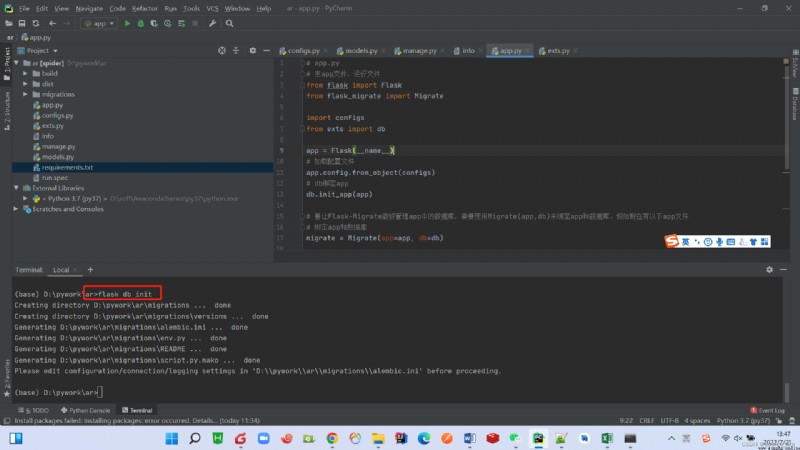
After execution, a migrations Catalog ( If you need to re init, You need to delete this directory before init):
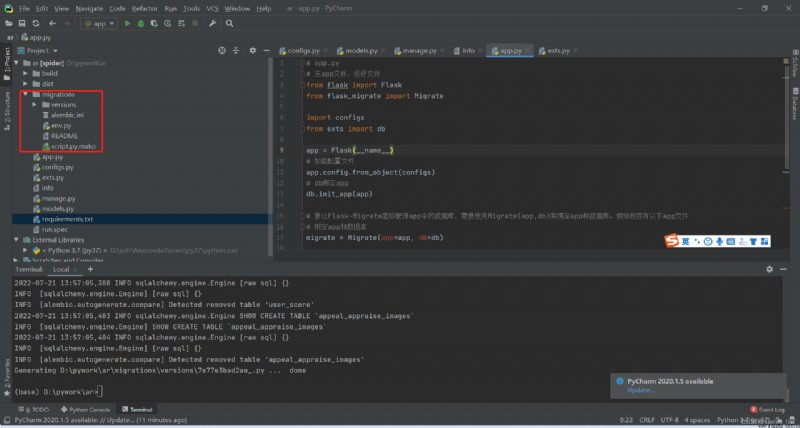
b. migrate-- Generate a migration file from the model changes
perform migrate command , Add the current model to the migration file :
flask db migrate
Problems arise :
ModuleNotFoundError: No module named 'MySQLdb'
Solution : install pymysql And change the database connection to mysql+pymysql:

c.update-- Use caution :
When you execute upgrade It will record all data tables except the program and prepare to delete , Once you implement update, All data tables that are not part of the program will be deleted !
perform update command , Operate the corresponding database in the migration file , Really map to the database :
flask db upgrade
completion of enforcement , The corresponding table will be generated in the database :

[1] flask-migrate file :
Flask-Migrate — Flask-Migrate documentation