Bought a cloud server , What would you like to sit on , Discover that you can build an online code environment , Whenever and wherever possible , Open a web page and write code 
Need to use jupyter, This is not just a Python Module , It is a service , A concept
My environment is
It needs to be installed in advance Python modular
pip install tornado
pip install jupyter
Commands are entered at the terminal
My catalog is here , You need to write the configuration file later
mkdir /home/danzhao/jupyter
If you do not create, an error will be reported during configuration
Otherwise, I can't get in . I just set a string of numbers , Then I can't get in
Setting the password needs to be in Python Set up... In the environment
from notebook.auth import passwd
passwd()
You will be prompted to enter your password twice , Just OK 了
Enter password:
Verify password:
After input, a string of encrypted strings will be returned , The cases I returned and those on the official website sha1 Dissimilarity , It's something like this
'argon2:$argon2id$v=19$m=10240,t=10,p=8$asodjfipasjdfpojasdpf$lfU/sauf0asjd0fjas'
Copy it , For later configuration
jupyter notebook --generate-config
It returns an address , Tell me that the generated file is in /root/.jupyter/jupyter_notebook_config.py
The configuration file can be visually modified by software , It's fine too vi modify
vi /root/.jupyter/jupyter_notebook_config.py
Configuration comes later , Because the password needs to be set
The official tip requires ssl To configure , This can https visit . We don't have to do this , Just skip ssl To configure
The necessary settings are as follows
c.NotebookApp.ip = '*' # Look at the instructions yes jupyter The white list IP It means
c.NotebookApp.password = u'argon2:$argon2id$v=19$m=10240,t=10,p=8$asodjfipasjdfpojasdpf$lfU/sauf0asjd0fjas' # The first 2 Password created in step
c.NotebookApp.notebook_dir = '/home/danzhao/jupyter' # The first 1 Folder created in step
c.NotebookApp.open_browser = False
c.NotebookApp.port = 1234 # Here is the port you want to access , It needs to be released from the server
After configuration, save
Start at the terminal
jupyter notebook
Some will prompt for --allow-root, Just add in
jupyter notebook --allow-root
Hui He Web Start the service
If it is necessary to continue operation after closing the terminal
nohup jupyter notebook --allow-root
So you can shut down the terminal , Write freely on the web Python 了
Suppose your public network IP yes 123.123.123.123, Then you can access the port set in the browser 
This is my way , Enter password to log in 
Log in and look like this . english UI, Not very friendly to China . The next step is to find a way to sinicize it , Although I can understand English 
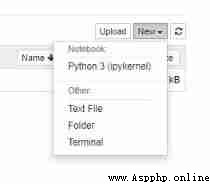
Try to New Here's a new one Python File running 
perfect ! Be accomplished
I see another one in the back Clusters, It is also equipped with , Although I don't use it very much 
jupyter server For single user only JupyterHub, At present, it only supports Ubuntu, my CentOS Not yet