Reference material :《Python Programming : From introduction to practice 》——【 beautiful 】Eric Matthes Writing Translated by Yuan Guozhong
Python edition :3.9.5
django edition :3.2.6
System :Windows 10
The so-called norm , That is to say The goal is . In this project , We want to What functions are implemented , user What can be done in this program , Project appearance And user's Interface And so on should be included in the specification .
When formulating specifications, we should follow one sentence —— Always consider for users .
Suppose that we have determined the name of the project here as hahaproject.
So-called A virtual environment Is a location in the system , You can install Python package , And compare it with others Python Package the isolation . This isolation operation with the help of virtual environment is Useful and necessary Of .( The necessity will be reflected when you deploy the project to the server !)
First step : Create a new folder somewhere on your computer , Name it hahaproject( It is recommended to create a new one to D disc , save C Disk space , Let's assume that the path of the newly created folder is D:\hahaproject).
The second step : Open the terminal ( Shortcut key :Windows key +R Post run cmd), First enter d: Switch to D disc , Then input cd hahaproject( Be careful ’cd’ There is a space after ), Switch to this directory .( Be careful !!! All the following code is executed in this directory !!! As shown in the figure below .)
The third step : Use the following command to create a virtual environment
D:\hahaproject>python -m venv hhp_env
D:\hahaproject>
After the above three steps are completed , You will find files in the newly created empty folder . We run here Python modular venv, And used it to create an ietter named hhp_env Virtual environment for .
Use this command to activate the virtual environment :
D:\hahaproject>hhp_env\Scripts\activate
(hhp_env) D:\hahaproject>
After the environment is active , The environment name will be enclosed in parentheses . under these circumstances , We can install packages in the environment , And use the installed package . stay hhp_env Package installed in Available only when the environment is active !
If you want to stop using the virtual environment , Executable command deactivate:
(hhp_env) D:\hahaproject>deactivate
D:\hahaproject>
If you directly shut down the terminal running the virtual environment , The virtual environment will no longer be active !
After creating and activating the virtual environment , Can be installed Django 了 ( Use here 3.2.6 edition ):
(hhp_env) D:\hahaproject>pip install Django==3.2.6
Collecting Django==3.2.6
...( A little )
Successfully installed Django-3.2.6 asgiref-3.4.1 pytz-2021.1 sqlparse-0.4.1
Don't forget ,Django Available only when the current virtual environment is active !
Execute the following command ( Never forget a space and a period at the end , This period allows the new project to use the appropriate directory structure , In this way, the application can be easily deployed to the server after the development ):
(hhp_env) D:\hahaproject>django-admin startproject hahaproject .
(hhp_env) D:\hahaproject>
After executing the above command , The project was created successfully , We use commands dir To see which files appear in the directory :
(hhp_env) D:\hahaproject>django-admin startproject hahaproject .
(hhp_env) D:\hahaproject>dir
···
From the output, you can see that there are two folders under the current directory , One python file , Namely :hahaproject, hhp_env, manage.py.
Now let's look at the folder hahaproject What are the files in , In the command dir Followed by the folder name , Space between :
(hhp_env) D:\hahaproject>django-admin startproject hahaproject .
(hhp_env) D:\hahaproject>dir
···
(hhp_env) D:\hahaproject>dir hahaproject
...
From the output, we can see that there are five in this folder .py file , most important of all settings.py( Appoint Django How to interact with your system and how to manage the project ),urls.py( tell Django What web pages should be created to respond to browser requests ),wsgi.py( help Django Provide the files it creates ,wsgi yes web server gateway interface namely Web Server gateway interface An acronym for ) These three files .
Django Store most of the information related to the project in the database , So we need to create one for Django Database used . Please execute the following command while the virtual environment is active :
(hhp_env) D:\hahaproject>python manage.py migrate
Operations to perform:
...
Applying sessions.0001_initial... OK
(hhp_env) D:\hahaproject>
Input again dir Check the files in the current folder to see that there is one more file db.sqlite3.
Let's check Django Whether the project was created correctly . Execute the command for this runserver, As shown below :
(hhp_env) D:\hahaproject>python manage.py runserver
Press enter after entering , A string of code as shown in the figure below appears :
The current server is on , The port used is the default port 8000, You can also specify the port when entering , such as :
(hhp_env) D:\hahaproject>python manage.py runserver 8001
After running , Open a Web browser , And enter the URL: http://127.0.0.1:8000/, You will see the following page :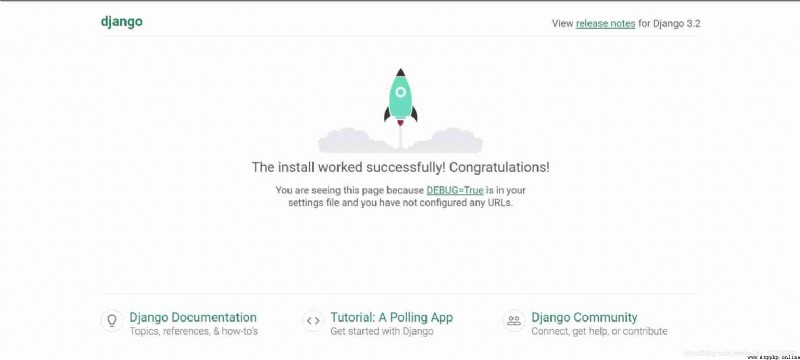
Don't shut down the server now . If you want to shut down , Press Ctrl+C that will do .
In this step we will Defining models and Activate the model , Create a superuser and Register our own model with the administration website , Explore the data stored in the project database using an interactive environment .
Before you complete these operations , We need to build the infrastructure needed to create the application .
Of course , The terminal window opened earlier should still be running runserver, stay Web What you do in the browser , There will be a corresponding code in this terminal , So we need to open another terminal window , Switch to manage.py In the directory ( That is just hahaproject In the folder ). Then activate the virtual environment , Do the following again .
Now execute the command startapp:
(hhp_env) D:\hahaproject>python manage.py startapp hahaprojects
(hhp_env) D:\hahaproject>
startapp The back is appname, Here we use hahaprojects. After executing the command , Let's enter the command dir see , You can find , Add a new folder hahaprojects. Reenter command dir hahaprojects Look at the files . The most important of these are the three documents :models.py( stay 2.1 Will be used in ), admin.py( stay 2.4 Will be used in ), views.py
First, we need to think about the data involved .
After thinking , open models.py, You can create the required class , class Contained in the attribute and Method . We created it at the code level class It's called Model . Model tell Django How to handle the data stored in the application .
Let's assume that we have created a named Laughter Of class . The code is as follows :
from django.db import models
# The above is the original code , Here is the code to add
class Laughter(models.Model):
""" Laughter """
owner = models.CharField(max_length=200)
date_added = models.DateTimeField(auto_now_add=True)
def __str__(self):
""" Return owner of laughter """
return self.owner
To use the model , Must let Django Put the application ( What we created above hahaprojects It's just an application ) Included in the project . So , open settings.py( Path is :D:\hahaproject\hahaproject\settings.py), Find one named INSTALLED_APPS tuples , Add the name of the application you created :
--snip--
INSTALLED_APPS = (
--snip--
'django.contrib.staticfiles',
# Above is the original part , Here are the parts you added
# My apps
'hahaprojects',
)
--snip--
below , Need make Django modify the database , So that it can store information related to the model we defined . So , Execute the following command in the terminal window :
(hhp_env) D:\hahaproject>python manage.py makemigrations hahaprojects
Appears after execution - Creat model Laughter Such a statement indicates that the modification was successful .
Then apply this migration , Give Way Django Help us modify the database :
(hhp_env) D:\hahaproject>python manage.py migrate
...
Applying hahaprojects.0001_initial... OK
If everything is normal when applying migration , The last sentence will appear (OK).
Whenever the project management data needs to be modified , Take the following three steps :
models.pypython manage.py makemigrationsapp_namepython manage.py migrateDjango Allows you to create users with all permissions —— The super user .
For in Django Create superuser in , Carry out orders :
(hhp_env) D:\hahaproject>python manage.py createsuperuser
Username:...
Email address:
Password:
Password(again):
Superuser created successfully.
(hhp_env) D:\hahaproject>
Follow the prompts to enter the user name and password ( Be careful : The password entered will not be displayed , Press enter directly after input ), E-mail can be left blank . The last indication is Superuser created successfully. It means the creation is successful .
open admin.py, We need to add a line of code here to register the class we created Laughter, The code line is as follows :
from django.contrib import admin
# Above is the original , Here is what to add
from hahaprojects.models import Laughter
admin.site.register(Laughter)
And then visit URL:http://127.0.0.1:8000/admin/, Then enter the user name and password at the time of registration , You can add and modify users and groups in the web page , You can also manage the relationship with the model just defined Laughter Relevant data .
notes : If you see the browser prompt to visit the web page is not available , Please make sure that the first open terminal window is running Django The server .
For example, we want to create another model , Then open it again models.py, Add a newly defined... At the end of the file class Just fine . here , For example, we define a new class LaughReason, And pass ForeignKey Compare it with the previous Laughter Connect , The statement is as follows :
from django.db import models
class Laughter(models.Model):
--snip--
# The above is the existing code , Here is the code to add
class LaughReason(models.Model):
""" The cause of laughter """
laugh = models.ForeignKey(Laughter,on_delete=models.CASCADE)
reason = models.TextField()# Here we do not limit the number of words
date_added = models.DateTimeField(auto_now_add=True)
def __str__(self):
""" Returns a string representation of the reason """
if len(self.reason) > 50:
return self.reason[:50] + "..."
else:
return self.reason
Because we added a new model , Therefore, you need to migrate the database again . Process and 2.2 The bold part at the end equally , Execute the following instructions :
(hhp_env) D:\hahaproject>python manage.py makemigrations hahaprojects
Migrations for 'hahaprojects':
hahaprojects\migrations\0002_laughreason.py
- Creat model LaughReason
(hhp_env) D:\hahaproject>python manage.py migrate
Operations to perform:
--snip--
Applying hahaprojects.0002_laughreason... OK
A new migration file was generated ——0002_laughreason.py, He told Django How to modify the database , Enable it to store and model LaughReason Relevant information .
We also need to register the model LaughReason. So , take admin.py Change it to the following :
from django.contrib import admin
from hahaprojects.models import Laughter, LaughReason# Notice that something new has been added here
admin.site.register(Laughter)
admin.site.register(LaughReason)
Back to http://127.0.0.1:8000/admin/ in , refresh , You'll find that hahaprojects Here is LaughReasons.
Here we will use Django shell.Django shell It is an ideal place to test the project and eliminate its faults .
Use the following command to enter shell conversation :
(hhp_env) D:\hahaproject>python manage.py shell
>>>
I have created two instances in advance ,owner Namely a and b.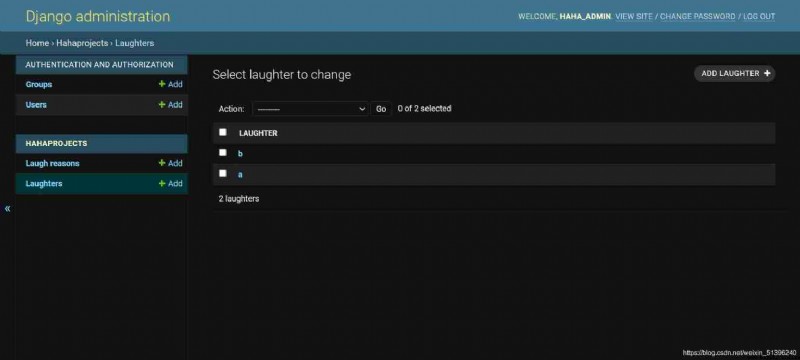
(hhp_env) D:\hahaproject>python manage.py shell
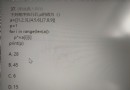
>>> from hahaprojects.models import Laughter
>>> Laughter.objects.all()
<QuerySet [<Laughter: a>, <Laughter: b>]>
QuerySet Called a query set , It's a list .
>>> laughters = Laughter.objects.all()
>>> for laughter in laughters:
... print(laughter.id, laughter)
...
1 a
2 b
Know the of the object ID after , You can get the object and view any of its properties .
>>> t = Laughter.objects.get(id=1)
>>> t.owner
'a'
>>> t.date_added
datetime.datetime(2021, 8, 11, 13, 29, 23, 647811, tzinfo=<UTC>)
>>> t.laughreason_set.all()
<QuerySet [<LaughReason: no reason>]>
To get data through foreign key relationships , Lowercase names of related models can be used +_+set.
notes : After each model modification , Both need to be rebooted shell( Input exit() Or press Ctrl+Z sign out shell), In this way, you can see the effect of the modification .
To be continued ……
Preview of the next content :
3. Create home page
4. Create other pages
Links show the way :
Next :【Django introduction 】 Use Django Development projects ( To continue )