4.2 Tag attributes
This section describes the properties of the tag . Each type of control has many properties . The properties of the label control are shown in the following table :
Define label in ACTIVE In the state of , Background color and text color . These two properties can be used to highlight text , Or some special effect .
import tkinter as tk
root=tk.Tk()
root.geometry('300x240')
b1 = tk.Label(root,text=' Background and text color change ',
activebackground='yellow',
activeforeground='red',state=tk.ACTIVE)
b1.pack()
root.mainloop()
result :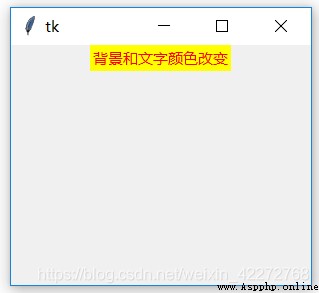
4.2.2 anchor
Specify how to align text . In general , The size of the tag matches the content to be displayed . However, there may be cases where the label is very large , It can be used at this time anchor To specify how to display text .
import tkinter as tk
root=tk.Tk()
root.geometry('300x240')
b1 = tk.Label(root,text=' Text alignment :SW',
anchor=tk.SW,width=20,height=5,bg='blue')
b1.pack()
root.mainloop()
result :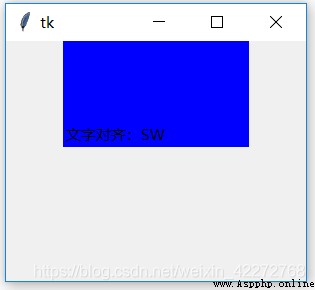
SW It means the southwest corner , That's the lower left corner . Other situations , As long as change anchor You can see the effect of the parameter . For a detailed description, see 3.3.4 section .
4.2.3 background & bg
Is to set the background color of the label , In the example in the previous section , This option is used to set the background of the label to blue . Please refer to the previous section .
4.2.4 bitmap
bitmap Not at all windows The bitmap inside , But in another format .tkinter Built in some bitmap picture , It can be used in the program .
import tkinter as tk
root=tk.Tk()
root.geometry('240X160')
b1 = tk.Label(root,bitmap='@x.xbm')
b1.pack()
root.mainloop()
result :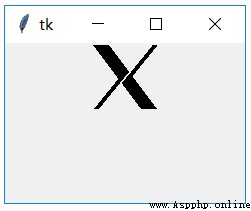
notes :1) Use the system's own bitmap, Just enter your name . such as bitmap=’error’
2) Use custom bitmap, Add the ’@’ that will do .
4.2.5 borderwidth & bd
Set the width of the label .bd Is an abbreviation .
import tkinter as tk
root=tk.Tk()
root.geometry('300x240')
b1 = tk.Label(root,text=' Border width ',
bd=20,bg='blue')
b1.pack()
root.mainloop()
result :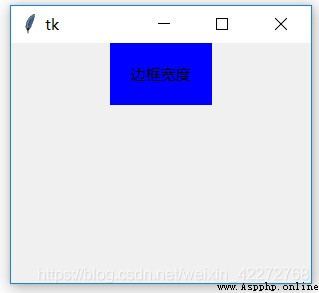
4.2.6 compound
compound Is to set how to display text on the picture . There are detailed descriptions in the table . For specific usage, refer to 4.1.3 Examples in .
4.2.7 cursor
When the mouse passes the label , The figure of the cursor . For specific cursor definitions, see .6 section
import tkinter as tk
root=tk.Tk()
root.geometry('300x240')
b1 = tk.Label(root,text=' Mouse shape ',bd=20,bg='blue',cursor="watch")
b1.pack()
root.mainloop()
4.2.8 disabledforeground
Display the text color when the label is disabled . Be sure to use state=tk.DISABLED, Set the status of the tag to DISABLED, To make this option work .
import tkinter as tk
root=tk.Tk()
root.geometry('300x240')
b1 = tk.Label(root,text=' Label prohibition ',
disabledforeground='red',state=tk.DISABLED)
b1.pack()
root.mainloop()
result :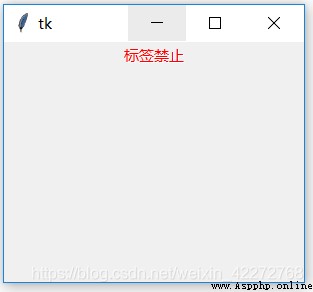
4.2.9 font
The font on the label . Only one font can be selected in a label . If you want to use multiple Fonts , Multiple tags can be used to implement . Description and use of fonts , Please see the .3 section .
4.2.10 foreground & fg
Settings are normal (NORMAL) Under the circumstances , The color of the text in the label .fg Is an abbreviation .
import tkinter as tk
root=tk.Tk()
root.geometry('300x240')
b1=tk.Label(root,text=' Label text color ',fg='blue')
b1.pack()
root.mainloop()
result :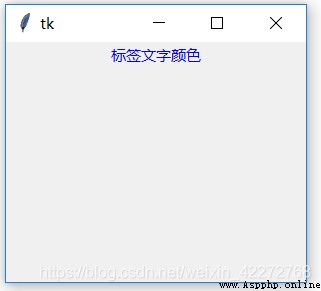
4.2.11 height
Set the height of the label . It should be noted that , In the case of text and images , The units of height are different . Text is set according to the number of lines of text , Image mode , It is set according to the size of pixels .
1. Text is set according to the number of lines
import tkinter as tk
root=tk.Tk()
b1=tk.Label(root,text=' The label height =10',
bg='blue',height=10)
b1.pack()
b2=tk.Label(root,text=' The label height =3',
bg='red',height=3)
b2.pack()
root.mainloop()
result :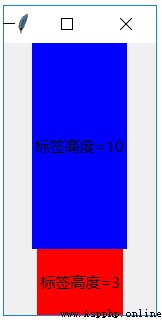
2. Images
If an image is placed in the label , The default size is set in pixels . Other units of measurement can also be used . See .1 Section .
import tkinter as tk
root=tk.Tk()
p = tk.PhotoImage(file='a.gif')
b1 = tk.Label(root,image=p,height=100)
b1.pack()
root.mainloop()
result :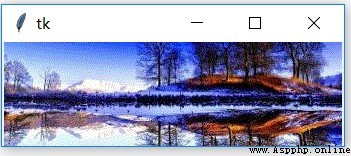
4.2.12 highlightbackground,highlightcolor and highlightthickness
Corresponding to the color of the border when the label does not get focus (highlightbackground)、 The color of the border when the label gets focus (highlightcolor) And the width of the border (highlightthickness). However, because the tag does not support input , So this 3 Parameters are actually useless .
4.2.13 image
Display images . And bitmap The format of is different . It is recommended to use gif Format . For detailed usage, see 4.1.2
4.2.14 justify
Text alignment function . When the label is wider than the displayed text , You can use alignment to adjust the display of text . Supported alignments are :
LEFT
RIGHT
CENTER
import tkinter as tk
root=tk.Tk()
root.geometry('300x240')
b1 = tk.Label(root,text=' Text alignment 1234\nabcdefg',
anchor='e',width=20,height=5,
justify=tk.RIGHT,bg='blue')
b1.pack()
root.mainloop()
result :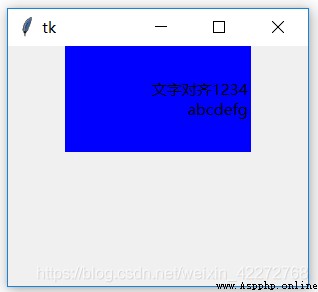
justify Is the alignment of multiple lines of text .anchor Is the alignment of the text . If not used anchor, The text is centered . The right alignment of the above figure will not appear .
Then don't use justify Is it possible to right align multiple lines of text ? Except in special circumstances , That is, all the text is the same length on each line , Otherwise, rows that are not right aligned will appear . actually ,anchor Just make sure that the first line can be right aligned or any other alignment , The multiline approach must use justify To control alignment .
4.2.15 padx and pady
Margins of labels and other controls .padx It's horizontal ,pady It's vertical . See the following figure for the detailed relationship .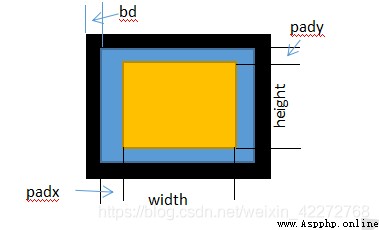
4.2.16 relief
Border beautification effect . The supported formats are :FLAT,SUNKEN, RAISED, GROOVE, RIDGE and SOLID. For details, see 3.3.5 section
import tkinter as tk
root=tk.Tk()
root.geometry('300x240')
b1 = tk.Label(root,text='FLAT Format ',
relief='flat',bg='blue',bd=5)
b1.pack()
b2 = tk.Label(root,text='SUNKEN Format ',
relief='sunken',bg='yellow',bd=5)
b2.pack()
b3 = tk.Label(root,text='RAISED Format ',
relief='raised',bg='red',bd=5)
b3.pack()
b4 = tk.Label(root,text='GROOVE Format ',
relief='groove',bg='green',bd=5)
b4.pack()
b5 = tk.Label(root,text='RIDGE Format ',
relief='ridge',bg='purple',bd=5)
b5.pack()
b5 = tk.Label(root,text='SOLID Format ',
relief='solid',bg='gray',bd=5)
b5.pack()
root.mainloop()
result :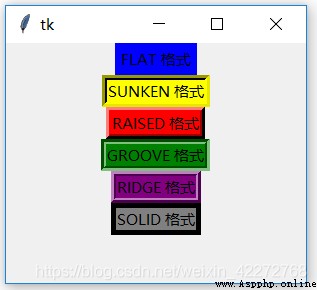
4.2.17 state
Set the status of the label . The default is NORMAL. The other two states are ACTIVE and DISABLED
4.2.18 takefocus
The value is True perhaps False. The default value is False. The function of this option is through Tab Key to move the focus to the label .
4.2.19 text
Set the text to be displayed on the label .
4.2.20 textvariable
It's a tkinter Variable , If the contents of this variable change , The content of the label also changes . Using this attribute requires the introduction of tkintervar modular .
import tkinter as tk
root=tk.Tk()
root.geometry('300x240')
label_str=tk.StringVar()
label_str.set('FLAT Format ')
b1 = tk.Label(root,text='FLAT Format ',relief='flat',
bg='blue',bd=5,textvariable=label_str)
b1.pack()
def change_b1():
label_str.set(' Changed the content of the label ')
b2 = tk.Button(root,text='b1',command=change_b1)
b2.pack()
root.mainloop()
result :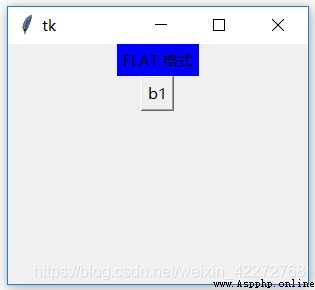
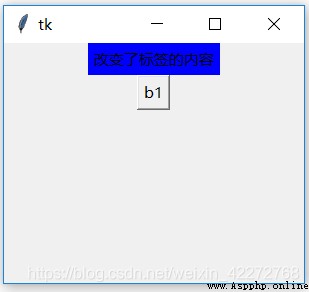
This function is useful for dynamically changing the contents of tags . Of course , You can also set the label text Option to change the contents of the tag .
4.2.21 underline
Show an underline under a letter .
import tkinter as tk
root=tk.Tk()
root.geometry('300x240')
b1 = tk.Label(root,text='Underline',underline=1)
b1.pack()
root.mainloop()
result :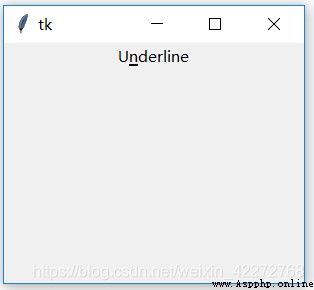
4.2.22 width
Set the width of the label . Specific usage and height similar , Please see the 4.2.11 section .
4.2.23 wraplength
If beyond a certain range , Wrap the label text . Note that this parameter is in pixels , Instead of the usual text width . See for specific usage 4.1.3 section .
4.3 Dynamic modification of properties
In the running of the program , It is unavoidable to dynamically modify the properties of the control . How to modify ? Very simple :
label[‘ The attribute name ’]= New properties
For example, to modify the text of the label , It only needs :
label[‘text’]=‘ New label text ’
All control properties can be modified through this method . I won't repeat it later . However, not all control properties can be dynamically modified , Some properties can only be set during initialization . In the life cycle of the control , Do not modify .