10.3 方法
文本控件的方法很多,主要是各種選擇、設置、標識等等。下面逐個介紹這些方法。
10.3.1 bbox(index)
給出能夠框住index代表的文字的4元組(x,y,width,height)。x,y是左上角的坐標點,而width和height分別是寬度和高度。有了這些信息就可以判斷諸如鼠標指針是否位於該index代表的文字范圍內。
import tkinter as tk
root=tk.Tk()
root.geometry('300x240')
b1=tk.Text(root,width=20,height=5)
b1.pack()
b3=tk.Label(root,text='bbox:')
def bbox():
b3['text']="bbox:"+str(b1.bbox('2.4'))
b2=tk.Button(root,text='bbox',command=bbox)
b2.pack()
b3.pack()
root.mainloop()
結果: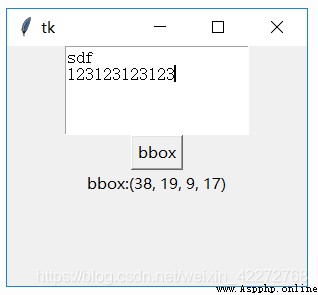
10.3.2 compare(index1, op, index2)
比較用index1和index2索引的大小,也就是位置的大小。注意此處比較的不是index1和index2代表的字符,而是索引本身。最常用的是比較一個’行.列’ 與tk.INSERT等的大小。可以判斷出彼此的位置。代碼如下:
text.compare(‘2.0’,‘<’,tk.INSERT)
*10.3.3 count(index1, index2, args)
count方法是新增的。主要的功能是統計在標識index1與index2之間的有關數據。統計什麼數據是由*args參數來決定的。包括:
(1)chars: 統計字符數。主要如果跨行,換行符也統計在內。
(2)displaychars:顯示的字符數
(3)displayindices:顯示的索引數
(4)displaylines:顯示的行數,在有折行的情況下,會比lines增多。因為折行也被計算為行數。
(5)indices:索引數
(6)lines:行數(從0開始計數)
(7)xpixels: 水平方向上index1和index2之間的像素差
(8)ypixels:垂直方向上index1和index2之間的像素差
(9)update:更新。避免出現統計誤差。
import tkinter as tk
root=tk.Tk()
root.geometry('300x240')
b1=tk.Text(root,width=20,height=5)
b1.pack()
b3=tk.Entry(root)
b4=tk.Label(root,text='結果:')
def count():
b1.count('1.1','2.5','update')
b4['text']='結果:'+str\
(b1.count('1.1','2.5',b3.get()))
b2=tk.Button(root,text='Count',command=count)
b2.pack()
b3.pack()
b4.pack()
root.mainloop()
結果: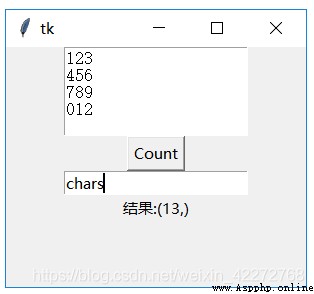
10.3.4 debug
設置debug開關。
10.3.5 delete(first,last=NONE)
刪除從first開始的到last之前的所有字符,last代表的字符並不刪除。如果last沒有指定,則只刪除first代表的一個字符。
import tkinter as tk
root=tk.Tk()
root.geometry('300x240')
b1=tk.Text(root,width=20,height=5)
b1.pack()
def delete():
b1.delete('1.1','2.3')
b2=tk.Button(root,text='Delete',command=delete)
b2.pack()
root.mainloop()
10.3.6 dlineinfo(index)
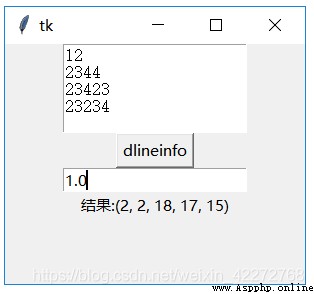
返回由index指定的字符所在的行的信息,結果是一個5元組:
x:水平方向坐標,一般是2,因為文本與邊框的距離默認值是2。
y:垂直方向坐標,一般是行數*(字符高度+行間距)+2(文本與邊框的默認距離)
width:字符寬度*每一行的字符總數
height: 字符高度+行間距
baseline: 與字符大小有關的一個結果
import tkinter as tk
root=tk.Tk()
root.geometry('300x240')
#font=('Courier New',10,)
b1=tk.Text(root,width=20,height=5,)
b1.pack()
b3=tk.Entry(root)
b4=tk.Label(root,text='結果:')
def dlineinfo():
b4['text']='結果:'+str\
(b1.dlineinfo(b3.get()))
b2=tk.Button(root,text='dlineinfo',
command=dlineinfo)
b2.pack()
b3.pack()
b4.pack()
root.mainloop()
結果: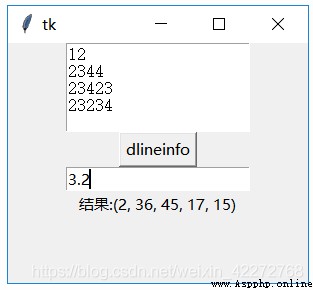
**10.3.7 dump(index1, index2=None, command=None, kw)
返回標識index1和index2之間的內容。輸入的參數為:
index1:起始標識
index2:結束標識。如果沒有該參數,則只返回index1代表的字符信息。
command:用自定義函數處理返回的結果。在這種情況下,dump的返回結果是None。
**kw:定義返回何種類型的內容。可以選擇的參數有:
all,image,mark,tag,text,window
返回的參數是一個三元組,包括(key,value,index)。
import tkinter as tk
root=tk.Tk()
root.geometry('300x240')
b1=tk.Text(root,width=20,height=5,)
b1.pack()
b4=tk.Label(root,text='結果:')
def abc(*args):
print(args)
def dump():
b4['text']='結果:'+str(b1.dump('1.0','4.0'))
b2=tk.Button(root,text='Dump',command=dump)
b2.pack()
b4.pack()
root.mainloop()
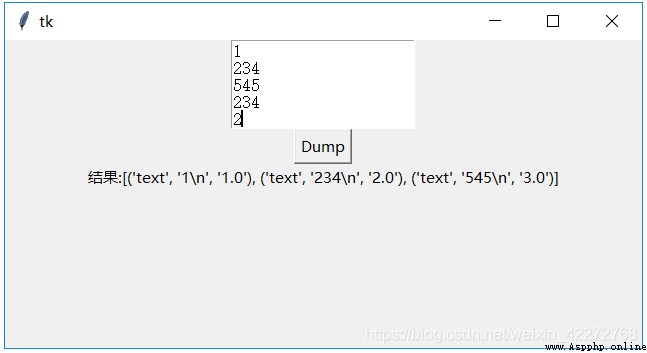
說明:返回的結果是一個三元組
key:是結果的類型,具體說明鍵輸入類型部分
value:是文本控件中的內容
index:是索引。如果有多個結果,就用起始的字符的索引。
如果有command參數,則dump返回None。處理在command參數指定的函數中進行。指定的函數需要定義參數*args,或者用三個參數:key,value,index。
*10.3.8 edit(args)
edit是一個新增的方法,主要就是把下面跟編輯有關的一些方法可以統一設置。*args 支持的參數有:
(1) canundo
(2) canredo,
(3) modified
“modified”選項對應edit_modified方法。用法如下:
Text.edit(‘modified’): 返回是否修改的標志值
Text.edit(‘modified’,True): 設置是否修改的標志值為True
Text.edit(‘modified’,False):設置是否修改的標志值為False
(4) redo
(5) reset
(6) separator
(7) undo
與此方法有關的方法有:edit_modified, edit_redo, edit_reset, edit_separator, edit_undo
10.3.9 edit_modified(arg=None)
設置或者獲得文本控件中的內容是否改變的標志(Boolean類型)。如果arg沒有設置,那麼該方法返回標志的狀態。如果arg有值,則改變標志的狀態。
插入、刪除、Undo、Redo都可能引起該標志的變化。
import tkinter as tk
root=tk.Tk()
root.geometry('300x240')
b1=tk.Text(root,width=20,height=5,)
b1.pack()
def edit_modified():
print(b1.edit_modified())
b2=tk.Button(root,text='edit_modified',command=edit_modified)
b2.pack()
root.mainloop()
10.3.10 edit_redo()
執行redo操作。前提是undo=True以及redo堆棧不為空。
10.3.11 edit_reset()
清空undo以及redo的堆棧內容。需要undo=True,否則該方法沒有任何動作。
10.3.12 edit_separator()
在undo堆棧中,插入一個separator標志。需要undo=True,否則該方法沒有任何動作。
10.3.13 edit_undo()
執行undo操作。前提是undo=True以及undo堆棧不為空
10.3.14 get(index1, index2=None)
獲取index1與index2(不包含)之間的內容。如果沒有輸入index2,只返回index1指定的字符。
import tkinter as tk
root=tk.Tk()
root.geometry('300x240')
b1=tk.Text(root,width=20,height=5,)
b1.pack()
b4=tk.Label(root,text='結果:')
def get():
b4['text']='結果:'+str(b1.get('1.0','4.0'))
b2=tk.Button(root,text='Get',command=get)
b2.pack()
b4.pack()
root.mainloop()
結果: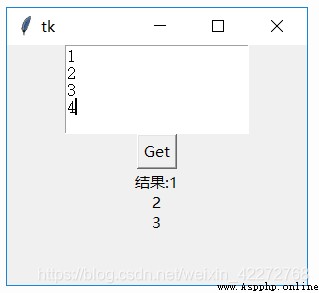
10.3.15 image_cget(self, index, option)
返回index指定的圖片的選項。option支持的選項有:
align: 對齊方式
image: 圖片內容
name: 圖片的名字。可以自定義。
padx: 水平方向內邊距
pady:垂直方向內邊距
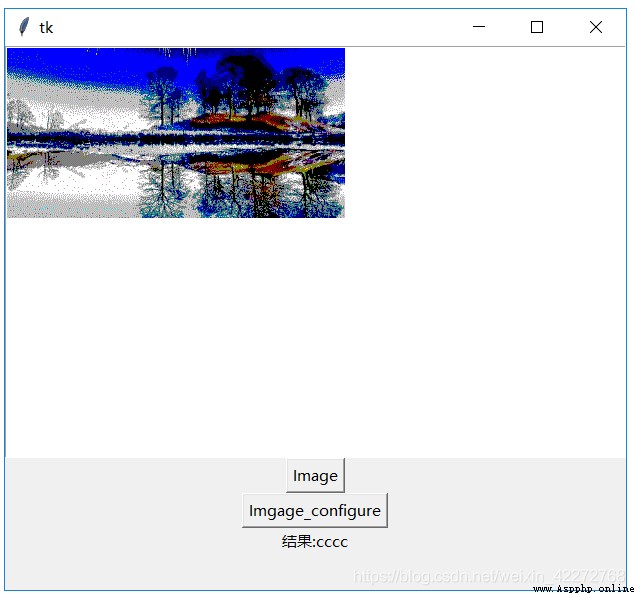
**10.3.16 image_configure( index, cnf=None, kw)
配置index指定的圖片。可配置的選項見10.3.15。
import tkinter as tk
root=tk.Tk()
root.geometry('300x240')
b1=tk.Text(root,)
b1.pack()
b4=tk.Label(root,text='結果:')
p=tk.PhotoImage(file="ab.gif")
def image():
b1.image_create(tk.END,image=p,name='helloabc')
def config():
b1.image_configure('1.0',name='cccc')
b4['text']='結果:'+str(b1.image_cget('1.0','name'))
b2=tk.Button(root,text='Image',command=image)
b5=tk.Button(root,text='Imgage_configure',command=config)
b2.pack()
b5.pack()
b4.pack()
root.mainloop()
結果: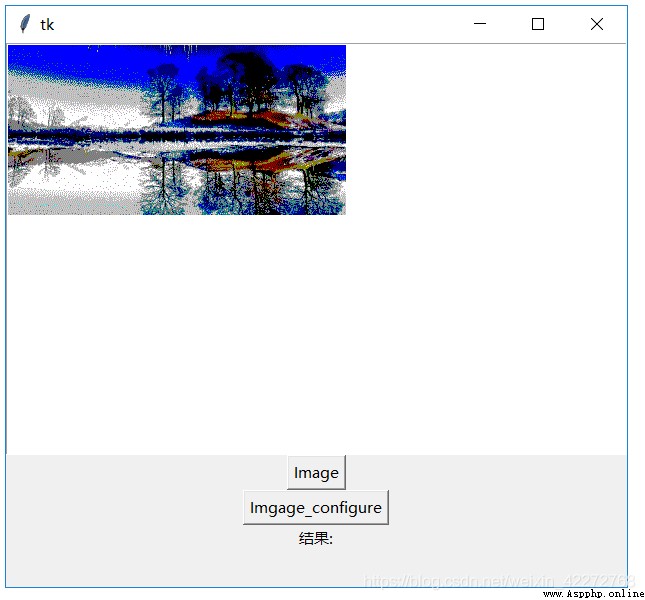
**10.3.17 image_create(self, index, cnf={}, kw)
在index指定的地方創建一個圖片。
import tkinter as tk
root=tk.Tk()
root.geometry('300x240')
b1=tk.Text(root,)
b1.pack()
p=tk.PhotoImage(file="a.gif")
def image():
b1.image_create(tk.END,image=p)
b2=tk.Button(root,text='Image',command=image)
b2.pack()
root.mainloop()
結果: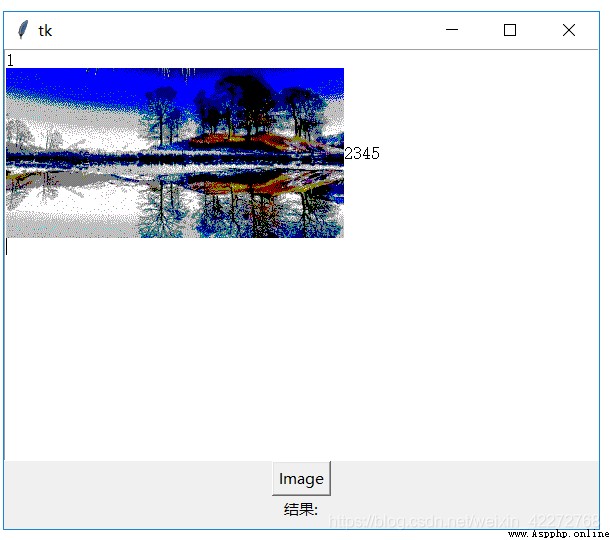
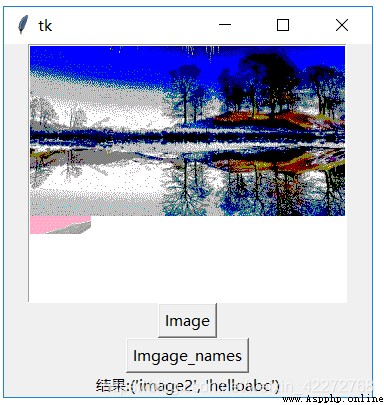
10.3.18 image_names()
返回文本控件所有圖像的名字。
import tkinter as tk
root=tk.Tk()
root.geometry('300x240')
b1=tk.Text(root,height=15,width=35)
b1.pack()
b4=tk.Label(root,text='結果:')
p=tk.PhotoImage(file="ab.gif")
p2 = tk.PhotoImage(file="b.gif")
def image():
b1.image_create('1.0',image=p,name='helloabc')
b1.image_create('2.0',image=p2,name='image2')
def names():
b4['text']='結果:'+str(b1.image_names())
b2=tk.Button(root,text='Image',command=image)
b5=tk.Button(root,text='Imgage_names',command=names)
b2.pack()
b5.pack()
b4.pack()
root.mainloop()
結果: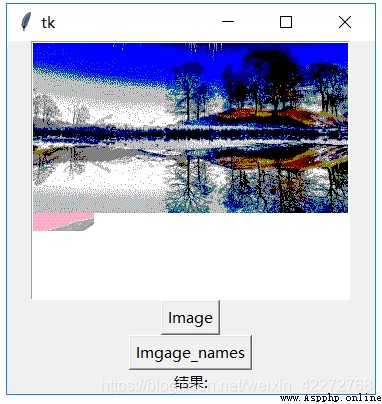
10.3.19 index(index)
返回以’行.列’形式的索引。比如把’tk.INSERT’,就是插入光標的位置索引轉換為’行.列’的形式。
import tkinter as tk
root=tk.Tk()
root.geometry('300x240')
b1=tk.Text(root,height=10,width=20)
b1.pack()
b4=tk.Label(root,text='結果:')
def index():
b4['text']='結果:'+str(b1.index(tk.INSERT))
b2=tk.Button(root,text='Index',command=index)
b2.pack()
b4.pack()
root.mainloop()
結果: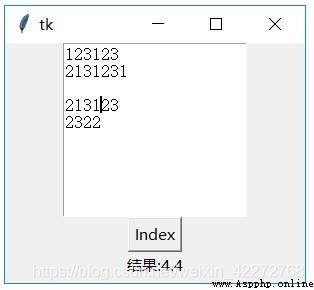
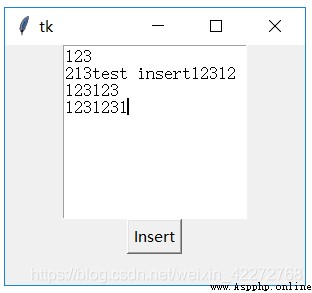
*10.3.20 insert(index, chars, args)
在index指定的位置插入字符串。可以通過*args設置插入字符串的tag。
import tkinter as tk
root=tk.Tk()
root.geometry('300x240')
b1=tk.Text(root,height=10,width=20)
b1.pack()
def insert():
b1.insert('2.3','test insert')
b2=tk.Button(root,text='Insert',command=insert)
b2.pack()
root.mainloop()
結果: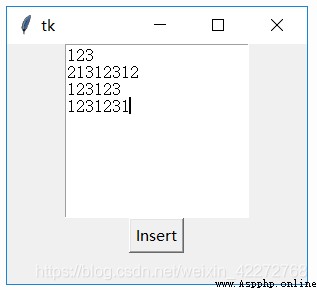
10.3.21 mark_gravity(markName, direction=None)
在markName指定的位置插入字符的時候,設置markName的位置是否變化。默認的方向是tk.RIGHT,markName的位置會始終在新插入字符的右側,也就是會不斷的變化。比如markName的位置在最開始是1.2,如果我們插入3個字符,那麼mark Name的位置就是1.5。
如何保持markName的位置不變?設定方向為tk.LEFT就是可以了。這個時候markName的位置始終保持在設定的位置。所謂的不變化,指的是在markName指定的位置插入字符的時候。如果是在markName指定位置的前面,比如1.1的位置插入字符,markName的位置也會變化。
import tkinter as tk
root=tk.Tk()
root.geometry('300x240')
b1=tk.Text(root,height=10,width=20)
b1.pack()
for i in range(1,5):
b1.insert('1.0',str(i))
b1.mark_set('mark1','1.2')
b3=tk.Entry(root)
def mark_gravity():
b1.mark_gravity('mark1',tk.LEFT)
print(b1.mark_gravity('mark1'))
print(b1.index('mark1'))
b2=tk.Button(root,text='Mark_gracity',command=mark_gravity)
b2.pack()
b3.pack()
root.mainloop()
10.3.22 mark_names()
返回所有的位置標識(mark)的名稱,包括tk.INSERT,tk.CURRENT和’tk::anchor1’。一般情況下,’tk::anchor1’指向最後一行的最後一個字符之後的位置,也就是最後一行的行尾。
10.3.23 mark_set(markName, index)
在index指定的位置之前設定一個位置標識(mark),用markName來標識。該位置標識(mark)的gravity默認值是tk.RIGHT。
可以在同一個index處設置不同名字的位置標識(mark)。如果在不同的index處設置同樣名字的位置標識(mark),只會記錄最新的index。
import tkinter as tk
root=tk.Tk()
root.geometry('300x240')
b1=tk.Text(root,height=10,width=20)
b1.pack()
b3=tk.Entry(root)
b4=tk.Entry(root)
def mark_set():
b1.mark_set(b3.get(),b4.get())
print(b1.mark_names())
print(b1.index('mark1'))
b2=tk.Button(root,text='Mark_set',command=mark_set)
b2.pack()
b3.pack()
b4.pack()
root.mainloop()
10.3.24 mark_next(index)
返回index後面的第一個位置標識(mark)的名字
import tkinter as tk
root=tk.Tk()
root.geometry('300x240')
b1=tk.Text(root,height=10,width=20)
b1.pack()
for i in range(1,11):
b1.insert('1.0',str(i))
b1.mark_set('mark1','1.2')
b1.mark_set('mark2','1.4')
b1.mark_set('mark3','1.8')
def mark_next():
n=b1.mark_next('mark2')
print(n,b1.index(n))
print(b1.mark_names())
b2=tk.Button(root,text='Mark_next',command=mark_next)
b2.pack()
root.mainloop()
10.3.25 mark_previous( index)
返回index前面的第一個位置標識(mark)的名字
import tkinter as tk
root=tk.Tk()
root.geometry('300x240')
b1=tk.Text(root,height=10,width=20)
b1.pack()
for i in range(1,11):
b1.insert('1.0',str(i))
b1.mark_set('mark1','1.2')
b1.mark_set('mark2','1.4')
b1.mark_set('mark3','1.8')
def mark_prev():
n=b1.mark_previous('mark2')
print(n,b1.index(n))
print(b1.mark_names())
b2=tk.Button(root,text='Mark_prev',command=mark_prev)
b2.pack()
root.mainloop()
*10.3.26 mark_unset( markNames)
刪除markName指定的位置標識(mark)的名字。可以一次刪除多個位置標識(mark),比如’mark1’,’mark2’等。
import tkinter as tk
root=tk.Tk()
root.geometry('300x240')
b1=tk.Text(root,height=10,width=20)
b1.pack()
for i in range(1,11):
b1.insert('1.0',str(i))
b1.mark_set('mark1','1.2')
b1.mark_set('mark2','1.4')
b1.mark_set('mark3','1.8')
print(b1.mark_names())
def mark_unset():
b1.mark_unset('mark1','mark2')
print(b1.mark_names())
b2=tk.Button(root,text='Mark_unset',command=mark_unset)
b2.pack()
root.mainloop()
*10.3.27 replace(index1, index2, chars, args)
將index1與index2之間的字符替換為chars代表的字符。*args可以用來定義標識(tag)。
import tkinter as tk
root=tk.Tk()
root.geometry('300x240')
b1=tk.Text(root,height=10,width=20)
b1.pack()
for i in range(1,11):
b1.insert('1.0',str(i))
b1.mark_set('mark1','1.2')
b1.mark_set('mark2','1.4')
b1.mark_set('mark3','1.8')
def replace():
b1.replace('1.2','1.5','replace')
b2=tk.Button(root,text='Replace',command=replace)
b2.pack()
root.mainloop()
結果: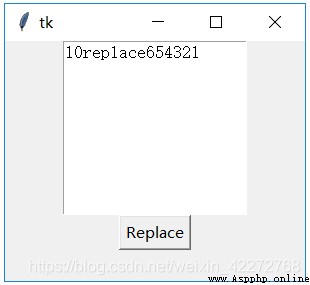
10.3.28 search( )
此方法的詳細定義為search(pattern, index, stopindex=None,
forwards=None, backwards=None, exact=None,
regexp=None, nocase=None, count=None, elide=None)
查找字符串。這個方法比較復雜,參數比較多。下面一一介紹:
(1)pattern
定義要查找的內容。可以是字符串或者正則表達式。
(2)index
起始位置
(3)stopindex
結束位置。如果沒有定義結束位置,會一直查找到末尾。如果stopindex的位置比index還要靠前,則返回空字符串。
(4)forwards
向前查找。(True 或者False)
(5)backwards
反向查找。(True 或者False)
(6)exact
是否精確匹配。(True 或者False)
(7)regexp
是否為正則表達式。(True 或者False)。
(8)nocase
是否區分大小寫。默認是False,區分大小寫。(True 或者False)
(9)count
匹配字符串的長度。需要設置IntVar變量來獲取。這個選項對正則表達式的情況很有用。可以知道匹配正則的長度。如果沒有使用正則,則返回的就是要尋找的字符串的長度。
(10)elide
import tkinter as tk
root=tk.Tk()
root.geometry('300x240')
b1=tk.Text(root,height=10,width=20)
b1.pack()
def search():
a=tk.IntVar()
s=b1.search('1*','1.0',count=a,regexp=True)
print(s,a.get())
b2=tk.Button(root,text='Search',command=search)
b2.pack()
root.mainloop()
10.3.29 see(index)
讓index指定的字符在文本控件中可見。這個對於有很多文字內容的情況非常有用,可以讓想看見的字符串立即可見,而不是使用滾動的方法。
import tkinter as tk
root=tk.Tk()
root.geometry('300x240')
b1=tk.Text(root,height=10,width=20)
b1.pack()
for i in range(1,20000):
b1.insert(str(i)+".0",str(i)+"\n")
def see():
b1.see('10000.0')
b2=tk.Button(root,text='See',command=see)
b2.pack()
root.mainloop()
*10.3.30 tag_add(tagName, index1, args)
增加一個tag標識。字符串起始位置是index1,結束位置在*args中定義。如果只有index1,則增加的tag只代表一個字符。
10.3.31 tag_bind( tagName, sequence, func, add=None)
對tagName定義的文字區域綁定event。Event包括鍵盤輸入、鼠標輸入等。當有相應的輸入的時候,定義的回調函數就會被觸發。
(1)新建綁定事件
需要輸入三個參數:tagName,sequence(需要綁定的事件),func(回調函數)。tagName在這種情況下
(2)添加綁定事件
前面三個參數與(1)的相同。需要第四個參數:add=’+’。也就是說,同一個tag和同一個sequence,可以綁定多個回調函數。
(3)判斷某個綁定事件是否存在
需要輸入2個參數:tagName和sequence以及None。會返回指定tagName的sequence事件是否已經綁定。如果已經綁定,會返回相應回調函數。
(4)返回所有的綁定事件
只輸入tagName以及None和None,就會會返回與此tagName有關的所有綁定事件。返回值是一個列表,包括所有的綁定的事件。不過綁定函數並沒有返回。要知道確切的綁定事件,還需要再調用方法上面(3)的方法。
#新綁定鼠標事件
import tkinter as tk
root=tk.Tk()
root.geometry('300x240')
b1=tk.Text(root,height=10,width=20)
b1.pack()
def tag_mouse(*args):
print('mouse click',*args)
def bind():
b1.tag_add('mouse1','1.0','1.5')
b1.tag_bind('mouse1','<Button-1>',tag_mouse)
b2=tk.Button(root,text='Tag_bind',command=bind)
b2.pack()
root.mainloop()
說明:點擊’Tag_bind’按鈕後,會綁定鼠標左鍵,當在第一行的1~4個字符上按下鼠標左鍵,就會調用tag_mouse函數。
#添加綁定事件,判斷某個事件是否存在以及返回所有綁定事件
#新綁定鼠標事件
import tkinter as tk
root=tk.Tk()
root.geometry('300x240')
b1=tk.Text(root,height=10,width=20)
b1.pack()
def tag_mouse(*args):
print('mouse click',*args)
def ctrl(*args):
print('Control_Left',*args)
def add():
b1.tag_bind('mouse1','<Control_L>',ctrl)
def bind():
b1.tag_add('mouse1','1.0','1.5')
b1.tag_bind('mouse1','<Button-1>',tag_mouse)
def list_events():
print(b1.tag_bind('mouse1',None,None))
def list_func():
print(b1.tag_bind('mouse1','<Button-1>',None))
print(b1.tag_bind('mouse1','<Control_L>',None))
b2=tk.Button(root,text='Tag_bind',command=bind)
b2.pack()
b3=tk.Button(root,text='Add_Event',command=add)
b3.pack()
b4=tk.Button(root,text='List_Events',command=list_events)
b4.pack()
b5=tk.Button(root,text='Liset_Func',command=list_func)
b5.pack()
root.mainloop()
10.3.32 tag_unbind(tagName, sequence, funcid=None)
解除相關綁定。如果只輸入tagName和sequence,則解除所有的與sequence有關的綁定函數。如果輸入相應的funcid,可以只解除一個回調函數,其他的回調函數不受影響。
10.3.33 tag_cget(tagName, option)
獲得標識tagName的配置選項。
import tkinter as tk
root=tk.Tk()
root.geometry('300x240')
b1=tk.Text(root,height=10,width=20)
b1.pack()
def tag():
b1.tag_add('second','2.1','2.2')
b1.tag_configure('second',relief=tk.GROOVE)
print(b1.tag_cget('second','relief'))
b2=tk.Button(root,text='Tag',command=tag)
b2.pack()
root.mainloop()
**10.3.34 tag_configure(tagName, cnf=None, kw)
對用tagName標識的字符串進行設置,支持的選項有:
import tkinter as tk
root=tk.Tk()
root.geometry('300x240')
b1=tk.Text(root,height=10,width=20)
b1.pack()
def tag():
b1.tag_add('second','2.0','2.10')
b1.tag_configure('second',background='red')
b2=tk.Button(root,text='Tag',command=tag)
b2.pack()
root.mainloop()
結果: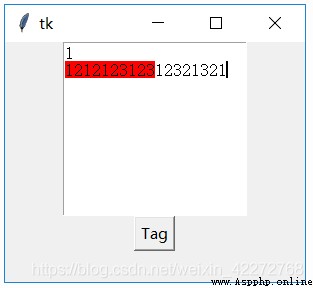
#底紋代碼
import tkinter as tk
root=tk.Tk()
root.geometry('300x240')
b1=tk.Text(root,height=10,width=20)
b1.pack()
def tag():
b1.tag_add('second','2.0','2.10')
b1.tag_configure('second',background='red',bgstipple='gray12')
b2=tk.Button(root,text='Tag',command=tag)
b2.pack()
root.mainloop()
#Font代碼:
import tkinter as tk
root=tk.Tk()
root.geometry('300x240')
b1=tk.Text(root,height=10,width=20)
b1.pack()
def tag():
b1.tag_add('second','2.0','2.1')
b1.tag_configure('second',font=('宋體',20,'bold'))
b2=tk.Button(root,text='Tag',command=tag)
b2.pack()
root.mainloop()
*10.3.35 tag_delete(tagNames)
刪除相應的tag。tagName指定的所有tag都會被刪除。
比如:
tag_delete(‘tag1’,’tag2’,’tag3’)會刪除tag1,tag2和tag3標識。
10.3.36 tag_lower(tagName, belowThis=None)
改變tag的優先級。實際上是改變tag在tag堆棧中的位置。如果輸入了belowThis參數,那麼會把tagName移動到belowThis代表的tag之下。如果沒有belowThis參數,tagName會移動到tag堆棧的最底部。
10.3.37 tag_names(index=None)
返回所有tag的名字。如果index不是None,則只返回index包含的tag名字。
10.3.38 tag_nextrange(tagName, index1, index2=None)
搜索tagName是否在index1和index2定義的區域內。如果沒有定義index2,則表示到文本控件的結尾。
如果tagName在該區域內,則返回tagName表示的[‘首字符’,’尾字符’]。如果tagName不在指定的區域,則返回空字符串。
只要有部分tagName代表的字符落在[index1,index2]的區域內,就滿足搜索條件,返回tagName代表的首字符和尾字符。
import tkinter as tk
root=tk.Tk()
root.geometry('300x240')
b1=tk.Text(root,height=10,width=20)
b1.pack()
def tag():
b1.tag_add('second','2.2','2.5')
print(b1.tag_nextrange('second','2.0','2.3'))
b2=tk.Button(root,text='Tag',command=tag)
b2.pack()
root.mainloop()
10.3.39 tag_prevrange(tagName, index1, index2=None)
與tag_nextrange()非常類似。不過是反向搜索,也就是說是向前查找的。搜索的起始位置是index1前面的字符,然後到index2的位置截至。如果沒有定義index2,會一直查找到文本控件的開始的地方。
需要注意的是,由於匹配還是從tagName代表的字符串的起始位置,所以index2的位置一定要小於或者等於tagName的起始位置,否則返回的是空字符串,哪怕tagName代表的字符串有部分位於[index2,index1]定義的區間。比如,tagName代表的是[‘2.2’,’2.5’],那麼index2一定要小於或者等於’2.2’。加入index2的值是’2.3’,返回就是空字符串。可以推測該方法的實現,是用tagName的起始位置和index2去比較,如果起始位置小於index2,就認為字符串不會被包含在[index2,index1]的區間內。
import tkinter as tk
root=tk.Tk()
root.geometry('300x240')
b1=tk.Text(root,height=10,width=20)
b1.pack()
def tag():
b1.tag_add('second','2.2','2.5')
print(b1.tag_prevrange('second','2.4','2.3'))
b2=tk.Button(root,text='Tag',command=tag)
b2.pack()
root.mainloop()
10.3.40 tag_raise(tagName, aboveThis=None)
此方法與tag_lower()是相反,是提高tagName的優先級。也就是說,會把tagName移動到aboveThis的上面。如果沒有定義aboveThis,就把tagName移動到堆棧的最頂部。
10.3.41 tag_ranges(tagName)
返回tagName代表的所有區間(range)。比如下面的例子:
import tkinter as tk
root=tk.Tk()
root.geometry('300x240')
b1=tk.Text(root,height=10,width=20)
b1.pack()
def tag():
b1.tag_add('second','2.2','2.5')
b1.tag_add('second','3.2','3.3')
print(b1.tag_ranges('second'))
b2=tk.Button(root,text='Tag',command=tag)
b2.pack()
root.mainloop()
說明:
返回值為:(<textindex object: ‘2.2’>, <textindex object: ‘2.5’>, <textindex object: ‘3.2’>, <textindex object: ‘3.3’>)
10.3.42 tag_remove( tagName, index1, index2=None)
從tagName中移除在區間[index1,index2]之間的字符。如果沒有定義index2,則只移除index1代表的單個字符。如果[index1,index2]是在tagName的中間,則會分割tagName代表的字符串為2個。
比如,tagName的起始區間是[‘2.2’,’2.8’],如果index1和index2分別是’2.3’和’2.5’,調用tag_remove之後,tagName的區間變為[‘2.2’,’2.3’]以及[‘2.5’,’2.8’]。也就是tagName代表的區間一分為二。
這裡的移除字符,不是從文本控件中刪除字符,而是從tagName代表的區間中去掉字符。
**10.3.43 window_create(index, cnf={}, kw)
創建窗口的用處是在文本控件中指定的位置創建嵌入式對象。比如,創建一個標簽(Label)、輸入框(Entry)等等。
創建嵌入式對象的方法有兩種:
(1)先創建文本對象的子控件,但是不要使用pack或者grid讓該子控件顯示。而是作為一個參數,傳遞給window_create方法。比如下面代碼中的:
b3=tk.Label(b1,text=‘abc’)
b1.window_create(‘1.2’,window=b3)
(2)第二種方法是通過-create參數傳遞一個回調函數。在回調函數中創建文本控件的子控件。
其他的參數還包括:padx,pady,align,stretch
import tkinter as tk
root=tk.Tk()
root.geometry('300x240')
b1=tk.Text(root,height=10,width=20)
b1.pack()
b3=tk.Label(b1,text='abc')
for i in range(1,11):
b1.insert('1.0',str(i))
def win():
b1.window_create('1.2',window=b3)
print(b1.window_names())
b2=tk.Button(root,text='Window Create',command=win)
b2.pack()
root.mainloop()
**10.3.44 window_configure(index, cnf=None, kw)
修改在index處創建的window配置。具體參數見10.3.43節。
10.3.45 window_cget(index, option)
返回在index處的窗口的配置參數。
10.3.46 window_names()
返回所有的創建窗口的名字。
10.3.47 xview(tk.MOVETO, fraction)
水平滾動文本控件內容,與水平滾動條的回調函數配合使用。見10.1.25節
fraction的值位於(0.0~1.0)之間。0.0表示最左邊,1.0表示最右邊。
10.3.48 xview(tk.SCROLL, n, what)
另外一種水平滾動文本控件內容方式。參數說明:
(1)What
定義移動的方式。可以是tk.UNITS或者tk.PAGES
(2)n
n取值表示移動多少個單位。正數表示向右移動,負數表示向左移動
10.3.49 .xview_moveto(fraction)
與xview(tk.MOVETO, fraction)作用一樣
10.3.50 xview_scroll(n, what)
與xview(tk.SCROLL, n, what)的作用一樣
10.3.51 yview(tk.MOVETO, fraction)
垂直滾動文本控件內容。使用方法與xview(tk.MOVETO, fraction)類似
10.3.52 yview(tk.SCROLL, n, what)
與xview(tk.SCROLL, n, what)類似,不過是垂直滾動。並且what的取值只能是tk.UNITS,單位是行。
10.3.53 yview_moveto(fraction)
與yview(tk.MOVETO, fraction)作用一樣
10.3.54 yview_scroll(n, what)
與yview(tk.SCROLL, n, what)的作用一樣