python tkinter按鈕Button的使用
創建和設置窗口
按鈕Button屬性1
按鈕Button屬性2
修改Button屬性
python tkinter的Button組件
Tkinter的布局方式有三種
python tkinter按鈕Button的使用創建和設置窗口from tkinter import *#創建窗口對象root = Tk()#窗口屬性設置root.title ('窗口標題')root.geometry('300x400')root.configure(bg='blue')root.iconbitmap(r'C:\Users\Administrator\Desktop\iVista 2 OS X Icons ico\ico\Burn.ico')Mark:使用了窗口的iconbitmap函數更改了圖標。
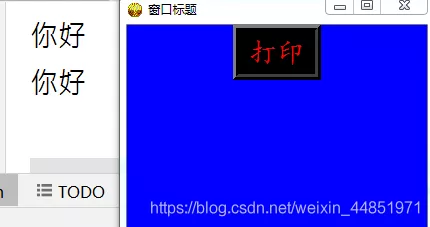
按鈕Button屬性1def print1(): print('你好')button = Button(root,text='打印', font=('楷體',20),fg='red',bg='black', anchor='center',command=print1, #command是命令的意思 height=1,width=5,bd=6)button.pack()root.mainloop()效果圖示

Mark:Button按鈕的很多屬性和Label標簽類似。
比如文本(text)、文本字體(font)、字體大小、顏色(fg)、文本在Button按鈕中的位置(anchor)、文本中不同行的對齊方式(justify)、按鈕的高度和寬度(height、width)、按鈕的背景色(bg)等等。和Lable標簽相比,Button按鈕有回調函數,command=函數名,當點擊按鈕時,就會執行回調函數的代碼塊。
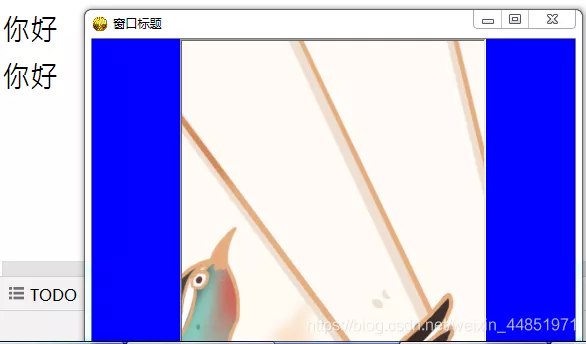
按鈕Button屬性2def hello(): print('你好')im = PhotoImage(file=r'C:\Users\Administrator\Desktop\圖片PNG格式\喜鵲桃花折扇.png')button = Button(root,text='button',command = hello, height=500,width=500,image=im, relief= SUNKEN)button.pack()root.mainloop()效果圖示

Mark:也可以在Button按鈕上顯示圖片。
先將想要顯示的圖片轉化為image對象(PhotoImage(file=‘圖片路徑’)),然後使用image屬性,image=image對象。如果不設置按鈕的高度和寬度(height,width),那麼顯示按鈕的大小就是圖片的大小。如果設置按鈕的高度和寬度,則只會顯示圖片的一部分。這裡,height、width的單位是像素單位。
修改Button屬性動態的修改按鈕Button的屬性
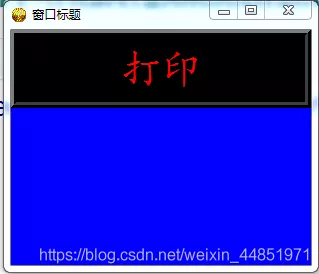
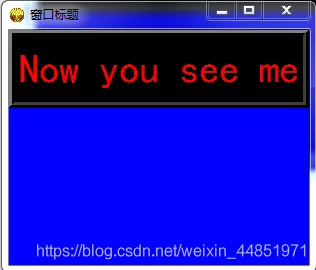
def print1(): #button['text']='Now you see me' button.configure(text='Now you see me')button = Button(root,text='打印', font=('楷體',30),fg='red',bg='black', anchor='center',command=print1, height=1,width=20,bd=6)button.pack()root.mainloop()效果圖示

點擊Button按鈕後,文本內容變成

Mark:Button屬性可以修改。
如果想呈現的效果是已經設置好的Button在點擊按鈕後屬性發生了變化,可以在回調函數裡修改Button的屬性:Button對象[‘關鍵參數’]=要修改的值或Button對象.comfigure(關鍵參數=要修改的值)。
小結:通過Button對象,我們可以在窗口中設置不同外觀的按鈕。而且,點擊Button按鈕,可以執行函數中的代碼塊。
python tkinter的Button組件這個地方難度不高,記住參數就行。
Tkinter的布局方式有三種幾何方法描述pack()包裝;grid()網格;place()位置;代碼如下:
# coding:utf8import tkinter as tkclass APP: def __init__(self, master): frame = tk.Frame(master) frame.pack(side=tk.RIGHT, padx=70, pady=100) b4 = tk.Button(frame, text="測試command點擊調用函數", bd="4", bg="yellow", command=lambda: self.Newtk("x")) b4.pack() @staticmethod def Newtk(x): if x != "x": return 0 win1 = tk.Tk() win1.title("提示信息") frame1 = tk.Frame(win1) frame1.pack(side=tk.RIGHT, padx=70, pady=100) l1 = tk.Label(frame1, text="噢,你點擊了。給你彈個框樂呵樂呵") l1.pack()admin = tk.Tk()admin.title("測試Button")win = APP(admin)admin.mainloop()w = Button ( master, option=value, ... ) 序號可選項 & 描述 1activebackground
當鼠標放上去時,按鈕的背景色
2activeforeground
當鼠標放上去時,按鈕的前景色
3bd
按鈕邊框的大小,默認為 2 個像素
4bg
按鈕的背景色
5command
按鈕關聯的函數,當按鈕被點擊時,執行該函數
6fg
按鈕的前景色(按鈕文本的顏色)
7font
文本字體
8height
按鈕的高度
9highlightcolor
要高亮的顏色
10image
按鈕上要顯示的圖片
11justify
顯示多行文本的時候,設置不同行之間的對齊方式,可選項包括LEFT, RIGHT, CENTER
12padx
按鈕在x軸方向上的內邊距(padding),是指按鈕的內容與按鈕邊緣的距離
13pady
按鈕在y軸方向上的內邊距(padding)
14relief
邊框樣式,設置控件3D效果,可選的有:FLAT、SUNKEN、RAISED、GROOVE、RIDGE。默認為 FLAT。
15state
設置按鈕組件狀態,可選的有NORMAL、ACTIVE、 DISABLED。默認 NORMAL。
16underline
下劃線。默認按鈕上的文本都不帶下劃線。取值就是帶下劃線的字符串索引,為 0 時,第一個字符帶下劃線,為 1 時,前兩個字符帶下劃線,以此類推
17width
按鈕的寬度,如未設置此項,其大小以適應按鈕的內容(文本或圖片的大小)
18wraplength
限制按鈕每行顯示的字符的數量
19text
按鈕的文本內容
19anchor
錨選項,控制文本的位置,默認為中心
以上為個人經驗,希望能給大家一個參考,也希望大家多多支持軟件開發網。