pip install django
What I'm using here is Django 3.2.6
Move to the appropriate path , Execute the following commands at the terminal , Some default files and folders will be created :
django-admin startproject demosite
Let's see startproject What was created :
mysite/
manage.py
mysite/
__init__.py
settings.py
urls.py
asgi.py
wsgi.py
The use of these directories and files is :
The outermost mysite/ The root directory is just a container for your project , The root directory name is right Django No impact , You can rename it to any name you like .
manage.py: One lets you manage... In various ways Django Command line tools for projects . You can read django-admin and manage.py Get all manage.py The details of the .
It's on the inside mysite/ The catalog contains your projects , It's a pure Python package . Its name is what you need to use when you reference anything inside it Python Package name . ( such as mysite.urls).
mysite/__init__.py: An empty file , tell Python This directory should be considered a Python package . If you are Python beginner , Read... In the official document More about packages .
mysite/settings.py:Django The configuration file for the project . If you want to know how this file works , Please check out Django To configure Understand the details .
mysite/urls.py:Django Project URL Statement , Like your website “ Catalog ”. read URL Scheduler Documentation to get more about URL The content of .
mysite/asgi.py: As your project runs in ASGI Compatible Web Entry on the server . read How to use ASGI To deploy Learn more about .
mysite/wsgi.py: As your project runs in WSGI Compatible Web Entry on the server . read How to use WSGI Deployment Learn more about .
In short :
File description of the default project
mysite
├── manage.py 【 Project Management , Start project 、 establish app、 Data management 】【 don't move 】【*** Often use ***】
└── mysite
├── __init__.py
├── settings.py 【 Project configuration 】 【*** Frequently modified ***】
├── urls.py 【URL The correspondence with the function 】【*** Frequently modified ***】
├── asgi.py 【 Receive network requests 】【 don't move 】
└── wsgi.py 【 Receive network requests 】【 don't move 】
Special instructions :
establish Django There are actually two ways to project
Command line , The project created is standard .
pycharm, On the basis of the standard, we have added something by default .( Not covered in this article )
Created a templates Catalog 【 Delete 】
settings.py in 【 Delete 】
python manage.py startapp app01
The document states :
- project
- app, User management 【 Table structure 、 function 、HTML Templates 、CSS】
- app, Order management 【 Table structure 、 function 、HTML Templates 、CSS】
- app, Background management 【 Table structure 、 function 、HTML Templates 、CSS】
- app, Website 【 Table structure 、 function 、HTML Templates 、CSS】
- app,API 【 Table structure 、 function 、HTML Templates 、CSS】
..
Be careful : Our development is relatively simple , Not much app, In general , Create... Under the project 1 individual app that will do .
├── app01
│ ├── __init__.py
│ ├── admin.py 【 Fix , Don't move 】django By default admin Background management .
│ ├── apps.py 【 Fix , Don't move 】app Start class
│ ├── migrations 【 Fix , Don't move 】 Database change record
│ │ └── __init__.py
│ ├── models.py 【** important **】, Operation on Database .
│ ├── tests.py 【 Fix , Don't move 】 unit testing
│ └── views.py 【** important **】, function .
├── manage.py
└── mysite2
├── __init__.py
├── asgi.py
├── settings.py
├── urls.py 【URL-> function 】
└── wsgi.py
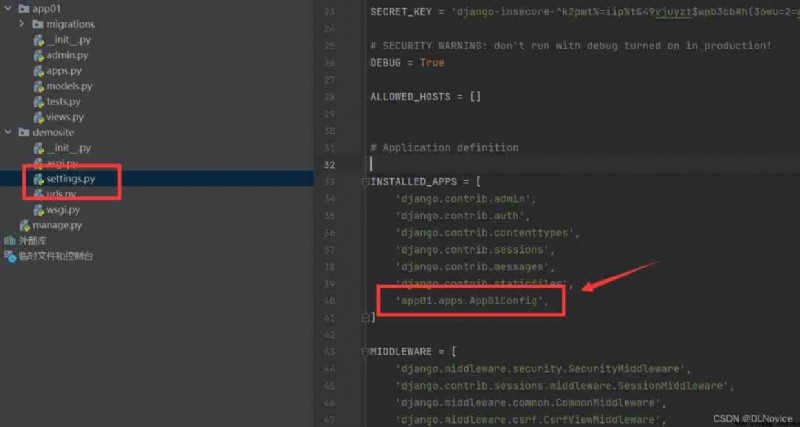
(1) We created it earlier app, Register before use
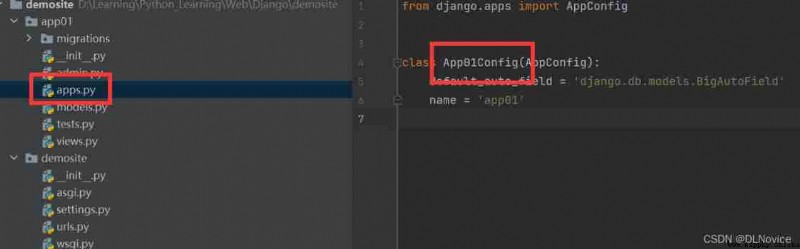
Add it to settings.py
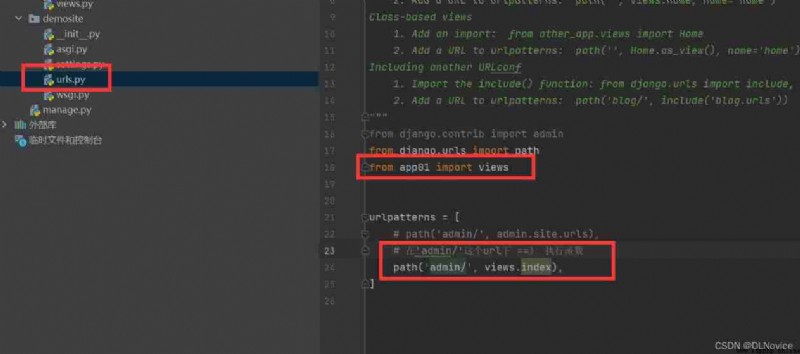
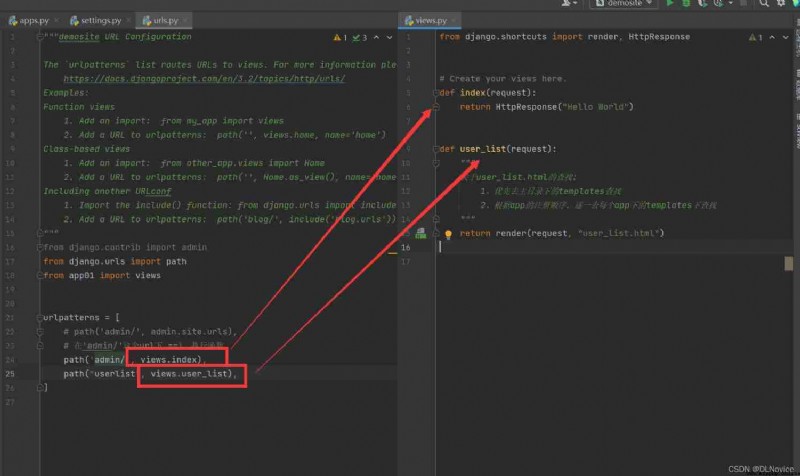
(2) To write URL Correspondence with view function (urls.py)
settings.py
from django.contrib import admin
from django.urls import path
from app01 import views
urlpatterns = [
# path('admin/', admin.site.urls),
# stay 'admin/' This url Next ==》 Execute function
path('admin/', views.index),
]
(3) Write view functions (views.py)
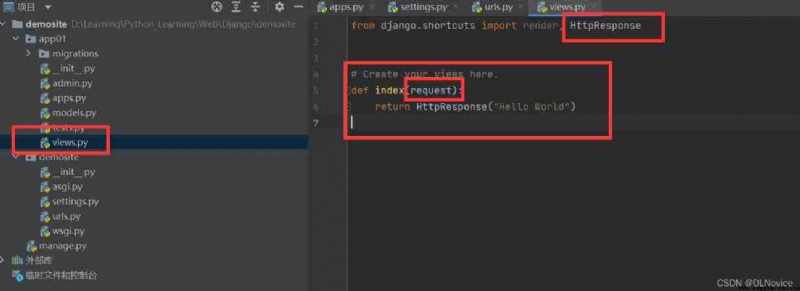
app01/views.py
from django.shortcuts import render, HttpResponse
# Create your views here.
def index(request):
return HttpResponse("Hello World")
(4) start-up django project
The two methods :
Command line mode
python manage.py runserver
PyCharm open
( If the project is by PyCharm Created , There will be a start button in the upper left corner )
127.0.0.1:8000/admin/
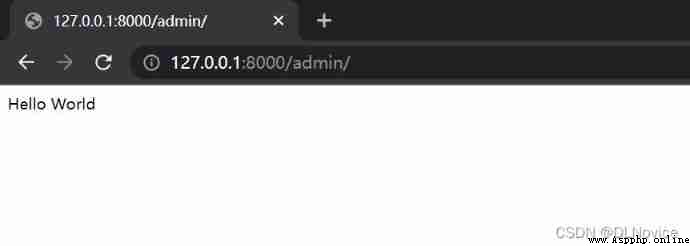
Be careful not to visit :http://127.0.0.1:8000/
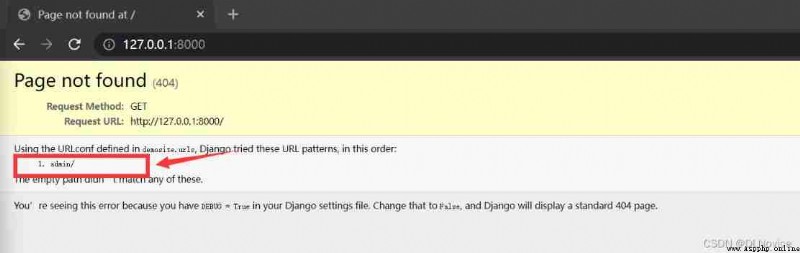
Remind you that we only created 127.0.0.1:8000/admin/
4.1 We return a ”Hello World“, So how to return a HTML What about the documents ?
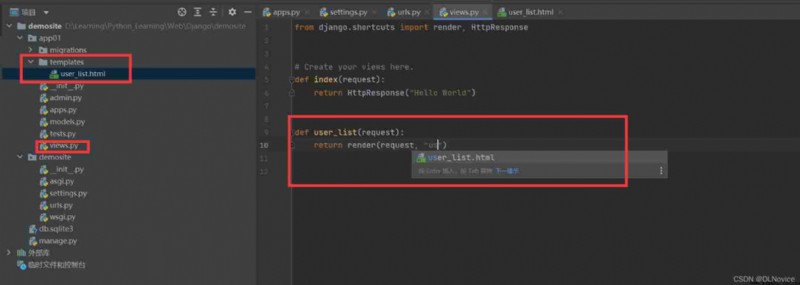
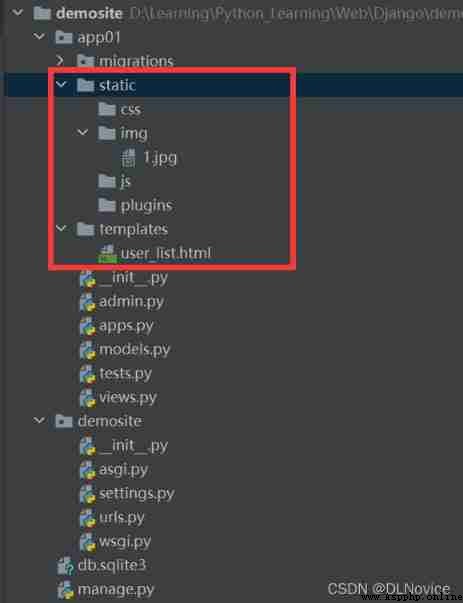
stay app01 Create directory under templates, Inside the store HTML file
user_list.html
<!DOCTYPE html>
<html lang="en">
<head>
<meta charset="UTF-8">
<title> User list </title>
</head>
<body>
<h1> hello </h1>
{# <img src="/static/img/1.jpg" alt="">#}
</body>
</html>
demosite/app01/views.py
from django.shortcuts import render, HttpResponse
# Create your views here.
def index(request):
return HttpResponse("Hello World")
def user_list(request):
""" About user_list.html Lookup : 1、 Go to the main directory first templates lookup 2、 according to app The order of registration , Go to each app Under the templates The lookup """
return render(request, "user_list.html")

In development , Generally will
Make a static file
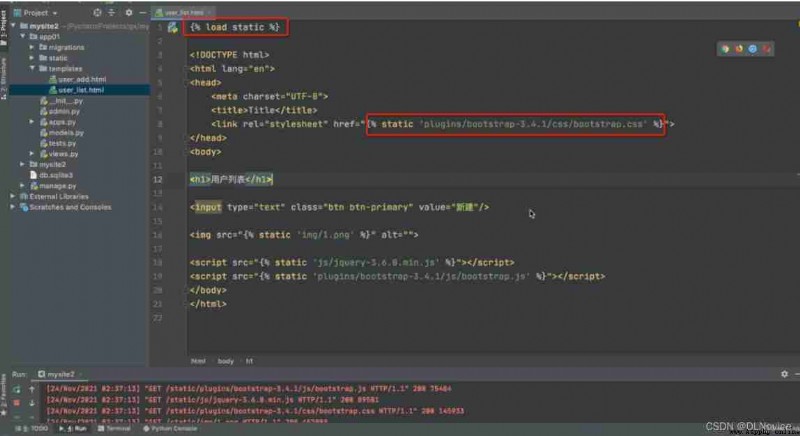
There are two ways to reference static files :
1、 Just use the path directly
2、 Modify the configuration file ( recommend )
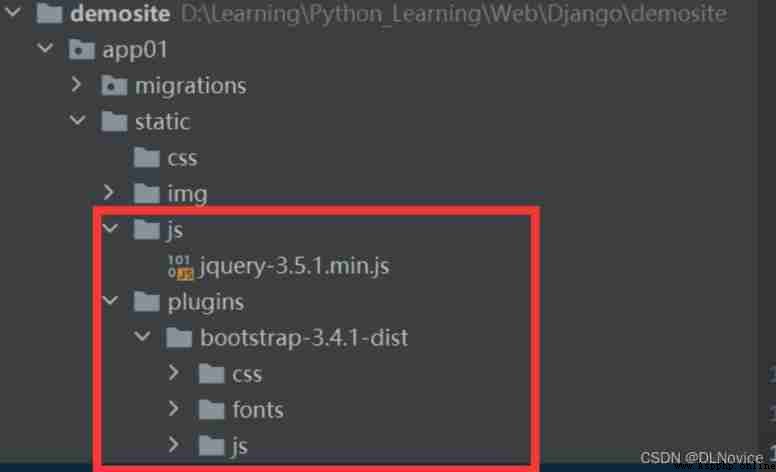
(1) Find web address
Bootstrap
start · Bootstrap v3 Chinese document | Bootstrap Chinese net (bootcss.com)
jQuery
jQuery The official website is often unavailable , Here is a website ::jQuery
Find the version to download , Click to download
(2) Baidu SkyDrive
views.py
def tql(request):
name = "DLNovice"
return render(request, "tql.html", {
"n1": name})
tql.html
<!DOCTYPE html>
<html lang="en">
<head>
<meta charset="UTF-8">
<title>Coder</title>
</head>
<body>
<h1> Learning template grammar </h1>
<div>{
{ n1 }}</div>
</body>
</html>
demonstration :

More variable types , Such as a dictionary , Refer to the rookie tutorial :Django Templates | Novice tutorial (runoob.com)
Essentially : stay HTML Write some placeholders in , These placeholders are replaced and processed by data .
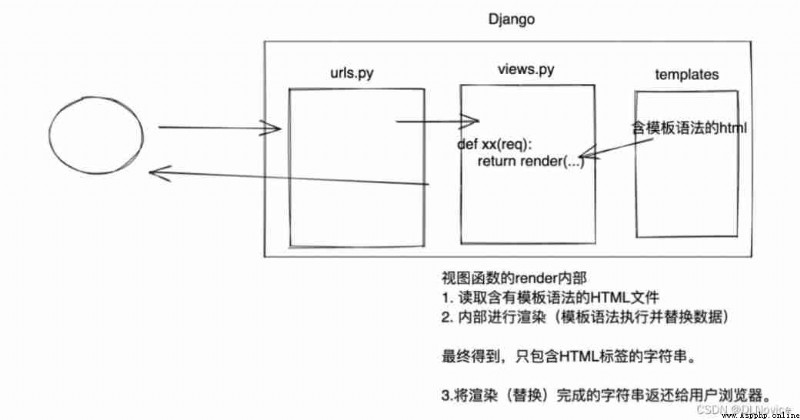

Three requests and three responses
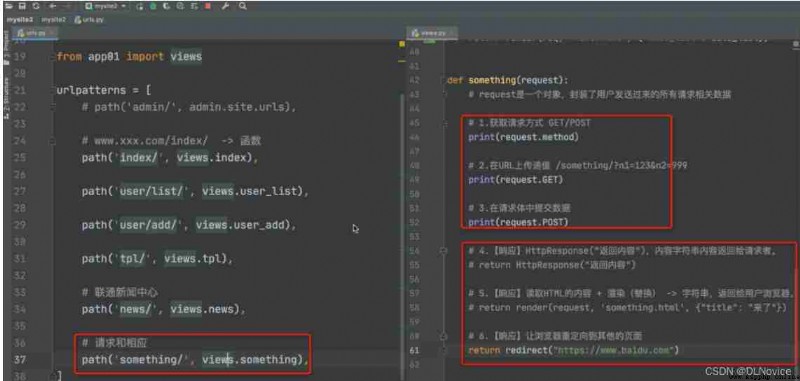
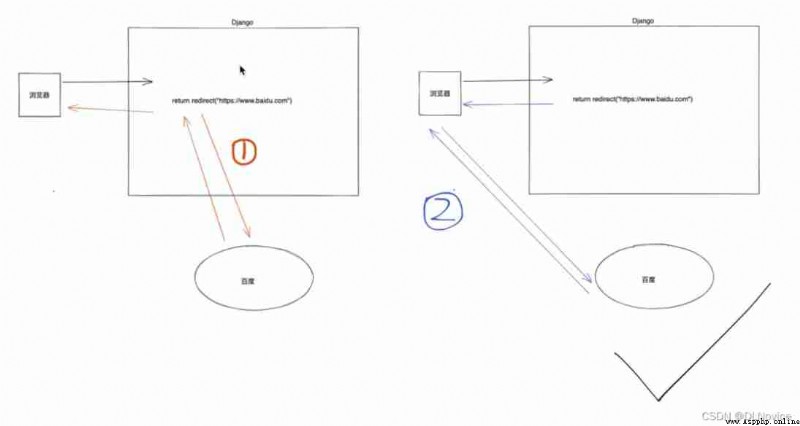
About redirection :
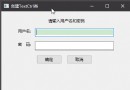
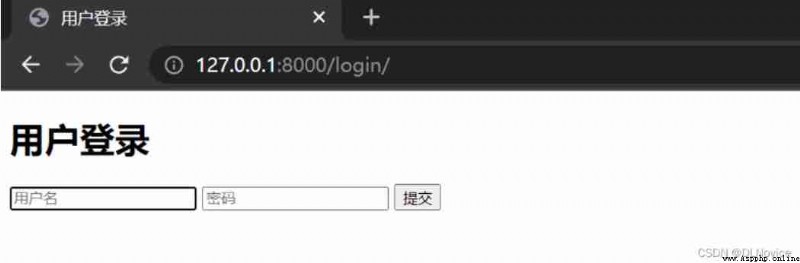
Let's make a simple case , Enter the account and password , return “ Login successful ”
urls.py
from django.contrib import admin
from django.urls import path
from app01 import views
urlpatterns = [
path("login/", views.login),
]
app01/views.py
from django.shortcuts import render, HttpResponse
def login(request):
if request.method == "GET":
return render(request, "login.html")
else:
return HttpResponse(" Login successful ")
login.html
<!DOCTYPE html>
<html lang="en">
<head>
<meta charset="UTF-8">
<title> The user login </title>
</head>
<body>
<h1> The user login </h1>
<form method="post" action="/login/">
<input type="text" name="user" placeholder=" user name ">
<input type="password" name="password" placeholder=" password ">
<input type="submit" value=" Submit ">
</form>
</body>
</html>
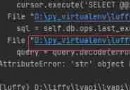
But you found out , You enter the data and submit it , Report errors :
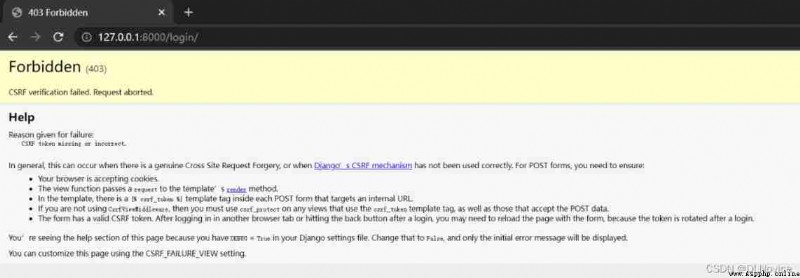
In fact, this is for flask You won't report this mistake , but django no way
because django One more mechanism , You can understand that there is an additional layer of security mechanism
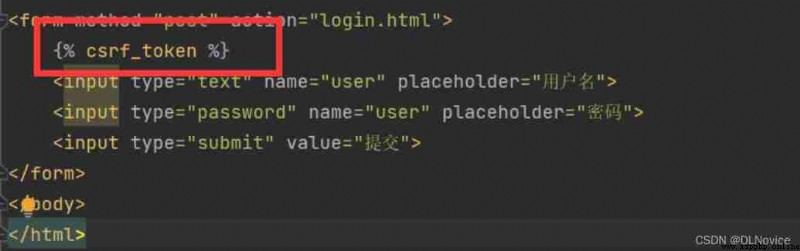
Solution :
stay form Add a sentence to the form :
{% csrf_token %}
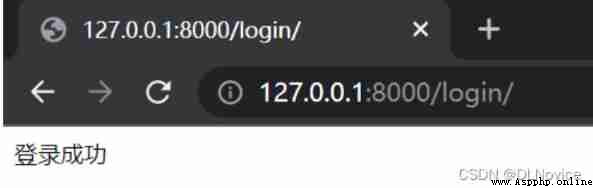
After restarting the project , Enter the account password and submit :
views.py
from django.shortcuts import render, HttpResponse, redirect
def login(request):
if request.method == "GET":
return render(request, "login.html")
else:
# If it is POST request , Get the data submitted by the user
# print(request.POST)
username = request.POST.get("user")
password = request.POST.get("password")
if username == "root" and password == "123":
# Redirect , Jump to CSDN
return redirect("https://www.csdn.net/")
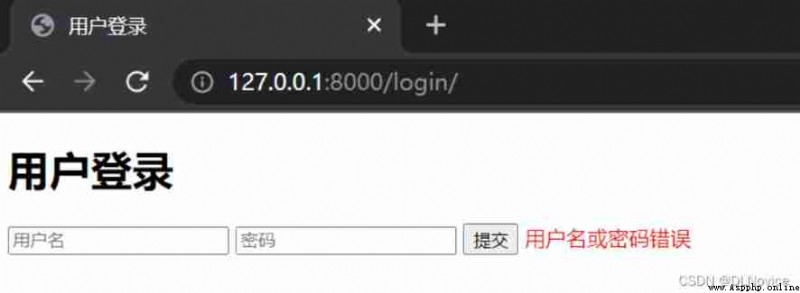
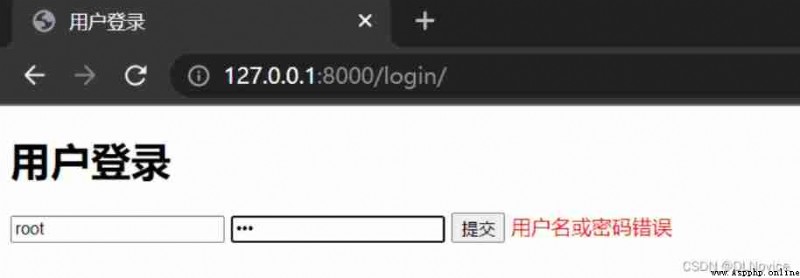
else:
return render(request, "login.html", {
"error_msg": " Wrong user name or password "})
login.html
<!DOCTYPE html>
<html lang="en">
<head>
<meta charset="UTF-8">
<title> The user login </title>
</head>
<body>
<h1> The user login </h1>
<form method="post" action="/login/">
{% csrf_token %}
<input type="text" name="user" placeholder=" user name ">
<input type="password" name="password" placeholder=" password ">
<input type="submit" value=" Submit "/>
<span >{
{ error_msg }}</span>
</form>
</body>
</html>
Effect demonstration :
MySQl database + pymysql
We can use pymsql This library operation MySQl database
but Django Provides a simpler solution :ORM frame
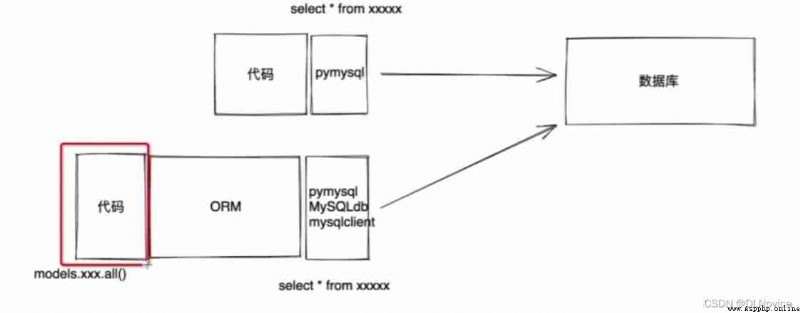
Let's use ORM frame
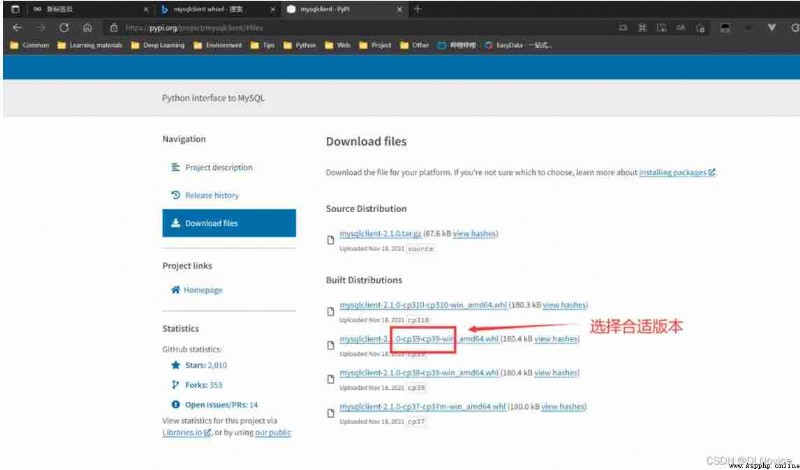
pip install mysqlclient
If installation fails , Baidu search “mysqlclient wheel”, We download the installation package directly
mysqlclient · PyPI
ORM You can do two things for us :
establish 、 modify 、 Delete tables in the database
Do not write SQl Statement , But notice that you create tables , But it doesn't help create the database
Manipulate the data in the table
start-up mysql
[[email protected]]# mysql -u root -p
Enter password:****** # Enter the terminal after logging in
Create database
mysql> create database Database name ;
Query OK, 1 row affected (0.01 sec)
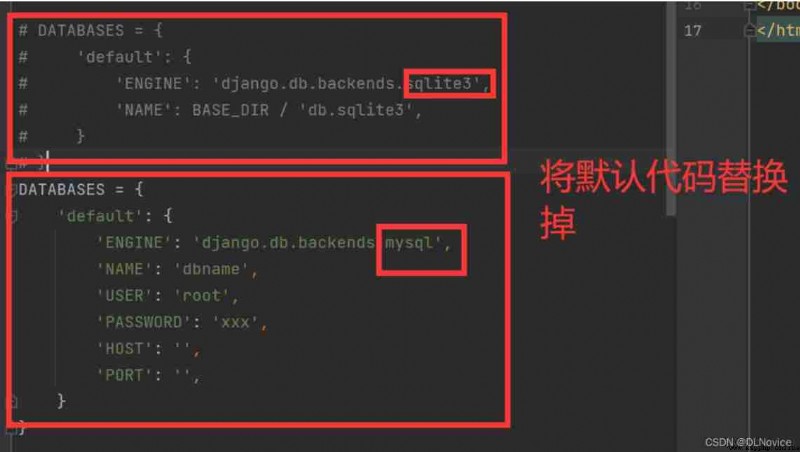
stay settings.py Configuration and modification in the file .
DATABASES = {

'default': {

'ENGINE': 'django.db.backends.mysql',
'NAME': 'dj', # Database name
'USER': 'root', # MySQL Account name
'PASSWORD': 'xxx', # MySQL Password
'HOST': '127.0.0.1', # Which machine MySQL, This machine can be used directly 127.0.0.1
'PORT': 3306,
}
}
django The default database is sqlite, Now let's switch to mysql
modify app Under the models.py
Such as :
from django.db import models
class UserInfo(models.Model):
name = models.CharField(max_length=32)
password = models.CharField(max_length=64)
age = models.IntegerField()
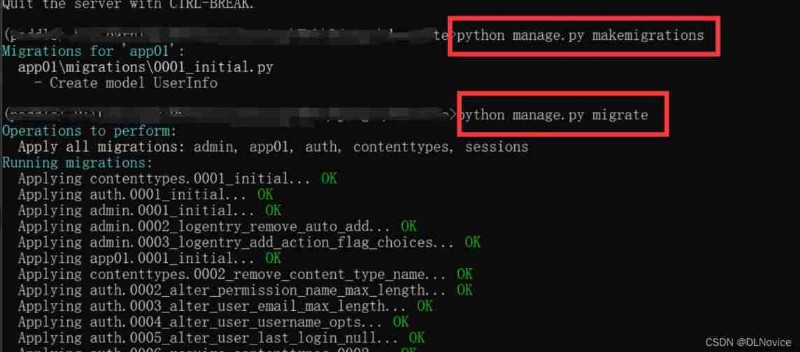
Execute two orders :
( Premise :app Registered )
python manage.py makemigrations
python manage.py migrate
Let's look at the database
use Database name ;show tables;desc Name of table ;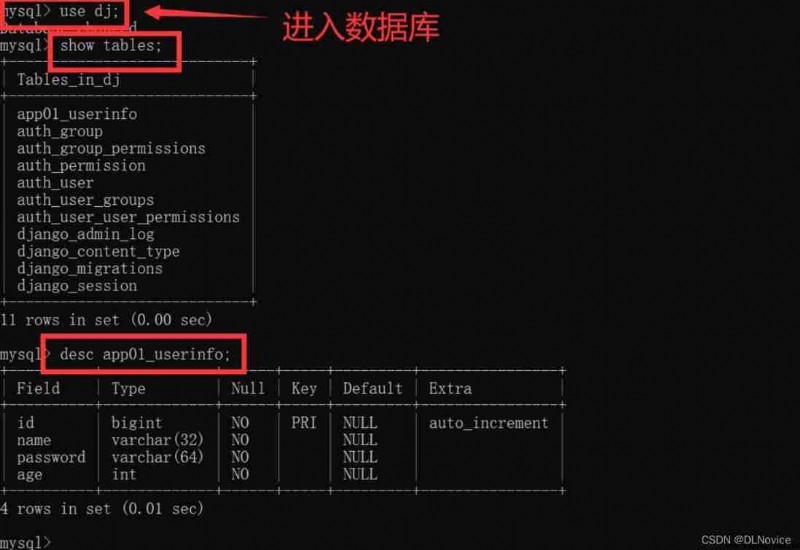
show tabes You can see that a bunch of tables are generated , Why? ?
So we want to add tables again , Or what if you don't want it ?
change app Under the models.py
Add the table and add the code directly , Delete the table or delete an element in the table to comment out the corresponding code
Every time you change the code , Rerun both commands
python manage.py makemigrations
python manage.py migrate
however , If the table already exists , It may contain data , At this time, you should revise the table , Like a excel form , You suddenly want to add a column .
At this time , function python manage.py makemigrations You will be given a choice :
>>> python manage.py makemigrations
You are trying to add a non-nullable field 'phone' to userinfo without a default; we can't do that (the database needs something to populate existing rows).
Please select a fix:
1) Provide a one-off default now (will be set on all existing rows with a null value for this column)
2) Quit, and let me add a default in models.py
Select an option:
perhaps , You add default values to your code (default), Such as :age = models.IntegerField(default=18)
Four common operations : Additions and deletions
(1) Add data
We are views.py Add a function orm()
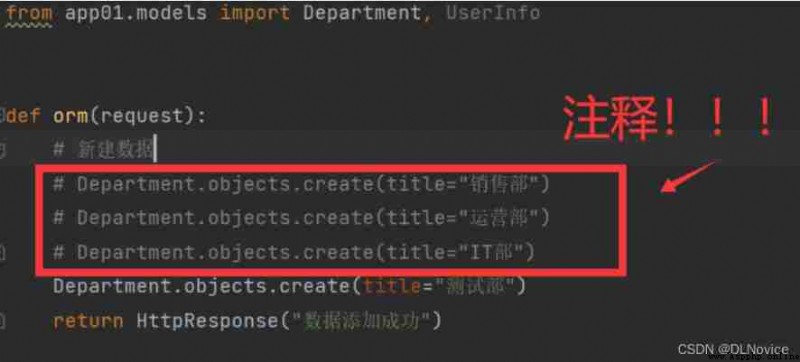
from django.shortcuts import render, HttpResponse, redirect
from app01.models import Department, UserInfo
def orm(request):
# New data
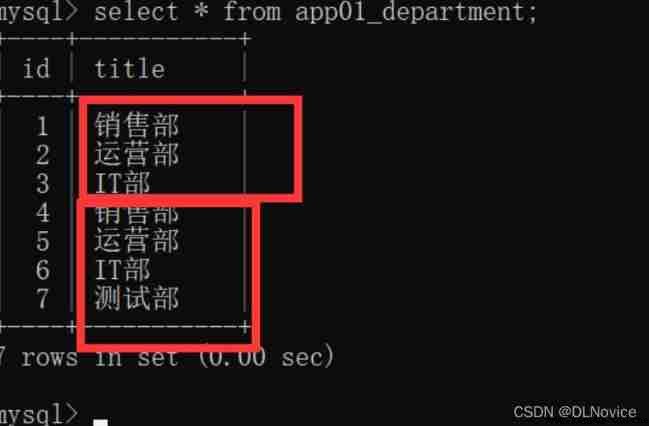
Department.objects.create(title=" The sales department ")
Department.objects.create(title=" Operation Department ")
Department.objects.create(title="IT Ministry ")
return HttpResponse(" Data added successfully ")
# notice http://127.0.0.1:8000/orm Normal output " Data added successfully ", It means that our previous operation was successful
python manage.py runserver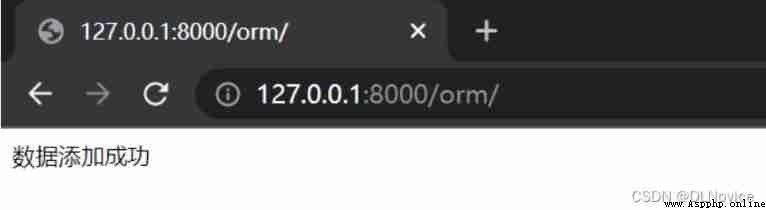
Now let's look at the database :

But be careful not to add again , The added data will be annotated
Otherwise it will be like this .....
For tables that require parameters , As we set before UserInfo():
Let's modify the function
def orm(request):
# New data
# Department.objects.create(title=" The sales department ")
# Department.objects.create(title=" Operation Department ")
# Department.objects.create(title="IT Ministry ")
# Department.objects.create(title=" Testing department ")
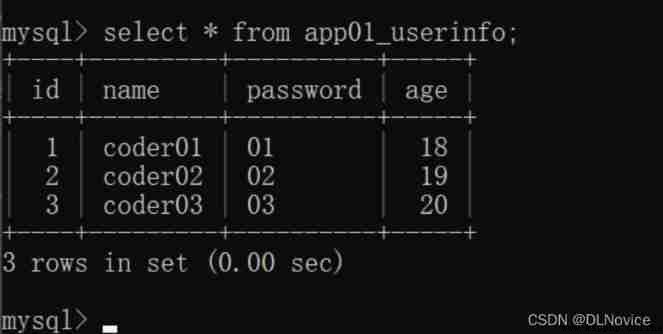
UserInfo.objects.create(name="coder01", password="01", age="18")
UserInfo.objects.create(name="coder02", password="02", age="19")
UserInfo.objects.create(name="coder03", password="03", age="20")
return HttpResponse(" Data added successfully ")
(2) Delete data
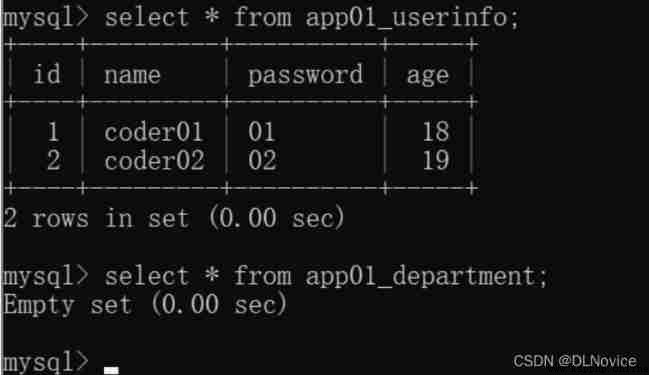
def orm(request):
# 2、 Delete data
Department.objects.all().delete() # delete() The previous code can be understood as ” Conditions “, Delete when conditions are met
UserInfo.objects.filter(id=3).delete()
return HttpResponse(" Data deletion successful ")
(3) get data
def orm(request):
# 3、 get data
# When we get the data QuerySet type data_list = [ That's ok , That's ok , That's ok ]
data_list = UserInfo.objects.all()
for obj in data_list:
print(obj.id, obj.name, obj.password, obj.age)
# Get the first data
first = UserInfo.objects.filter(id=1).first()
print(first.name, first.password)
return HttpResponse(" Data acquisition success ")
You can see... At the terminal :
System check identified no issues (0 silenced).
February 14, 2022 - 20:48:51
Django version 3.2.6, using settings 'demosite.settings'
Starting development server at http://127.0.0.1:8000/
Quit the server with CTRL-BREAK.
1 coder01 01 18
2 coder02 02 19
coder01 01
[14/Feb/2022 20:48:55] "GET /orm/ HTTP/1.1" 200 18
(4) Modifying data
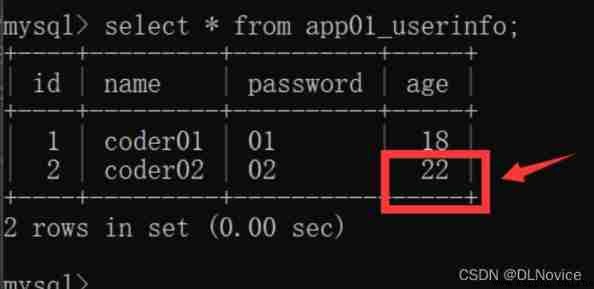
def orm(request):
# 4、 Update data
# UserInfo.objects.all().update(password=999)
# UserInfo.objects.filter(id=2).update(age=22)
UserInfo.objects.filter(name="coder02").update(age=22)
return HttpResponse(" Data modified successfully ")
url
function
views.py
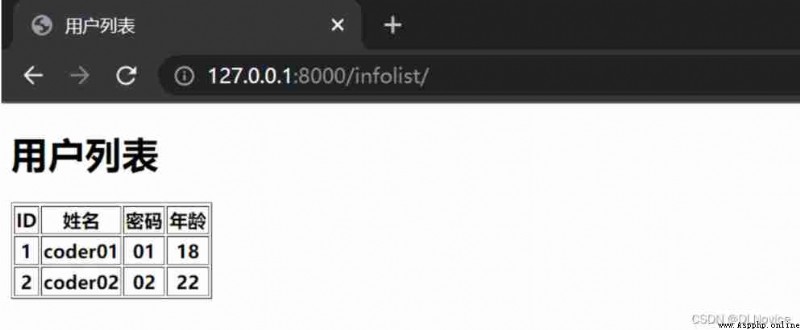
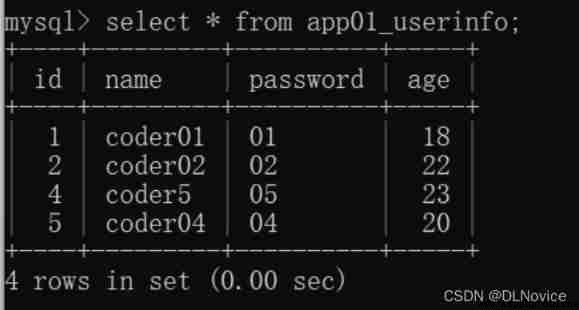
def info_list(request):
# 1、 Get all user information in the database
# [ object , object , object ]
data_list = UserInfo.objects.all()
return render(request, "infolist.html", {
"data_list": data_list})
infolist.html
<!DOCTYPE html>
<html lang="en">
<head>
<meta charset="UTF-8">
<title> User list </title>
</head>
<body>
<h1> User list </h1>
<table border="1">
<thead>
<tr>
<th>ID</th>
<th> full name </th>
<th> password </th>
<th> Age </th>
</tr>
</thead>
<tbody>
{% for obj in data_list %}
<tr>
<th>{
{ obj.id }}</th>
<th>{
{ obj.name }}</th>
<th>{
{ obj.password }}</th>
<th>{
{ obj.age }}</th>
</tr>
{% endfor %}
</tbody>
</table>
</body>
</html>
urls.py
path("info/add/", views.info_add)
views.py
from django.shortcuts import render, HttpResponse, redirect
from app01.models import Department, UserInfo
# User registration
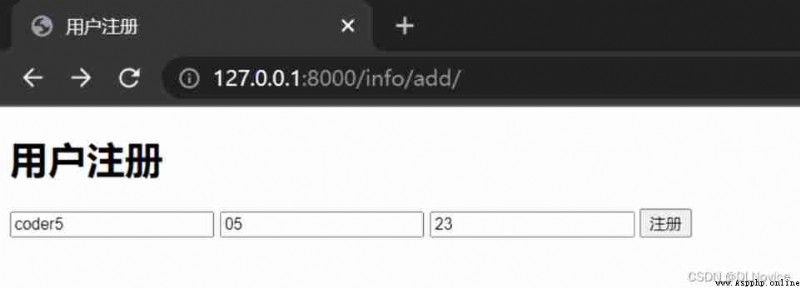
def info_add(request):
if request.method == "GET":
return render(request, "info_add.html")
# Get the data submitted by the user
user = request.POST.get("user")
password = request.POST.get("pwd")
age = request.POST.get("age")
# Add to database
UserInfo.objects.create(name=user, password=password, age=age)
return redirect("http://127.0.0.1:8000/infolist/")
info_add.html
<!DOCTYPE html>
<html lang="en">
<head>
<meta charset="UTF-8">
<title> User registration </title>
</head>
<body>
<h1> User registration </h1>
<form method="post", action="/info/add/">
{% csrf_token %} {# Don't forget to add this sentence : avoid django The effectiveness of that layer of security mechanism #}
<input type="text" name="user" placeholder=" user name ">
<input type="text" name="pwd" placeholder=" password ">
<input type="text" name="age" placeholder=" Age ">
<input type="submit" value=" register ">
</form>
</body>
</html>
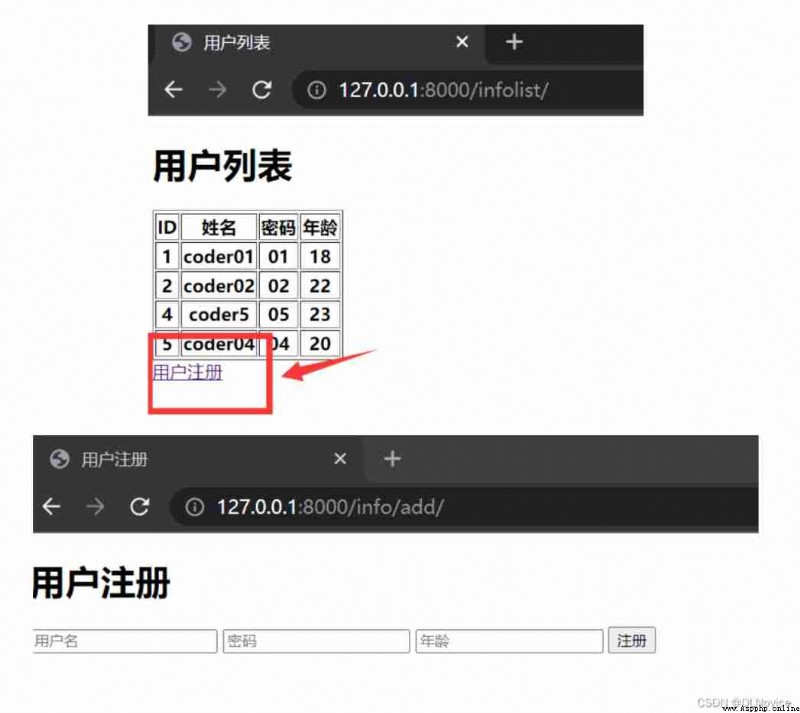
Then we just jump to what we wrote before : View user list function
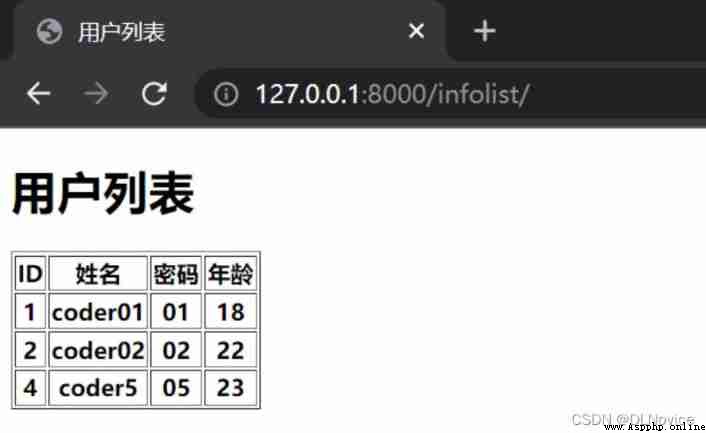
Small optimization : Add jump function
We hope that
You can add buttons to the user list ” User registration “, Jump directly to the user registration interface
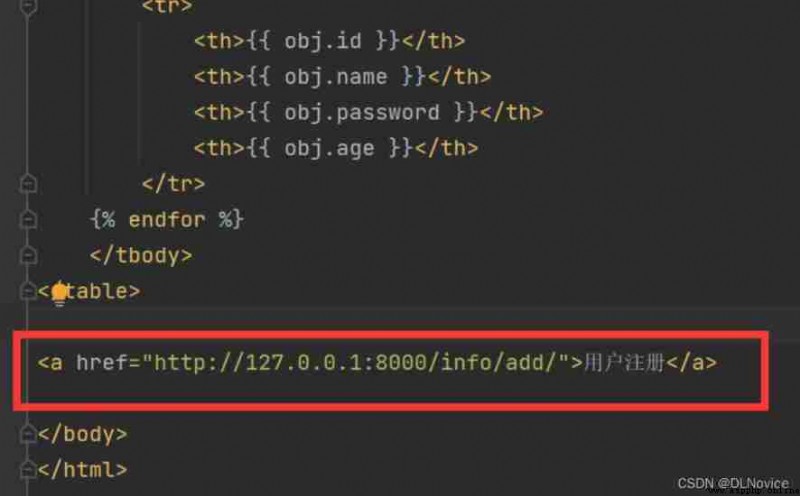
==》 The one that shows the list of users HTML Just put a label in the file
<a href="http://127.0.0.1:8000/info/add/"> User registration </a>
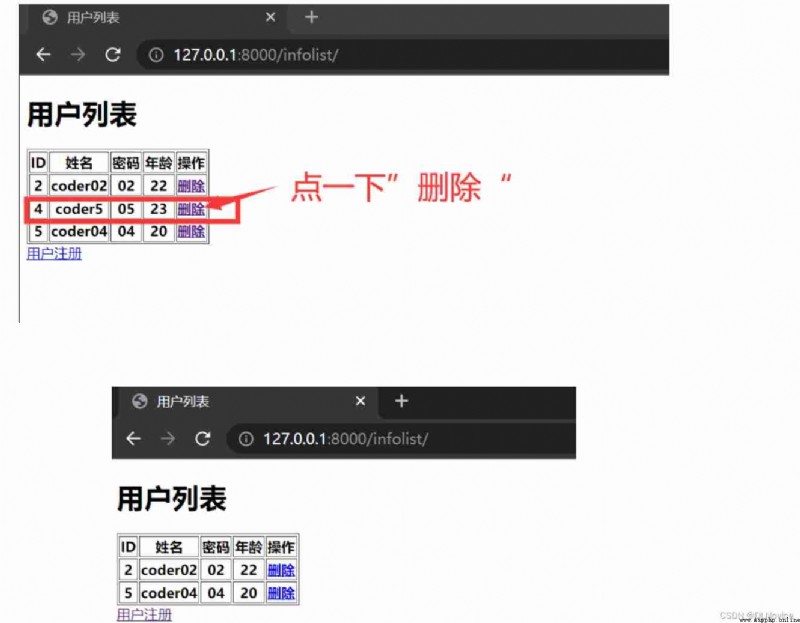
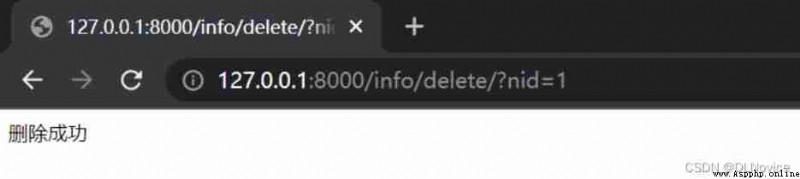
We now implement a function , By visiting url To delete a user
Mark the user to be deleted on url in
such as :
 visit http://127.0.0.1:8000/info/delete/?nid=1
Just delete id=1 Users of
The effect is shown as follows :
We add the function of deleting users to ” Show user list “ modular
urls.py
path("info/delete/", views.info_delete),
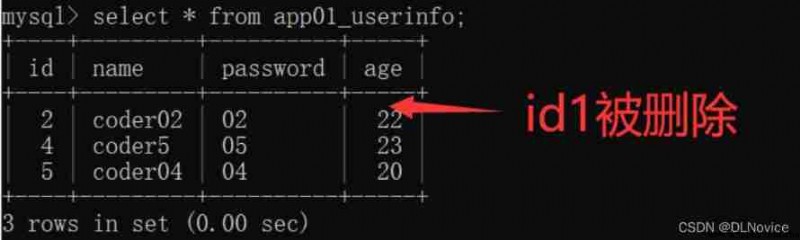
views.py
# Delete user
def info_delete(request):
nid = request.GET.get("nid")
UserInfo.objects.filter(id=nid).delete()
# After deletion, jump back to " User presentation " Interface
return redirect("/infolist/")
infolist.html
<!DOCTYPE html>
<html lang="en">
<head>
<meta charset="UTF-8">
<title> User list </title>
</head>
<body>
<h1> User list </h1>
<table border="1">
<thead>
<tr>
<th>ID</th>
<th> full name </th>
<th> password </th>
<th> Age </th>
<th> operation </th>
</tr>
</thead>
<tbody>
{% for obj in data_list %}
<tr>
<th>{
{ obj.id }}</th>
<th>{
{ obj.name }}</th>
<th>{
{ obj.password }}</th>
<th>{
{ obj.age }}</th>
<th>
<a href="http://127.0.0.1:8000/info/delete/?nid={
{ obj.id }}"> Delete </a>
</th>
</tr>
{% endfor %}
</tbody>
</table>
<a href="http://127.0.0.1:8000/info/add/"> User registration </a>
</body>
</html>