Django的模板層負責呈現內容到浏覽器,簡單來說就是用來放HTML等靜態網頁的東西的,便於前端界面的管理以及django自身的調用。
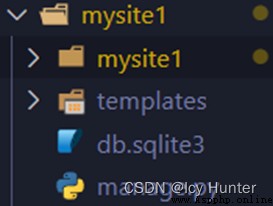
首先在manage.py同目錄下創建templates文件夾,用於放HTML等文件。
然後我們需要告訴django模板放在哪裡,因此還需要配置文件setting.py配置對應模板層的路徑。
TEMPLATES = [
{

'BACKEND': 'django.template.backends.django.DjangoTemplates',
# 配置模板層的路徑,項目絕對路徑+模板層文件名=模板層路徑
'DIRS': [os.path.join(BASE_DIR, 'templates')],
'APP_DIRS': True,
'OPTIONS': {

'context_processors': [
'django.template.context_processors.debug',
'django.template.context_processors.request',
'django.contrib.auth.context_processors.auth',
'django.contrib.messages.context_processors.messages',
],
},
},
]
配置好路徑之後,就可以在templates文件夾下創建一個test_html.html
內容如下:
<!DOCTYPE html>
<html lang="en">
<head>
<meta charset="UTF-8">
<meta http-equiv="X-UA-Compatible" content="IE=edge">
<meta name="viewport" content="width=device-width, initial-scale=1.0">
<title>Document</title>
</head>
<body>
<h3>模板層!!!hello world !!</h3>
</body>
</html>
隨便放點東西就可以。
然後配置對應的路由和視圖
配置視圖
views.py:
from django.shortcuts import render
from django.http import HttpResponse
def test_html(request):
return render(request, "test_html.html")
由於使用模板層,因此對應調用的代碼也會簡便許多。
配置路由
urls.py:
from django.contrib import admin
from django.urls import path
from . import views
urlpatterns = [
path("test_html", views.test_html),
]
然後運行服務器即可。
打開浏覽器進入http://127.0.0.1:8000//test_html
看到以下內容說明模板層配置成功!
django的模板層網頁變量數據的傳輸很方便,直接{ {變量名}}即可傳輸,和jsp中java變量傳輸到網頁之中差不太多,當然django模板層同樣也能夠嵌入python代碼。
django中能夠傳遞的數據類型如下:
str、int、list、tuple、dict、func、obj
傳遞的方法列舉:
{ {變量名}}
{ {變量名.index}}
{ {變量名.key}}
{ {變量名.方法}}
{ {函數名}}
接下來舉個例子應該就懂怎麼操作了。
首先配置視圖函數view.py:
from django.shortcuts import render
from django.http import HttpResponse
def hello():
return "hello world"
class dog():
def say(self):
return "hellllllllll"
def test_html(request):
dic = {
}
dic["int"] = 88
dic["str"] = "good"
dic["list"] = ["A", "B", "C"]
dic["dicts"] = {
"A":555, "B":666}
dic["func"] = hello
dic["obj"] = dog()
return render(request, "test_html.html", dic)
數據傳輸都只能夠通過字典的形式傳輸過去,我們這裡傳輸了一個int、一個str、一個list、一個字典、一個函數以及一個對象過去。
然後配置模板層的網頁內容,templates文件夾下的test_html.html如下:
<!DOCTYPE html>
<html lang="en">
<head>
<meta charset="UTF-8">
<meta http-equiv="X-UA-Compatible" content="IE=edge">
<meta name="viewport" content="width=device-width, initial-scale=1.0">
<title>Document</title>
</head>
<body>
<h3>模板層!!!hello world !!{
{username}}</h3>
<table>
<tr>
<td>int</td>
<td>{
{int}}</td>
</tr>
<tr>
<td>str</td>
<td>{
{str}}</td>
</tr>
<tr>
<td>list_one</td>
<td>{
{list.1}}</td>
</tr>
<tr>
<td>dicts</td>
<td>{
{dicts.A}}</td>
</tr>
<tr>
<td>func</td>
<td>{
{func}}</td>
</tr>
<tr>
<td>obj</td>
<td>{
{obj.say}}</td>
</tr>
</table>
</body>
</html>
看代碼應該就知道各種類型該怎麼調用了。
配置路由urls.py:
from django.contrib import admin
from django.urls import path
from . import views
urlpatterns = [
path("test_html", views.test_html),
]
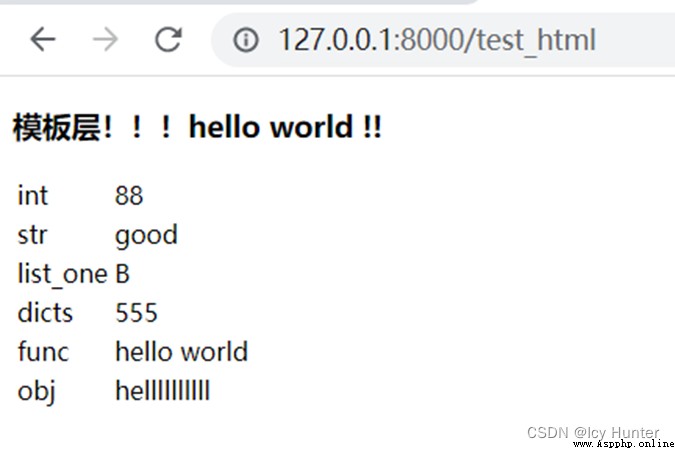
然後運行服務器,訪問http://127.0.0.1:8000//test_html

能夠看到變量都能夠傳輸過來了。其中比較需要注意的就是列表元素的索引是 變量名.index(索引號)來索引。
python代碼嵌入的話,語法應該差不多,只需要在<%%>中輸入python代碼即可調用。
我們接著剛才的配置,只需要將test_html.html中的內容加上python代碼的調用即可看到效果。
test_html.html:
<!DOCTYPE html>
<html lang="en">
<head>
<meta charset="UTF-8">
<meta http-equiv="X-UA-Compatible" content="IE=edge">
<meta name="viewport" content="width=device-width, initial-scale=1.0">
<title>Document</title>
</head>
<body>
<h3>模板層!!!hello world !!{
{
username}}</h3>
<table>
<tr>
<td>int</td>
<td>{
{
int}}</td>
</tr>
<tr>
<td>str</td>
<td>{
{
str}}</td>
</tr>
<tr>
<td>list_one</td>
<td>{
{
list.1}}</td>
</tr>
<tr>
<td>dicts</td>
<td>{
{
dicts.A}}</td>
</tr>
<tr>
<td>func</td>
<td>{
{
func}}</td>
</tr>
<tr>
<td>obj</td>
<td>{
{
obj.say}}</td>
</tr>
</table>
{
%if dicts.A > 100 %}
hello world
{
%else %}
good mornings world
{
%endif %}
{
% for i in list%}
{
{
i}}
{
%empty%}
空的
{
%endfor %}
</body>
</html>
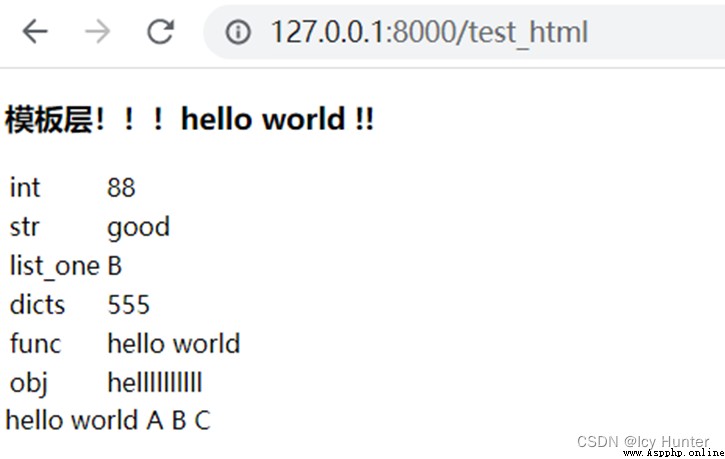
運行服務器可得到:
最下面一行就是嵌入的python代碼發揮的作用。
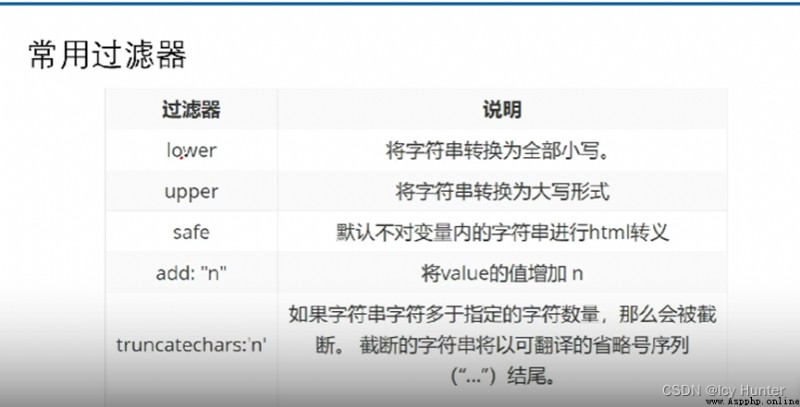
模板過濾器,能通過過濾器來改變變量的輸出顯示
語法:{ {變量|過濾器}}

舉個例子就懂了。
views.py:
from django.shortcuts import render
from django.http import HttpResponse
def hello():
return "hello world"
class dog():
def say(self):
return "hellllllllll"
def test_html(request):
dic = {
}
dic["int"] = 88
dic["str"] = "good"
dic["list"] = ["A", "B", "C"]
dic["dicts"] = {
"A":555, "B":666}
dic["func"] = hello
dic["obj"] = dog()
dic["script"] = "<script>alert(6666)</script>"
return render(request, "test_html.html", dic)
test_html.html:
<!DOCTYPE html>
<html lang="en">
<head>
<meta charset="UTF-8">
<meta http-equiv="X-UA-Compatible" content="IE=edge">
<meta name="viewport" content="width=device-width, initial-scale=1.0">
<title>Document</title>
</head>
<body>
<h3>模板層!!!hello world !!{
{username}}</h3>
<table>
<tr>
<td>int</td>
<td>{
{int | add:"50"}}</td>
</tr>
<tr>
<td>str</td>
<td>{
{str | upper}}</td>
</tr>
<tr>
<td>list_one</td>
<td>{
{list.1}}</td>
</tr>
<tr>
<td>dicts</td>
<td>{
{dicts.A}}</td>
</tr>
<tr>
<td>func</td>
<td>{
{func}}</td>
</tr>
<tr>
<td>obj</td>
<td>{
{obj.say}}</td>
</tr>
<tr>
<td>script</td>
<td>{
{script | safe}}</td>
</tr>
</table>
</body>
</html>
路由沒變,還是上一個例子的那個。
運行服務器,應該會有一個彈窗,然後int會加上50,str會變成大寫。
平時上網的時候,我們可以發現很多網站裡的網頁都是有類似之處的,例如同一個網站裡,最上面的導航欄以及最下面的版權塊等等都是相同的,只是網頁中間的核心內容變化了,為了提高代碼的復用性,提高開發效率,django能夠實現模板層的集成和重寫,和面向對象的操作差不多。
下面舉個例子就能直觀的體會了。
首先配置路由,這裡我們需要配置兩個路由,分別進入父網頁和子網頁
urls.py:
from django.contrib import admin
from django.urls import path
from . import views
urlpatterns = [
path("father", views.father),
path("child", views.child)
]
然後我們配置對應的視圖函數:
views.py:
from django.shortcuts import render
from django.http import HttpResponse
def father(request):
dic = {
}
dic["a"] = 10
return render(request, "father.html", dic)
def child(request):
return render(request, "child.html")
最後我們需要配置對應的HTML,在templates文件夾下分別配置父網頁和子網頁的HTML。
django繼承可修改的部分是以下格式:
{
%block 塊名%}
##########
{
%endblock%}
這個塊名中的東西如果被重寫則會覆蓋,剩余的東西則會被原封不動的繼承下來。
那麼father.html如下:
<!DOCTYPE html>
<html lang="en">
<head>
<meta charset="UTF-8">
<meta http-equiv="X-UA-Compatible" content="IE=edge">
<meta name="viewport" content="width=device-width, initial-scale=1.0">
<title>Document</title>
</head>
<body>
2022----------------------------------
<br>
{%block info %}
這是主頁
{%endblock %}
</body>
</html>
child.html如下:
{
% extends "father.html"%}
{
%block info%}
你好,歡迎光臨,謝謝惠顧
{
%endblock%}
其中{% extends “father.html”%}表示繼承father,html的內容,然後又重寫了info塊中的內容,因此會覆蓋原內容,因此最後啟動服務器後的結果如下:

可以發現只是修改了block info中的內容。
值得注意的是,模板繼承時,模板傳入的變量是無法繼承的