Reprinted from :
How to be in Python Use in MQTT - You know Python It's a widely used interpretive type 、 Advanced programming 、 Universal programming language .Python The philosophy of design emphasizes the readability of code and concise syntax ( In particular, use space indentation to divide code blocks , Instead of using braces or keywords ).Python Allow developers to express with less code … https://zhuanlan.zhihu.com/p/187481769
Python It's a widely used interpretive type 、 Advanced programming 、 Universal programming language .Python The philosophy of design emphasizes the readability of code and concise syntax ( In particular, use space indentation to divide code blocks , Instead of using braces or keywords ).Python Let developers express their ideas in less code , Whether it's a small or a large program , The language tries to make the structure of the program clear .
MQTT It's based on publishing / Subscription mode Lightweight Internet of things message transmission protocol , It can provide real-time and reliable message services for networked devices with very little code and bandwidth , It is widely used in the Internet of things 、 Mobile Internet 、 Smart hardware 、 Car networking 、 Power, energy and other industries .
This article mainly introduces how to do it in Python Project use paho-mqtt Client library , Implement client and MQTT Server connection 、 subscribe 、 Unsubscribe 、 Send and receive messages and other functions .
This project uses Python 3.6 Conduct development testing , The reader can confirm with the following command Python Version of .
* ~ python3 --version
Python 3.6.7paho-mqtt Is currently the Python It's more used in MQTT Client library , It's in Python 2.7 or 3.x For client classes, the MQTT v3.1 and v3.1.1 Support for . It also provides some helper functions , To publish a message to MQTT The server becomes very simple .
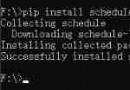
Pip yes Python Package management tools , The tool provides the right Python Bag search 、 download 、 install 、 Uninstalled features .
pip3 install -i https://pypi.doubanio.com/simple paho-mqttThis article will use EMQ X Provided Free public MQTT The server , The service is based on EMQ X Of MQTT Internet of things cloud platform establish . The server access information is as follows :
from paho.mqtt import client as mqtt_client Set up MQTT Broker Connection address , Ports and topic, At the same time, we call Python random.randint Functions are randomly generated MQTT client id.
broker = 'broker.emqx.io'
port = 1883
topic = "/python/mqtt"
client_id = f'python-mqtt-{random.randint(0, 1000)}' Write the connection callback function on_connect, This function will be called after the client connects , In this function, you can use rc To determine whether the client is successfully connected . Usually at the same time we will create a MQTT client , The client will connect to broker.emqx.io.
def connect_mqtt():
def on_connect(client, userdata, flags, rc):
if rc == 0:
print("Connected to MQTT Broker!")
else:
print("Failed to connect, return code %d\n", rc)
# Set Connecting Client ID
client = mqtt_client.Client(client_id)
client.on_connect = on_connect
client.connect(broker, port)
return client So let's define a while Loop statement , In the loop we will set the call per second MQTT client publish Functional direction /python/mqtt Subject send message .
def publish(client):
msg_count = 0
while True:
time.sleep(1)
msg = f"messages: {msg_count}"
result = client.publish(topic, msg)
# result: [0, 1]
status = result[0]
if status == 0:
print(f"Send `{msg}` to topic `{topic}`")
else:
print(f"Failed to send message to topic {topic}")
msg_count += 1 Write a message callback function on_message, This function will be used on the client side from MQTT Broker Called after receiving the message , In this function, we will print out the subscribed topic Name and received message content .
def subscribe(client: mqtt_client):
def on_message(client, userdata, msg):
print(f"Received `{msg.payload.decode()}` from `{msg.topic}` topic")
client.subscribe(topic)
client.on_message = on_messageMessage release code
# python 3.6
import random
import time
from paho.mqtt import client as mqtt_client
broker = 'broker.emqx.io'
port = 1883
topic = "/python/mqtt"
# generate client ID with pub prefix randomly
client_id = f'python-mqtt-{random.randint(0, 1000)}'
def connect_mqtt():
def on_connect(client, userdata, flags, rc):
if rc == 0:
print("Connected to MQTT Broker!")
else:
print("Failed to connect, return code %d\n", rc)
client = mqtt_client.Client(client_id)
client.on_connect = on_connect
client.connect(broker, port)
return client
def publish(client):
msg_count = 0
while True:
time.sleep(1)
msg = f"messages: {msg_count}"
result = client.publish(topic, msg)
# result: [0, 1]
status = result[0]
if status == 0:
print(f"Send `{msg}` to topic `{topic}`")
else:
print(f"Failed to send message to topic {topic}")
msg_count += 1
def run():
client = connect_mqtt()
client.loop_start()
publish(client)
if __name__ == '__main__':
run()
Message subscription code
# python3.6
import random
from paho.mqtt import client as mqtt_client
broker = 'broker.emqx.io'
port = 1883
topic = "/python/mqtt"
# generate client ID with pub prefix randomly
client_id = f'python-mqtt-{random.randint(0, 100)}'
def connect_mqtt() -> mqtt_client:
def on_connect(client, userdata, flags, rc):
if rc == 0:
print("Connected to MQTT Broker!")
else:
print("Failed to connect, return code %d\n", rc)
client = mqtt_client.Client(client_id)
client.on_connect = on_connect
client.connect(broker, port)
return client
def subscribe(client: mqtt_client):
def on_message(client, userdata, msg):
print(f"Received `{msg.payload.decode()}` from `{msg.topic}` topic")
client.subscribe(topic)
client.on_message = on_message
def run():
client = connect_mqtt()
subscribe(client)
client.loop_forever()
if __name__ == '__main__':
run()function MQTT Message release code , We'll see the client connect successfully , And successfully publish the message .
python3 pub.py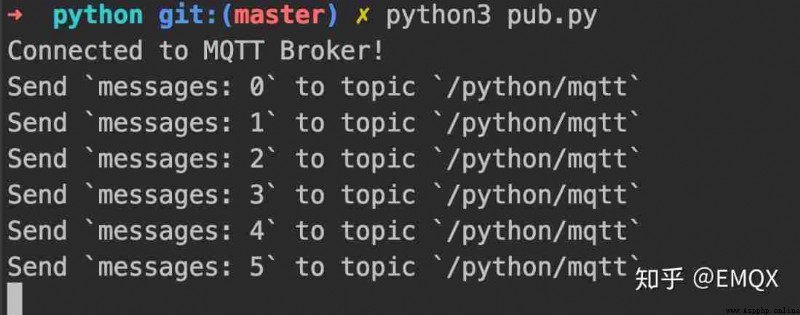
function MQTT Message subscription code , We'll see the client connect successfully , And successfully received the published message .
python3 sub.py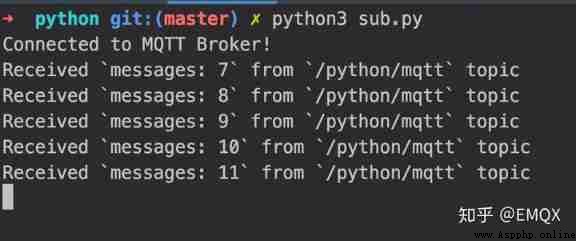
thus , We finished using paho-mqtt The client connects to public MQTT The server , And realized the test client and MQTT Server connection 、 Message publishing and subscription .
And C ++ or Java And other high-level languages ,Python It is more suitable for the business logic implementation on the device side , Use Python You can reduce the logical complexity of your code , Reduce the cost of interacting with the device . We believe in the Internet of things Python There will be a wider range of applications .
Next, we will release more about the Internet of things development and Python Related articles of , Stay tuned .
Postscript :
This article uses EMQ Provided by the company Free public MQTT service , Used for testing . The content of this article is also EMQ Official articles of the company , The code is simple and practical , To prevent quality content from being swallowed , Redeposit .
In this paper, the Python The code uses the latest (python3.6 And later )f-string Format String Syntax , Than %s and format Of More intuitive syntax .
name = 'apple'
print(f"I eat an `{name}` ")
# The output is I eat an apple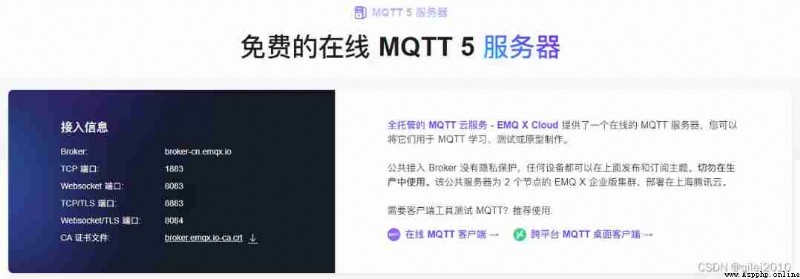
Copyright notice : This paper is about EMQ original , Reprint please indicate the source .
Link to the original text :https://www.emqx.io/cn/blog/how-to-