這篇文章主要介紹“Python first-order-model怎麼實現讓照片動起來”的相關知識,小編通過實際案例向大家展示操作過程,操作方法簡單快捷,實用性強,希望這篇“Python first-order-model怎麼實現讓照片動起來”文章能幫助大家解決問題。
我們先看一下README關於項目的基本信息,可以看出除了表情驅動照片,還可以姿態遷移。

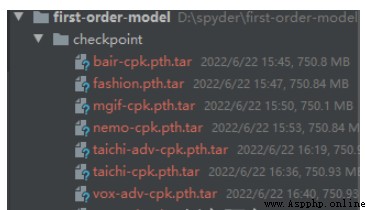
模型文件提供了線上的下載地址。
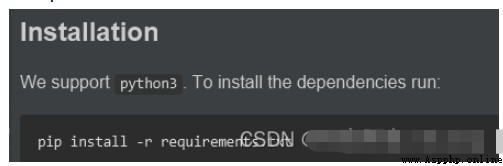
將requirements.txt中的依賴安裝一下。
在測試README中的命令的時候,如果出現一下報錯。
Traceback (most recent call last):
File "demo.py", line 17, in <module>
from animate import normalize_kp
File "D:\spyder\first-order-model\animate.py", line 7, in <module>
from frames_dataset import PairedDataset
File "D:\spyder\first-order-model\frames_dataset.py", line 10, in <module>
from augmentation import AllAugmentationTransform
File "D:\spyder\first-order-model\augmentation.py", line 13, in <module>
import torchvision
File "C:\Users\huyi\.conda\envs\fom\lib\site-packages\torchvision\__init__.py", line 2, in <module>
from torchvision import datasets
File "C:\Users\huyi\.conda\envs\fom\lib\site-packages\torchvision\datasets\__init__.py", line 9, in <module>
from .fakedata import FakeData
File "C:\Users\huyi\.conda\envs\fom\lib\site-packages\torchvision\datasets\fakedata.py", line 3, in <module>
from .. import transforms
File "C:\Users\huyi\.conda\envs\fom\lib\site-packages\torchvision\transforms\__init__.py", line 1, in <module>
from .transforms import *
File "C:\Users\huyi\.conda\envs\fom\lib\site-packages\torchvision\transforms\transforms.py", line 16, in <module>
from . import functional as F
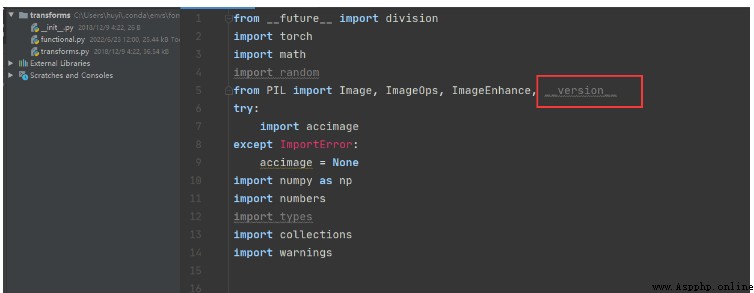
File "C:\Users\huyi\.conda\envs\fom\lib\site-packages\torchvision\transforms\functional.py", line 5, in <module>
from PIL import Image, ImageOps, ImageEnhance, PILLOW_VERSION
ImportError: cannot import name 'PILLOW_VERSION' from 'PIL' (C:\Users\huyi\.conda\envs\fom\lib\site-packages\PIL\__init__.py)
這個問題主要是我使用的pillow版本過高的原因,如果不想找對應的低版本,可以按照我的方式解決。
1、修改functional.py代碼,將PILLOW_VERSION調整為__version__。
2、將imageio升級。
pip install --upgrade imageio -i https://pypi.douban.com/simple
3、安裝imageio_ffmpeg模塊。
pip install imageio-ffmpeg -i https://pypi.douban.com/simple
官方給出的使用方法我就不重復測試,大家可以按照下面的命令去測試一下。

這裡我推薦一個可視化的庫gradio,下面我將demo.py的代碼改造了一下。
新的工具文件代碼如下:
#!/user/bin/env python# coding=utf-8"""@project : [email protected] : 劍客阿良[email protected] : [email protected] : [email protected] : 2022-06-23 14:35:28"""import uuidfrom typing import Optional import gradio as grimport matplotlib matplotlib.use('Agg')import os, sysimport yamlfrom argparse import ArgumentParserfrom tqdm import tqdm import imageioimport numpy as npfrom skimage.transform import resizefrom skimage import img_as_ubyteimport torchfrom sync_batchnorm import DataParallelWithCallback from modules.generator import OcclusionAwareGeneratorfrom modules.keypoint_detector import KPDetectorfrom animate import normalize_kpfrom scipy.spatial import ConvexHull if sys.version_info[0] < 3: raise Exception("You must use Python 3 or higher. Recommended version is Python 3.7") def load_checkpoints(config_path, checkpoint_path, cpu=False): with open(config_path) as f: config = yaml.load(f) generator = OcclusionAwareGenerator(**config['model_params']['generator_params'], **config['model_params']['common_params']) if not cpu: generator.cuda() kp_detector = KPDetector(**config['model_params']['kp_detector_params'], **config['model_params']['common_params']) if not cpu: kp_detector.cuda() if cpu: checkpoint = torch.load(checkpoint_path, map_location=torch.device('cpu')) else: checkpoint = torch.load(checkpoint_path) generator.load_state_dict(checkpoint['generator']) kp_detector.load_state_dict(checkpoint['kp_detector']) if not cpu: generator = DataParallelWithCallback(generator) kp_detector = DataParallelWithCallback(kp_detector) generator.eval() kp_detector.eval() return generator, kp_detector def make_animation(source_image, driving_video, generator, kp_detector, relative=True, adapt_movement_scale=True, cpu=False): with torch.no_grad(): predictions = [] source = torch.tensor(source_image[np.newaxis].astype(np.float32)).permute(0, 3, 1, 2) if not cpu: source = source.cuda() driving = torch.tensor(np.array(driving_video)[np.newaxis].astype(np.float32)).permute(0, 4, 1, 2, 3) kp_source = kp_detector(source) kp_driving_initial = kp_detector(driving[:, :, 0]) for frame_idx in tqdm(range(driving.shape[2])): driving_frame = driving[:, :, frame_idx] if not cpu: driving_frame = driving_frame.cuda() kp_driving = kp_detector(driving_frame) kp_norm = normalize_kp(kp_source=kp_source, kp_driving=kp_driving, kp_driving_initial=kp_driving_initial, use_relative_movement=relative, use_relative_jacobian=relative, adapt_movement_scale=adapt_movement_scale) out = generator(source, kp_source=kp_source, kp_driving=kp_norm) predictions.append(np.transpose(out['prediction'].data.cpu().numpy(), [0, 2, 3, 1])[0]) return predictions def find_best_frame(source, driving, cpu=False): import face_alignment def normalize_kp(kp): kp = kp - kp.mean(axis=0, keepdims=True) area = ConvexHull(kp[:, :2]).volume area = np.sqrt(area) kp[:, :2] = kp[:, :2] / area return kp fa = face_alignment.FaceAlignment(face_alignment.LandmarksType._2D, flip_input=True, device='cpu' if cpu else 'cuda') kp_source = fa.get_landmarks(255 * source)[0] kp_source = normalize_kp(kp_source) norm = float('inf') frame_num = 0 for i, image in tqdm(enumerate(driving)): kp_driving = fa.get_landmarks(255 * image)[0] kp_driving = normalize_kp(kp_driving) new_norm = (np.abs(kp_source - kp_driving) ** 2).sum() if new_norm < norm: norm = new_norm frame_num = i return frame_num def h_interface(input_image: str): parser = ArgumentParser() opt = parser.parse_args() opt.config = "./config/vox-256.yaml" opt.checkpoint = "./checkpoint/vox-cpk.pth.tar" opt.source_image = input_image opt.driving_video = "./data/input/ts.mp4" opt.result_video = "./data/result/{}.mp4".format(uuid.uuid1().hex) opt.relative = True opt.adapt_scale = True opt.cpu = True opt.find_best_frame = False opt.best_frame = False # source_image = imageio.imread(opt.source_image) source_image = opt.source_image reader = imageio.get_reader(opt.driving_video) fps = reader.get_meta_data()['fps'] driving_video = [] try: for im in reader: driving_video.append(im) except RuntimeError: pass reader.close() source_image = resize(source_image, (256, 256))[..., :3] driving_video = [resize(frame, (256, 256))[..., :3] for frame in driving_video] generator, kp_detector = load_checkpoints(config_path=opt.config, checkpoint_path=opt.checkpoint, cpu=opt.cpu) if opt.find_best_frame or opt.best_frame is not None: i = opt.best_frame if opt.best_frame is not None else find_best_frame(source_image, driving_video, cpu=opt.cpu) print("Best frame: " + str(i)) driving_forward = driving_video[i:] driving_backward = driving_video[:(i + 1)][::-1] predictions_forward = make_animation(source_image, driving_forward, generator, kp_detector, relative=opt.relative, adapt_movement_scale=opt.adapt_scale, cpu=opt.cpu) predictions_backward = make_animation(source_image, driving_backward, generator, kp_detector, relative=opt.relative, adapt_movement_scale=opt.adapt_scale, cpu=opt.cpu) predictions = predictions_backward[::-1] + predictions_forward[1:] else: predictions = make_animation(source_image, driving_video, generator, kp_detector, relative=opt.relative, adapt_movement_scale=opt.adapt_scale, cpu=opt.cpu) imageio.mimsave(opt.result_video, [img_as_ubyte(frame) for frame in predictions], fps=fps) return opt.result_video if __name__ == "__main__": demo = gr.Interface(h_interface, inputs=[gr.Image(shape=(500, 500))], outputs=[gr.Video()]) demo.launch() # h_interface("C:\\Users\\huyi\\Desktop\\xx3.jpg")代碼說明
1、將原demo.py中的main函數內容,重新編輯為h_interface方法,輸入是想要驅動的圖片。
2、其中driving_video參數使用了我自己錄制的一段表情視頻ts.mp4,我建議在使用的時候可以自己用手機錄制一段替換。
3、使用gradio來生成方法的頁面,下面會展示給大家看。
4、使用uuid為結果視頻命名。
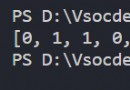
執行結果如下
Running on local URL: http://127.0.0.1:7860/
To create a public link, set `share=True` in `launch()`.
打開本地的地址:http://localhost:7860/
可以看到我們實現的交互界面如下:
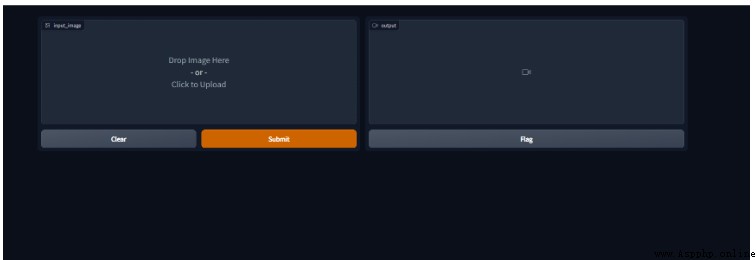
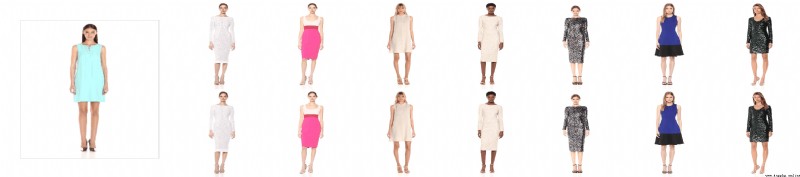
我們上傳一下我准備的樣例圖片,提交制作。

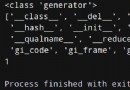
看一下執行的日志,如下圖。

看一下制作結果。

由於上傳不了視頻,我將視頻轉成了gif。

關於“Python first-order-model怎麼實現讓照片動起來”的內容就介紹到這裡了,感謝大家的閱讀。如果想了解更多行業相關的知識,可以關注億速雲行業資訊頻道,小編每天都會為大家更新不同的知識點。