前言
資源下載和安裝
安裝補充
工具代碼驗證
前言看到一個很有意思的項目,其實在之前就在百度飛漿等平台上看到類似的實現效果。
可以將照片按照視頻的表情,動起來。看一下項目給出的效果。

項目地址:first-order-model項目地址
還是老樣子,不管作者給出的種種效果,自己測試一下。
資源下載和安裝我們先看一下README關於項目的基本信息,可以看出除了表情驅動照片,還可以姿態遷移。


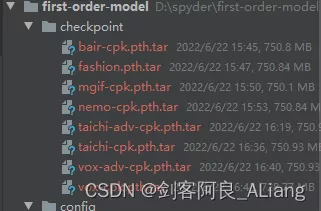
模型文件提供了線上的下載地址。

文件很大而且難下,我下好了放到我的雲盤上,可以從下面雲盤下載。
鏈接 提取碼:ikix
模型文件放到根目錄下新建的checkpoint文件夾下。


將requirements.txt中的依賴安裝一下。

在測試README中的命令的時候,如果出現一下報錯。
Traceback (most recent call last):
File "demo.py", line 17, in <module>
from animate import normalize_kp
File "D:\spyder\first-order-model\animate.py", line 7, in <module>
from frames_dataset import PairedDataset
File "D:\spyder\first-order-model\frames_dataset.py", line 10, in <module>
from augmentation import AllAugmentationTransform
File "D:\spyder\first-order-model\augmentation.py", line 13, in <module>
import torchvision
File "C:\Users\huyi\.conda\envs\fom\lib\site-packages\torchvision\__init__.py", line 2, in <module>
from torchvision import datasets
File "C:\Users\huyi\.conda\envs\fom\lib\site-packages\torchvision\datasets\__init__.py", line 9, in <module>
from .fakedata import FakeData
File "C:\Users\huyi\.conda\envs\fom\lib\site-packages\torchvision\datasets\fakedata.py", line 3, in <module>
from .. import transforms
File "C:\Users\huyi\.conda\envs\fom\lib\site-packages\torchvision\transforms\__init__.py", line 1, in <module>
from .transforms import *
File "C:\Users\huyi\.conda\envs\fom\lib\site-packages\torchvision\transforms\transforms.py", line 16, in <module>
from . import functional as F
File "C:\Users\huyi\.conda\envs\fom\lib\site-packages\torchvision\transforms\functional.py", line 5, in <module>
from PIL import Image, ImageOps, ImageEnhance, PILLOW_VERSION
ImportError: cannot import name 'PILLOW_VERSION' from 'PIL' (C:\Users\huyi\.conda\envs\fom\lib\site-packages\PIL\__init__.py)
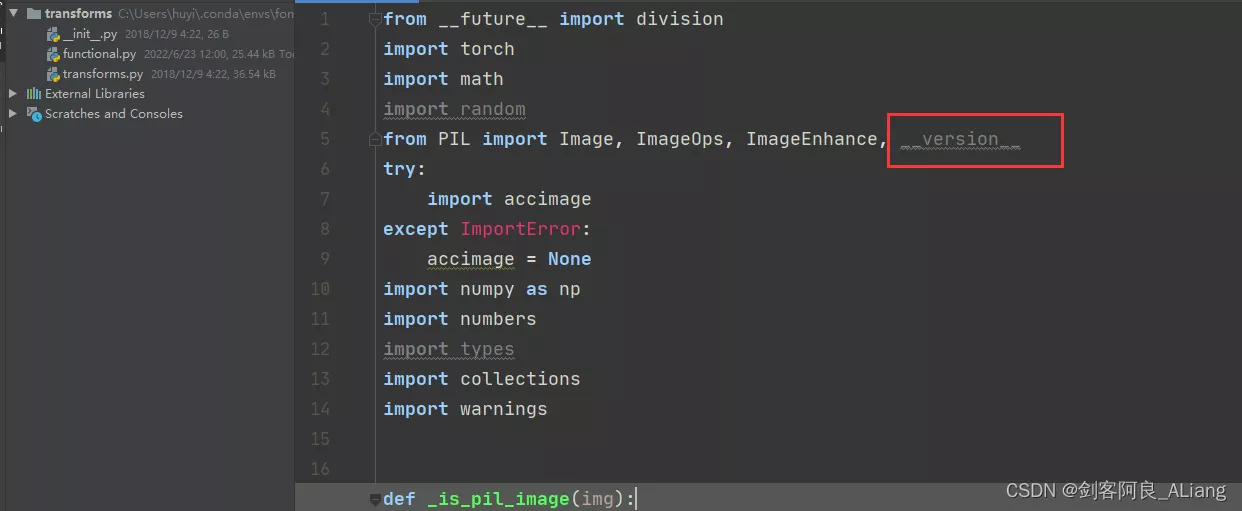
這個問題主要是我使用的pillow版本過高的原因,如果不想找對應的低版本,可以按照我的方式解決。
1、修改functional.py代碼,將PILLOW_VERSION調整為__version__。

2、將imageio升級。
pip install --upgrade imageio -i https://pypi.douban.com/simple
3、安裝imageio_ffmpeg模塊。
pip install imageio-ffmpeg -i https://pypi.douban.com/simple
官方給出的使用方法我就不重復測試,大家可以按照下面的命令去測試一下。

這裡我推薦一個可視化的庫gradio,下面我將demo.py的代碼改造了一下。
新的工具文件代碼如下:
#!/user/bin/env python# coding=utf-8"""@project : [email protected] : 劍客阿良[email protected] : [email protected] : [email protected] : 2022-06-23 14:35:28"""import uuidfrom typing import Optionalimport gradio as grimport matplotlibmatplotlib.use('Agg')import os, sysimport yamlfrom argparse import ArgumentParserfrom tqdm import tqdmimport imageioimport numpy as npfrom skimage.transform import resizefrom skimage import img_as_ubyteimport torchfrom sync_batchnorm import DataParallelWithCallbackfrom modules.generator import OcclusionAwareGeneratorfrom modules.keypoint_detector import KPDetectorfrom animate import normalize_kpfrom scipy.spatial import ConvexHullif sys.version_info[0] < 3: raise Exception("You must use Python 3 or higher. Recommended version is Python 3.7")def load_checkpoints(config_path, checkpoint_path, cpu=False): with open(config_path) as f: config = yaml.load(f) generator = OcclusionAwareGenerator(**config['model_params']['generator_params'], **config['model_params']['common_params']) if not cpu: generator.cuda() kp_detector = KPDetector(**config['model_params']['kp_detector_params'], **config['model_params']['common_params']) if not cpu: kp_detector.cuda() if cpu: checkpoint = torch.load(checkpoint_path, map_location=torch.device('cpu')) else: checkpoint = torch.load(checkpoint_path) generator.load_state_dict(checkpoint['generator']) kp_detector.load_state_dict(checkpoint['kp_detector']) if not cpu: generator = DataParallelWithCallback(generator) kp_detector = DataParallelWithCallback(kp_detector) generator.eval() kp_detector.eval() return generator, kp_detectordef make_animation(source_image, driving_video, generator, kp_detector, relative=True, adapt_movement_scale=True, cpu=False): with torch.no_grad(): predictions = [] source = torch.tensor(source_image[np.newaxis].astype(np.float32)).permute(0, 3, 1, 2) if not cpu: source = source.cuda() driving = torch.tensor(np.array(driving_video)[np.newaxis].astype(np.float32)).permute(0, 4, 1, 2, 3) kp_source = kp_detector(source) kp_driving_initial = kp_detector(driving[:, :, 0]) for frame_idx in tqdm(range(driving.shape[2])): driving_frame = driving[:, :, frame_idx] if not cpu: driving_frame = driving_frame.cuda() kp_driving = kp_detector(driving_frame) kp_norm = normalize_kp(kp_source=kp_source, kp_driving=kp_driving, kp_driving_initial=kp_driving_initial, use_relative_movement=relative, use_relative_jacobian=relative, adapt_movement_scale=adapt_movement_scale) out = generator(source, kp_source=kp_source, kp_driving=kp_norm) predictions.append(np.transpose(out['prediction'].data.cpu().numpy(), [0, 2, 3, 1])[0]) return predictionsdef find_best_frame(source, driving, cpu=False): import face_alignment def normalize_kp(kp): kp = kp - kp.mean(axis=0, keepdims=True) area = ConvexHull(kp[:, :2]).volume area = np.sqrt(area) kp[:, :2] = kp[:, :2] / area return kp fa = face_alignment.FaceAlignment(face_alignment.LandmarksType._2D, flip_input=True, device='cpu' if cpu else 'cuda') kp_source = fa.get_landmarks(255 * source)[0] kp_source = normalize_kp(kp_source) norm = float('inf') frame_num = 0 for i, image in tqdm(enumerate(driving)): kp_driving = fa.get_landmarks(255 * image)[0] kp_driving = normalize_kp(kp_driving) new_norm = (np.abs(kp_source - kp_driving) ** 2).sum() if new_norm < norm: norm = new_norm frame_num = i return frame_numdef h_interface(input_image: str): parser = ArgumentParser() opt = parser.parse_args() opt.config = "./config/vox-256.yaml" opt.checkpoint = "./checkpoint/vox-cpk.pth.tar" opt.source_image = input_image opt.driving_video = "./data/input/ts.mp4" opt.result_video = "./data/result/{}.mp4".format(uuid.uuid1().hex) opt.relative = True opt.adapt_scale = True opt.cpu = True opt.find_best_frame = False opt.best_frame = False # source_image = imageio.imread(opt.source_image) source_image = opt.source_image reader = imageio.get_reader(opt.driving_video) fps = reader.get_meta_data()['fps'] driving_video = [] try: for im in reader: driving_video.append(im) except RuntimeError: pass reader.close() source_image = resize(source_image, (256, 256))[..., :3] driving_video = [resize(frame, (256, 256))[..., :3] for frame in driving_video] generator, kp_detector = load_checkpoints(config_path=opt.config, checkpoint_path=opt.checkpoint, cpu=opt.cpu) if opt.find_best_frame or opt.best_frame is not None: i = opt.best_frame if opt.best_frame is not None else find_best_frame(source_image, driving_video, cpu=opt.cpu) print("Best frame: " + str(i)) driving_forward = driving_video[i:] driving_backward = driving_video[:(i + 1)][::-1] predictions_forward = make_animation(source_image, driving_forward, generator, kp_detector, relative=opt.relative, adapt_movement_scale=opt.adapt_scale, cpu=opt.cpu) predictions_backward = make_animation(source_image, driving_backward, generator, kp_detector, relative=opt.relative, adapt_movement_scale=opt.adapt_scale, cpu=opt.cpu) predictions = predictions_backward[::-1] + predictions_forward[1:] else: predictions = make_animation(source_image, driving_video, generator, kp_detector, relative=opt.relative, adapt_movement_scale=opt.adapt_scale, cpu=opt.cpu) imageio.mimsave(opt.result_video, [img_as_ubyte(frame) for frame in predictions], fps=fps) return opt.result_videoif __name__ == "__main__": demo = gr.Interface(h_interface, inputs=[gr.Image(shape=(500, 500))], outputs=[gr.Video()]) demo.launch() # h_interface("C:\\Users\\huyi\\Desktop\\xx3.jpg")代碼說明
1、將原demo.py中的main函數內容,重新編輯為h_interface方法,輸入是想要驅動的圖片。
2、其中driving_video參數使用了我自己錄制的一段表情視頻ts.mp4,我建議在使用的時候可以自己用手機錄制一段替換。
3、使用gradio來生成方法的頁面,下面會展示給大家看。
4、使用uuid為結果視頻命名。
執行結果如下
Running on local URL: http://127.0.0.1:7860/
To create a public link, set `share=True` in `launch()`.
打開本地的地址:http://localhost:7860/
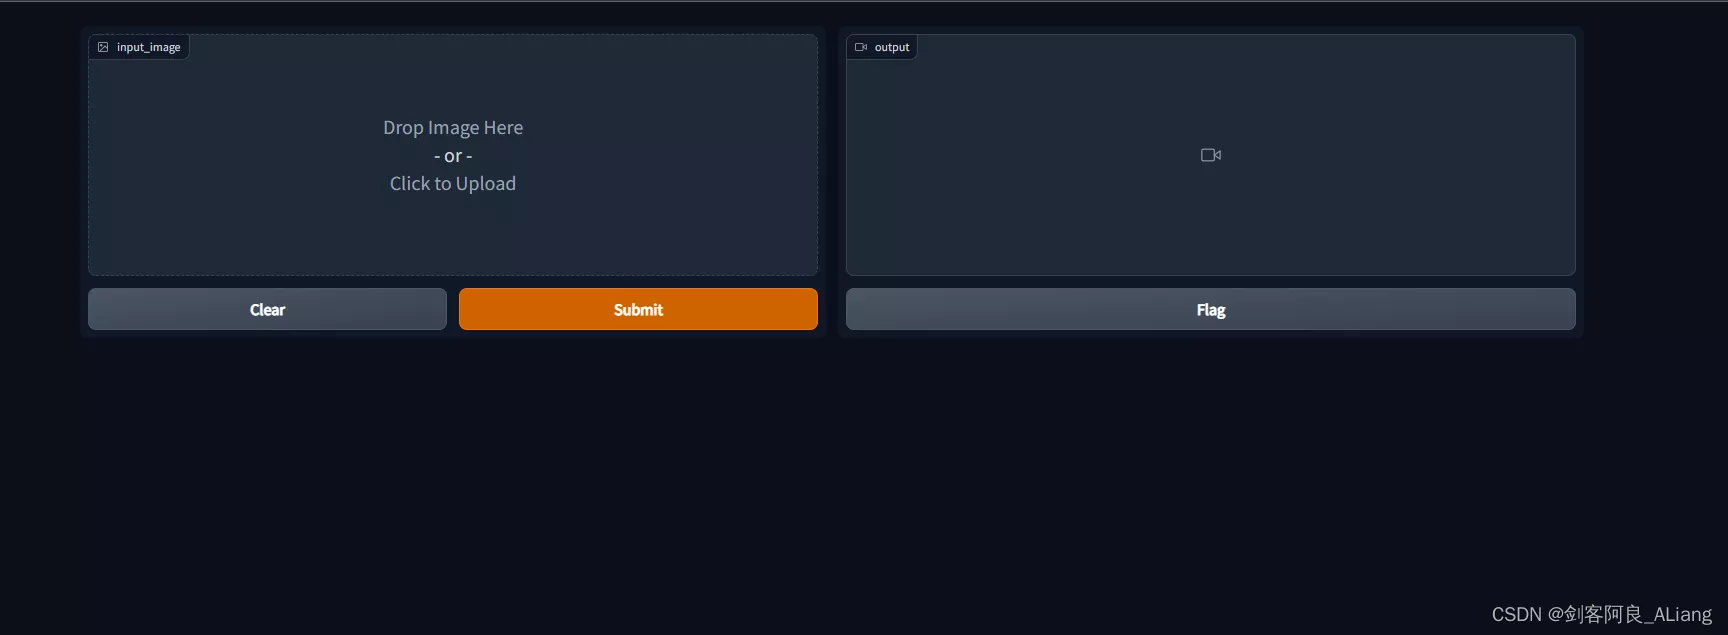
可以看到我們實現的交互界面如下:

我們上傳一下我准備的樣例圖片,提交制作。

看一下執行的日志,如下圖。

看一下制作結果。

由於上傳不了視頻,我將視頻轉成了gif。

還是蠻有意思的,具體的參數調優我就不弄了,大家可能根據需要調整我提供的方法裡面的參數。
以上就是Python first-order-model實現讓照片動起來的詳細內容,更多關於Python 照片動起來的資料請關注軟件開發網其它相關文章!