wxpython stay windows The system is similar to the normal library installation
pip install wxpython
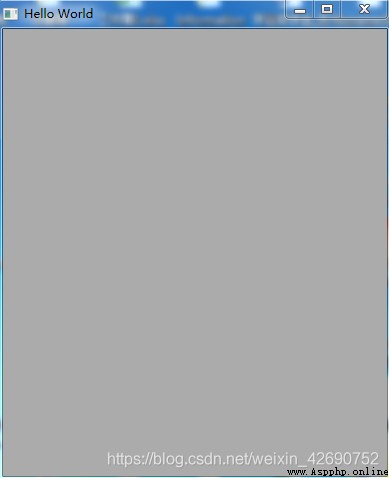
The simplest pop-up title is “Hello World” The window of
# First things, first. Import the wxPython package.
import wx
# Next, create an application object.
app = wx.App()
# Then a frame.
frm = wx.Frame(None, title="Hello World")
# Show it.
frm.Show()
# Start the event loop.
app.MainLoop()
The results are shown in the following figure 
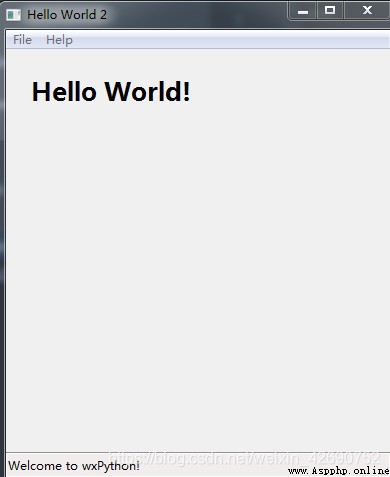
Implement some more complex functions
#!/usr/bin/env python
""" Hello World, but with more meat. """
import wx
class HelloFrame(wx.Frame):
""" A Frame that says Hello World """
def __init__(self, *args, **kw):
# ensure the parent's __init__ is called
super(HelloFrame, self).__init__(*args, **kw)
# create a panel in the frame
pnl = wx.Panel(self)
# put some text with a larger bold font on it
st = wx.StaticText(pnl, label="Hello World!")
font = st.GetFont()
font.PointSize += 10
font = font.Bold()
st.SetFont(font)
# and create a sizer to manage the layout of child widgets
sizer = wx.BoxSizer(wx.VERTICAL)
sizer.Add(st, wx.SizerFlags().Border(wx.TOP|wx.LEFT, 25))
pnl.SetSizer(sizer)
# create a menu bar
self.makeMenuBar()
# and a status bar
self.CreateStatusBar()
self.SetStatusText("Welcome to wxPython!")
def makeMenuBar(self):
""" A menu bar is composed of menus, which are composed of menu items. This method builds a set of menus and binds handlers to be called when the menu item is selected. """
# Make a file menu with Hello and Exit items
fileMenu = wx.Menu()
# The "\t..." syntax defines an accelerator key that also triggers
# the same event
helloItem = fileMenu.Append(-1, "&Hello...\tCtrl-H",
"Help string shown in status bar for this menu item")
fileMenu.AppendSeparator()
# When using a stock ID we don't need to specify the menu item's
# label
exitItem = fileMenu.Append(wx.ID_EXIT)
# Now a help menu for the about item
helpMenu = wx.Menu()
aboutItem = helpMenu.Append(wx.ID_ABOUT)
# Make the menu bar and add the two menus to it. The '&' defines
# that the next letter is the "mnemonic" for the menu item. On the
# platforms that support it those letters are underlined and can be
# triggered from the keyboard.
menuBar = wx.MenuBar()
menuBar.Append(fileMenu, "&File")
menuBar.Append(helpMenu, "&Help")
# Give the menu bar to the frame
self.SetMenuBar(menuBar)
# Finally, associate a handler function with the EVT_MENU event for
# each of the menu items. That means that when that menu item is
# activated then the associated handler function will be called.
self.Bind(wx.EVT_MENU, self.OnHello, helloItem)
self.Bind(wx.EVT_MENU, self.OnExit, exitItem)
self.Bind(wx.EVT_MENU, self.OnAbout, aboutItem)
def OnExit(self, event):
"""Close the frame, terminating the application."""
self.Close(True)
def OnHello(self, event):
"""Say hello to the user."""
wx.MessageBox("Hello again from wxPython")
def OnAbout(self, event):
"""Display an About Dialog"""
wx.MessageBox("This is a wxPython Hello World sample",
"About Hello World 2",
wx.OK|wx.ICON_INFORMATION)
if __name__ == '__main__':
# When this module is run (not imported) then create the app, the
# frame, show it, and start the event loop.
app = wx.App()
frm = HelloFrame(None, title='Hello World 2')
frm.Show()
app.MainLoop()
The result is shown in the following figure 
Use wxFormBuilder Software for page design , And get the python Code , The download address of the software is https://sourceforge.net/projects/wxformbuilder/
Then we will develop the business logic
stay wxFormBuilder Page design , The code is as follows , And named it frame.py
# -*- coding: utf-8 -*-
###########################################################################
## Python code generated with wxFormBuilder (version Jun 17 2015)
## http://www.wxformbuilder.org/
##
## PLEASE DO "NOT" EDIT THIS FILE!
###########################################################################
import wx
import wx.xrc
###########################################################################
## Class Frame
###########################################################################
class Frame(wx.Frame):
def __init__(self, parent):
wx.Frame.__init__(self, parent, id=wx.ID_ANY, title=u"Hello World", pos=wx.DefaultPosition,
size=wx.Size(500, 300), style=wx.DEFAULT_FRAME_STYLE | wx.TAB_TRAVERSAL)
self.SetSizeHintsSz(wx.DefaultSize, wx.DefaultSize)
bSizer1 = wx.BoxSizer(wx.VERTICAL)
self.caption = wx.StaticText(self, wx.ID_ANY, u" Simple addition calculation ", wx.DefaultPosition, wx.DefaultSize, 0)
self.caption.Wrap(-1)
bSizer1.Add(self.caption, 0, wx.ALL, 5)
self.text1 = wx.TextCtrl(self, wx.ID_ANY, u"0", wx.DefaultPosition, wx.DefaultSize, 0)
bSizer1.Add(self.text1, 0, wx.ALL, 5)
self.cal = wx.StaticText(self, wx.ID_ANY, u"+", wx.DefaultPosition, wx.DefaultSize, 0)
self.cal.Wrap(-1)
bSizer1.Add(self.cal, 0, wx.ALL, 5)
self.text2 = wx.TextCtrl(self, wx.ID_ANY, u"0", wx.DefaultPosition, wx.DefaultSize, 0)
bSizer1.Add(self.text2, 0, wx.ALL, 5)
self.button_main = wx.Button(self, wx.ID_ANY, u" Calculation ", wx.DefaultPosition, wx.DefaultSize, 0)
bSizer1.Add(self.button_main, 0, wx.ALL, 5)
self.result = wx.TextCtrl(self, wx.ID_ANY, u"0", wx.DefaultPosition, wx.DefaultSize, 0)
bSizer1.Add(self.result, 0, wx.ALL, 5)
self.SetSizer(bSizer1)
self.Layout()
self.Centre(wx.BOTH)
# Connect Events
self.button_main.Bind(wx.EVT_BUTTON, self.main_button_click)
def __del__(self):
pass
# Virtual event handlers, overide them in your derived class
def main_button_click(self, event):
event.Skip()
Write another one. main.py The addition function can be realized
#!/usr/bin/env python
# -*- coding: utf-8 -*-
import wx
import frame
class Window(frame.Frame):
def init_main_window(self):
self.text1.SetValue('0')
self.text2.SetValue('0')
def main_button_click(self, event):
try:
res = int(self.text1.GetValue()) + int(self.text2.GetValue())
self.result.SetValue(str(res))
except:
self.result.SetValue(' Incorrect input , Please re-enter ')
if __name__ == '__main__':
app = wx.App()
main_win = Window(None)
main_win.init_main_window()
main_win.Show()
app.MainLoop()
The first step is to install pywin32 modular
pip install pywin32
The second step is to install pyinstaller modular
pip install pyinstaller
The third step is to use pyinstaller package , Such as
pyinstaller -F demo.py
The packaging command is generally used pyinstaller -F < The source file name .py>
Other parameters include :
–clean: Clear the temporary directory generated during packaging :pychache、build
-D,–onedir: Generate a folder containing executable files , Instead of a single executable
-F,–onefile: Generate a single executable ( convenient )
-i < Icon file .iclo>: Specify the icon of the executable