第一種:.py文件直接封裝成exe
第二種:整個項目封裝成exe
補充說明:
總結
第一種:.py文件直接封裝成exe1.cmd進入py文件所在的目錄
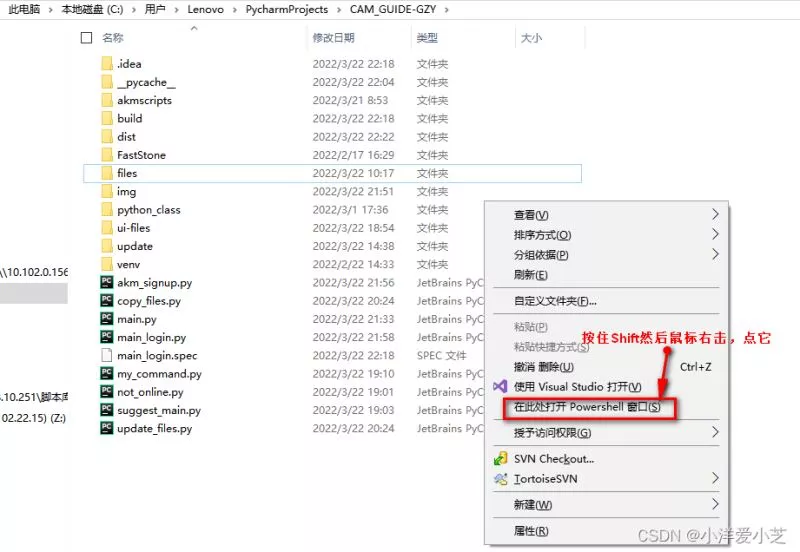
備注:在py文件所在的目錄下,按住shift+鼠標右擊,然後找到“在此處打開PowerShell窗口”,即可進入當前目錄
2.輸入以下代碼:
備注:使用-D制作出來的exe比使用-F的快很多,因為-F把所有dll文件都打包到一個exe中了(-F這時候exe會很大,加載變慢,推薦-D)
#-w:不顯示後台 -i添加圖標pyinstaller -D -w -i D:\\main.ico ***.py(py文件名)第二種:整個項目封裝成exe1.打開項目的位置;
2.打開cmd,切換到項目的路徑下,在控制台輸入:
#為了解決編碼問題chcp 650013.打開cmd,切換到項目的路徑下,在控制台輸如:
生成main.spec文件
pyi-makespec main.py4.制作spec文件
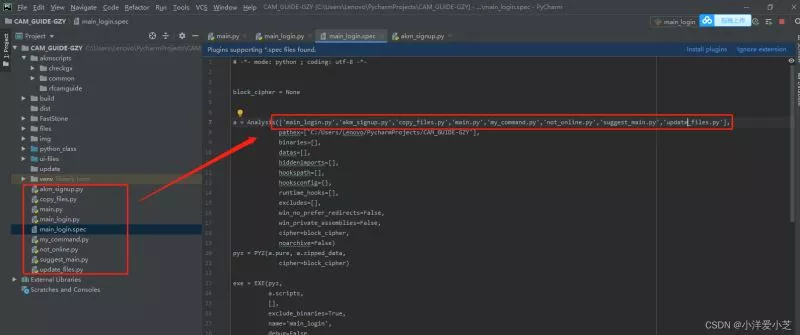
# -*- mode: python ; coding: utf-8 -*-block_cipher = Nonea = Analysis(['main_login.py','akm_signup.py','copy_files.py','main.py','my_command.py','not_online.py','suggest_main.py','update_files.py'], pathex=['C:/Users/Lenovo/PycharmProjects/CAM_GUIDE-GZY'], binaries=[], datas=[], hiddenimports=[], hookspath=[], hooksconfig={}, runtime_hooks=[], excludes=[], win_no_prefer_redirects=False, win_private_assemblies=False, cipher=block_cipher, noarchive=False)pyz = PYZ(a.pure, a.zipped_data, cipher=block_cipher)exe = EXE(pyz, a.scripts, [], exclude_binaries=True, name='main_login', debug=False, bootloader_ignore_signals=False, strip=False, upx=True, console=True, disable_windowed_traceback=False, target_arch=None, codesign_identity=None, entitlements_file=None , icon='D:\\auto.ico' )coll = COLLECT(exe, a.binaries, a.zipfiles, a.datas, strip=False, upx=True, upx_exclude=[], name='main_login')a.Analysis中輸入所有的py文件,與main(我這裡是main_login,這裡其實指的事你的主文件)一個文件夾的可以直接寫文件名,不一個文件夾的需要寫完整的文件路徑
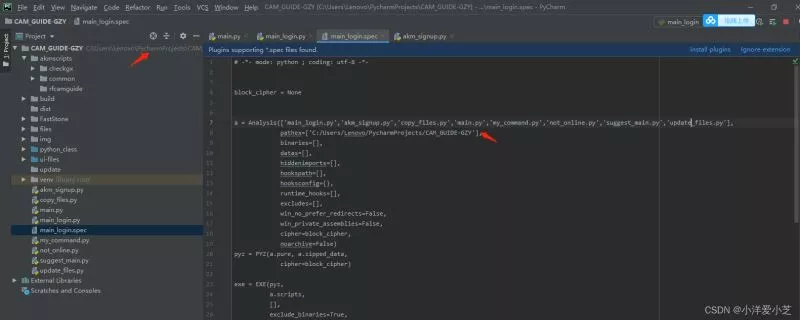
b.pathex中輸入項目的路徑
c.如果exe要自定義一個圖標的話需要調整entitlements_file=None這邊(注意:這裡用-i無法自定義圖標)
entitlements_file=None , icon='D:\\auto.ico')…其余的一般不用填
d.用配置好的spec文件制作exe:
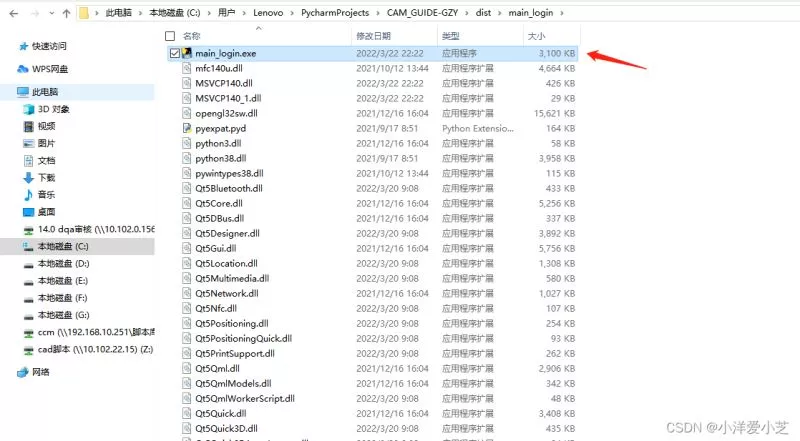
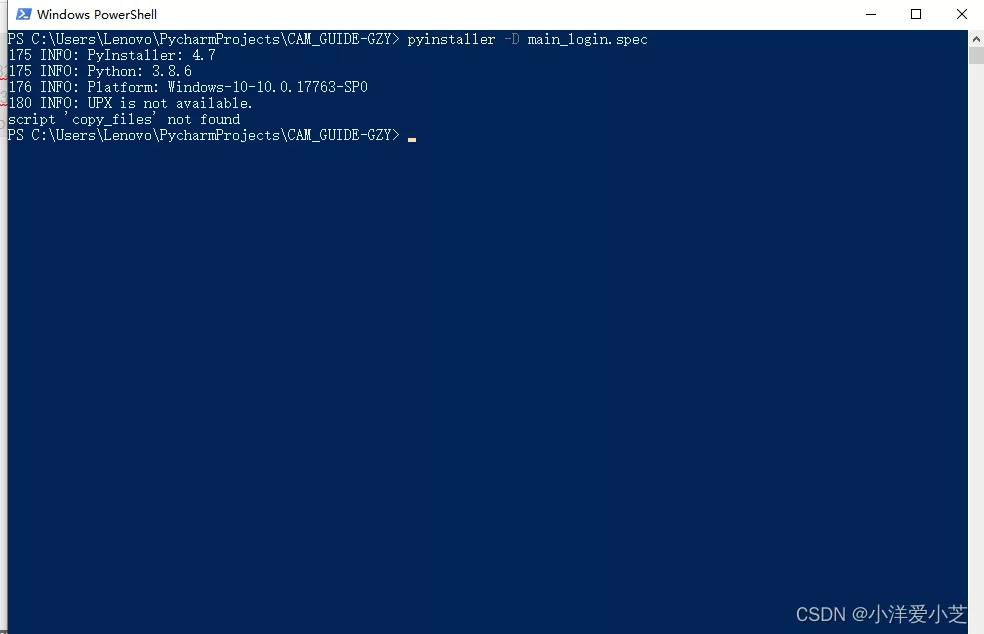
pyinstaller -D main_login.specmain.exe(我這裡是main_login.exe啦)路徑在該目錄的dist文件夾下
shift+鼠標右擊+在此處打開PowerShell窗口,效果如下:
到此這篇關於python封裝成exe的文章就介紹到這了,更多相關python封裝成exe內容請搜索軟件開發網以前的文章或繼續浏覽下面的相關文章希望大家以後多多支持軟件開發網!