Preface
install
Code transformation and use
PrefaceIn fact, I wanted to write about the painting of old photos long ago , Many people also asked me about this project .
Recently DeOldify The project is well done .
Project address :DeOldify Project address
First, let's take a look at the picture comparison effect given by the project .
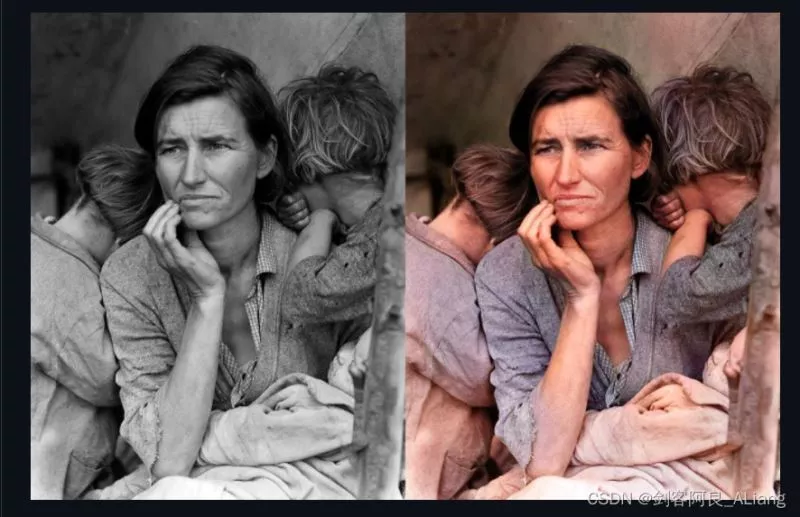
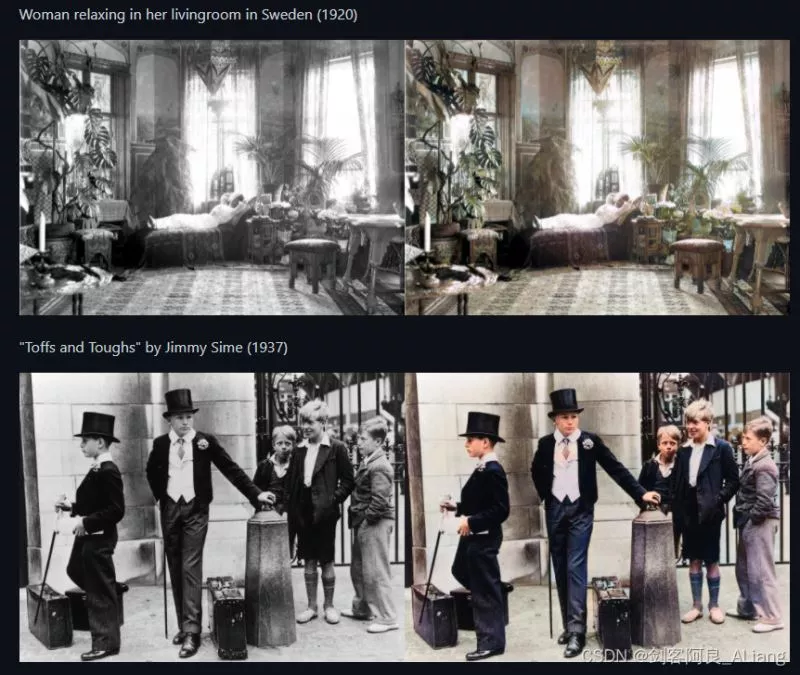
It can be seen from the given effect , The colored picture is right for the character 、 scenery 、 goods 、 The environment has become very vivid .
Let's install the project execution environment , Test your picture .
installTake a look at the results of the project README The installation section of .
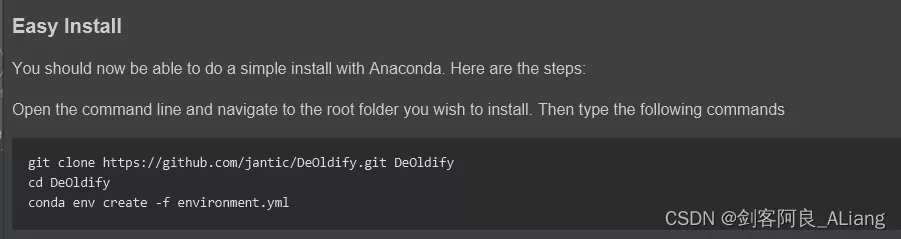
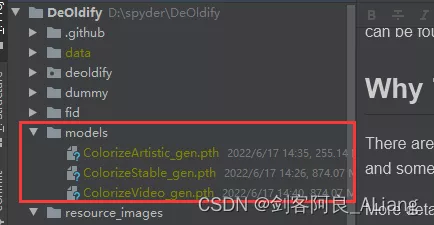
Use anaconda Installation environment . After the installation, see what model files need to be downloaded .
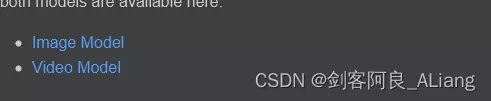
Take a closer look at , This paper gives the difference between different models .
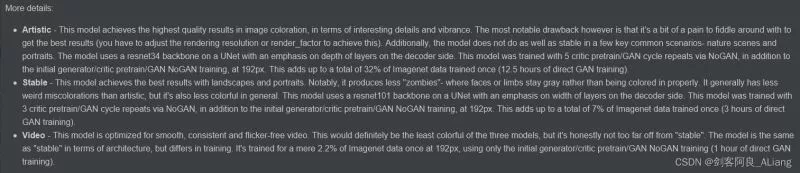
From the author's description , You can see the front 2 A model mainly for images , One art, one stability , See the difference when you use it .
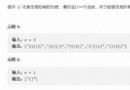
If the three models are difficult to download , You can download it from my network disk , The address is as follows .
link Extraction code :kr3c
Download the 3 Model files are placed in the root directory of the project models In the folder , Create without models.
The author in README Given in docker Quick start and api Starting mode . A little bit of a problem , I'd better change it myself .
Have a look first app.py Code content .
@app.route("/process", methods=["POST"])def process_image(): input_path = generate_random_filename(upload_directory,"jpeg") output_path = os.path.join(results_img_directory, os.path.basename(input_path)) try: if 'file' in request.files: file = request.files['file'] if allowed_file(file.filename): file.save(input_path) try: render_factor = request.form.getlist('render_factor')[0] except: render_factor = 30 else: url = request.json["url"] download(url, input_path) try: render_factor = request.json["render_factor"] except: render_factor = 30 result = None try: result = image_colorizer.get_transformed_image(input_path, render_factor=render_factor, post_process=True, watermarked=True) except: convertToJPG(input_path) result = image_colorizer.get_transformed_image(input_path, render_factor=render_factor, post_process=True, watermarked=True) finally: if result is not None: result.save(output_path, quality=95) result.close() callback = send_file(output_path, mimetype='image/jpeg') return callback, 200 except: traceback.print_exc() return {'message': 'input error'}, 400 finally: pass clean_all([ input_path, output_path ])It can be seen that POST The main operations of the interface are divided into : Get file stream 、 Adjust the rendering factor according to the parameters ( The default is 30)、 adopt image_colorizer Object for coloring 、 Finally, the file stream is returned to . According to this method, I modified a tool method for direct use .
The code is as follows :
#!/user/bin/env python# coding=utf-8"""@project : [email protected] : Swordsman a Liang [email protected] : [email protected] : [email protected] : 2022-06-17 16:37:13"""import osfrom pathlib import Pathfrom app_utils import convertToJPGfrom deoldify.visualize import ModelImageVisualizer, get_image_colorizerdef colorizer(input_path, output_dir): _output_path = os.path.join(output_dir, os.path.basename(input_path)) _image_colorizer = get_image_colorizer(artistic=True) try: result = _image_colorizer.get_transformed_image(input_path, render_factor=30, post_process=True, watermarked=True) except: convertToJPG(input_path) result = _image_colorizer.get_transformed_image(input_path, render_factor=30, post_process=True, watermarked=True) finally: if result is not None: result.save(_output_path, quality=95) result.close()if __name__ == '__main__': colorizer("./data/image/xxx1.jpg", "./data/result1")I will not deal with some abnormal situations , If necessary , Add some supplementary code when using .
artistic Parameter as whether to use art model bool Parameters .
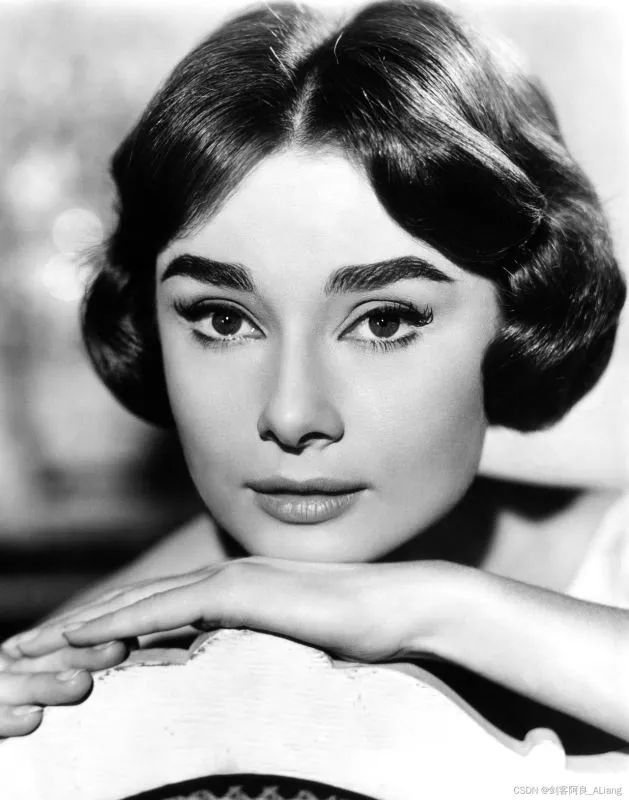
Take a look at the photos I prepared that need coloring .
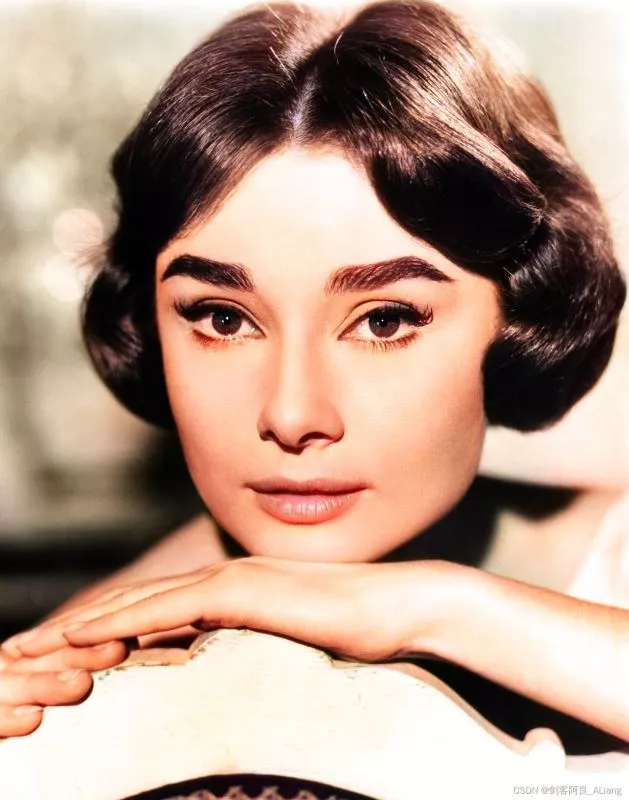
choice Artistic The effect of the model is as follows :
choice Stable The effect of the model is as follows :

There are still some differences , I just don't have any artistic germs , I can't see how artistic .
Be careful
1、 The above tool code introduces several methods in the project , There may be a problem of missing incoming packages . The supplementary installation is as follows :
pip install opencv-python -i https://pypi.douban.com/simple
pip install scikit-image -i https://pypi.douban.com/simple
pip install ffmpeg -i https://pypi.douban.com/simple
2、 install scikit-image It'll be installed when it's ready Pillow The latest version , May cause execution errors , Supplement, uninstall and install Pillow as follows :
pip uninstall Pillow
pip install Pillow==6.2.2
That's all Python+DeOldify Details of realizing the coloring function of old photos , More about Python DeOldify For information on coloring old photos, please pay attention to other relevant articles on the software development network !