Qt5 Do not install by default MySQL Database driven , This gives support to different versions of MySQL Database support provides flexible support , At the same time, it improves MySQL The difficulty of using the database . This article details how to install MySQL Database driver plug-in and use .
In the installation MySQL Before plug in , You need to prepare the following software :
MySQL database , The version used in this instance is 8.0.28, This version comes with MySQL Connector C, Therefore, no additional installation is required MySQL Connector C.
Visual Studio 2019 Community version ,Visual Studio 2019 Need to install VC++ Function module
Qt frame : Used in this instance Qt The Framework version is 5.15.2, And install Qt Framework source code
Python development environment :anaconda,Anaconda Of Python Version is 3.9.7
install PyQt5 And its related components :
pip install PyQt5==5.15.2 pyqtwebengine==5.15.2 pyqtdatavisualization==5.15.2 pyqtchart==5.15.2 pyqt3d==5.15.2 pyqt5-plugins==5.15.2.2.2 qscintilla==2.12.0
First step : open Visual Studio 2019 The command line :X64 Native Tools Command Prompt for VS 2019
The second step : Navigate the directory to... In the command Qt Install under directory sql Driver plug-in Directory :
cd %QTDIR%\Src\qtbase\src\plugins\sqldrivers
The location of this article is :
C:\Qt\5.15.2\Src\qtbase\src\plugins\sqldrivers
The third step : To configure MySQL Database driven plug-in compilation options :
install MySQL Connector C edition
qmake -- MYSQL_INCDIR="C:/Program Files/MySQL/MySQL Connector C 6.1/include" MYSQL_LIBDIR="C:/Program Files/MySQL/MySQL Connector C 6.1/lib"
The command line used this time is as follows :
qmake -- MYSQL_INCDIR="C:\Program Files\MySQL\MySQL Server 8.0\include" MYSQL_LIBDIR="C:\Program Files\MySQL\MySQL Server 8.0\lib"
Be careful ,qmake The command must add the current command line environment
Step four : Compile and install MySQL Database driver plug-in
nmake sub-mysql
nmake install
After compiling and installing ,MySQL The database plug-in is automatically installed to ,Qt Installation position of frame . The location here is :
C:\Qt\5.15.2\msvc2019_64\plugins\sqldrivers

Finally, put the... In the red box 4 Files copied to PyQt5 In the database plug-in folder of , The position here is :
C:\Anaconda3\Lib\site-packages\PyQt5\Qt\plugins\sqldrivers
Please follow your own Anaconda Install find .
Step five , take MySQL Drive support DLL Copied to the Anaconda The root directory of the installation directory :
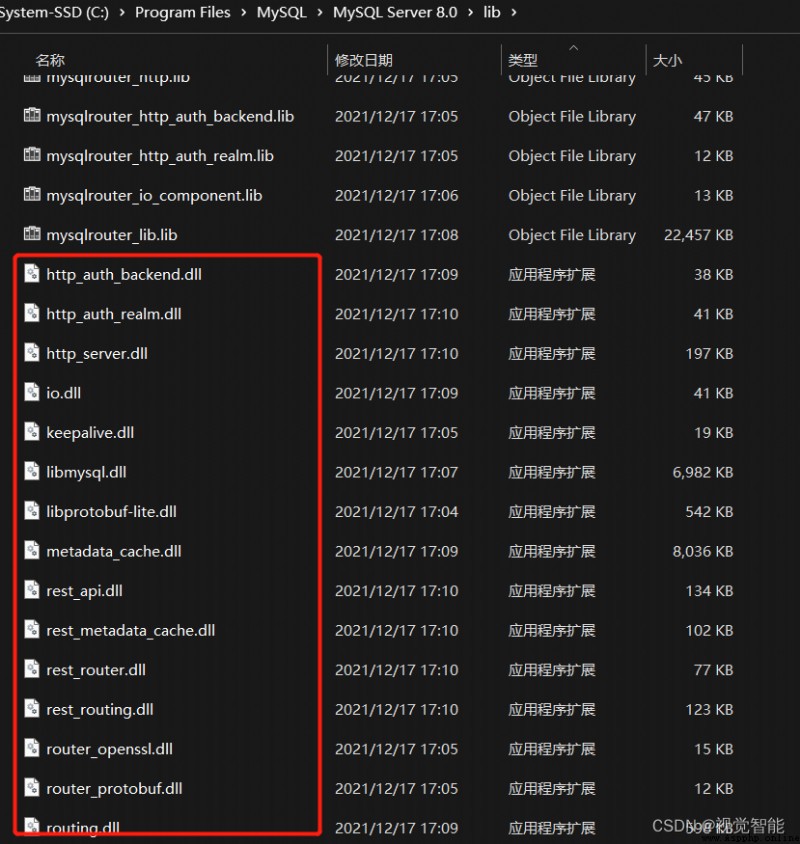
Be careful , If you do not copy these files to Anaconda Root directory or other system environment , Otherwise, the subsequent database connection will not succeed .
Complete the previous steps , It can be used normally MySQL Database driven plug-ins .
First step , Import dependency Library :
import sys
from PyQt5.QtSql import QSqlDatabase
The second step , Query the current database driver plug-in
drivers = QSqlDatabase.drivers()
print(drivers)
The output here is as follows :
[‘QSQLITE’, ‘QMARIADB’, ‘QMYSQL’, ‘QMYSQL3’, ‘QODBC’, ‘QODBC3’, ‘QPSQL’, ‘QPSQL7’]
You can tell from the output ,QMYSQL Express MySQL The database driver has been successfully installed
The third step , Connect to database
# load MySQL Database driven
db = QSqlDatabase.addDatabase("QMYSQL")
# Set up the database IP Address
db.setHostName('localhost')
# Set database port
db.setPort(3306)
# Please modify according to your own database name
db.setDatabaseName(' Database name ')
db.setUserName('MySQL Database user name ')
db.setPassword('MySQL Database user login password ')
# Connect and open the database
db.open()
if db.isOpen():
print("connected to mysql database")
else:
print("mysql connect failed:",db.lastError().text())
sys.exit()
# Close the database
db.close()
The output here is as follows :