我們首先要知道
用Spring主要是兩件事:
1、開發Bean;2、配置Bean。對於Spring框架來說,它要做的,就是根據配置文件來創建bean實例,並調用bean實例的方法完成“依賴注入”。
Spring框架的作用是什麼?有什麼優點?
現在我們用例子來具體理解它
1)setter(設置)注入
2)構造器注入
3)接口注入
但是,我們要了解什麼是依賴?
我們所知道的依賴:
①依靠別人或事物而不能自立或自給;②指各個事物或現象互為條件而不可分離。
專業解析:依賴,在代碼中一般指通過局部變量,方法參數,返回值等建立的對於其他對象的調用關系。
例如:在A類的方法中,實例化了B類的對象並調用其方法以完成特定的功能,我們就說A類依賴於B類。
Spring設置注入和構造注入的區別
設置注入是先通過調用無參構造器創建一個bean實例,然後調用對應的setter方法注入依賴關系;而構造注入則直接調用有參數的構造器,當bean實例創建完成後,已經完成了依賴關系的注入。另外這兩種依賴注入的方式,並沒有絕對的好壞,只是適應的場景有所不同。
setter方法注入:
Entity
public class Happy {
private String happyInfo;


public void happy(){
    System.out.println(happyInfo);
}

public String getHappyInfo() {
    return happyInfo;
}

public void setHappyInfo(String happyInfo) {
    this.happyInfo = happyInfo;
}
applicationContext.xml:
<?xml version="1.0" encoding="UTF-8"?>
<beans xmlns="http://www.springframework.org/schema/beans"
    xmlns:xsi="http://www.w3.org/2001/XMLSchema-instance"
    xsi:schemaLocation="
        http://www.springframework.org/schema/beans http://www.springframework.org/schema/beans/spring-beans.xsd">
 <!-- IOC 將Happy 交給Spring管理 -->
   <bean id="happy" class="cn.wgy.day_01.entity.Happy">
        <!-- DI 從setInfo方法得知,Happy依賴info屬性,注入            賦值-->
        <!--通過框架來賦值,不能用set()方法來賦值  -->
        <!--happyinfo 是set()提供的  -->
         <property name="happyInfo" value="中秋快樂"></property>
         <!-- <property name="happyInfo">
         <value>中秋快樂</value>
         </property> -->
   </bean>
</beans>
test類
public static void main(String[] args) {
    //獲取上下文對象
    //ApplicationContext context2=new FileSystemXmlApplicationContext("applicationContext.xml");

    //BeanFactory beanf=new FileSystemXmlApplicationContext("applicationContext.xml");

    ApplicationContext context=new ClassPathXmlApplicationContext("applicationContext.xml");
    //    Object getBean(String name) throws BeansException;
    Happy happy = (Happy) context.getBean("happy");

    happy.happy();
}
}
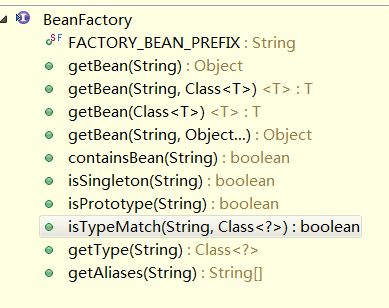
注意:ApplicationContext ,其實還有BeauFactory也可以,那麼它們兩的區別是啥呢?請看下面


BeanFacotry是spring中比較原始的Factory。如XMLBeanFactory就是一種典型的BeanFactory。原始的BeanFactory無法支持spring的許多插件,如AOP功能、Web應用等。
ApplicationContext接口,它由BeanFactory接口派生而來,因而提供BeanFactory所有的功能。ApplicationContext以一種更向面向框架的方式工作以及對上下文進行分層和實現繼承,ApplicationContext包還提供了以下的功能:
01.MessageSource, 提供國際化的消息訪問
02. 資源訪問,如URL和文件
03.事件傳播
04. 載入多個(有繼承關系)上下文 ,使得每一個上下文都專注於一個特定的層次,比如應用的web層
1.利用MessageSource進行國際化
BeanFactory是不支持國際化功能的,因為BeanFactory沒有擴展Spring中MessageResource接口。相反,由於ApplicationContext擴展了MessageResource接口,因而具有消息處理的能力(i18N)
ContextLoader有兩個實現:ContextLoaderListener和ContextLoaderServlet。它們兩個有著同樣的功能,除了listener不能在Servlet 2.2兼容的容器中使用。自從Servelt 2.4規范,listener被要求在web應用啟動後初始化。很多2.3兼容的容器已經實現了這個特性。使用哪一個取決於你自己,但是如果所有的條件都一樣,你大概會更喜歡ContextLoaderListener;關於兼容方面的更多信息可以參照ContextLoaderServlet的JavaDoc。
這個listener需要檢查contextConfigLocation參數。如果不存在的話,它將默認使用/WEB-INF/applicationContext.xml。如果它存在,它就會用預先定義的分隔符(逗號,分號和空格)分開分割字符串,並將這些值作為應用上下文將要搜索的位置。ContextLoaderServlet可以用來替換ContextLoaderListener。這個servlet像listener那樣使用contextConfigLocation參數。
5.其它區別
1).BeanFactroy采用的是延遲加載形式來注入Bean的,即只有在使用到某個Bean時(調用getBean()),才對該Bean進行加載實例化,這樣,我們就不能發現一些存在的spring的配置問題。而ApplicationContext則相反,它是在容器啟動時,一次性創建了所有的Bean。這樣,在容器啟動時,我們就可以發現Spring中存在的配置錯誤。
2).BeanFactory和ApplicationContext都支持BeanPostProcessor、BeanFactoryPostProcessor的使用,但兩者之間的區別是:BeanFactory需要手動注冊,而ApplicationContext則是自動注冊
構造器注入:
其他的代碼都差不多,這裡我就直接寫applicationContext.xml
        ">
  <!--構造器的注入  -->
  <bean id="user1" class="cn.wgy.day01.entity.User">
  <constructor-arg  index="0" type="java.lang.String" value="Promise"/>
  <constructor-arg  index="1" type="java.lang.String" value="[email protected]"/>
  </bean>
</beans>
多種方式實現依賴注入
設值注入 : 普通屬性,域屬性(JavaBean屬性)
構造注入: 普通屬性,域屬性(JavaBean屬性)
命名空間p注入: 普通屬性,域屬性(JavaBean屬性)
我們使用前要先要在Spring配置文件中引入p命名空間 :xmlns:p="http://www.springframework.org/schema/p"
 <bean id="user" class="cn.wgy.day01.entity.User" p:username="Promise">
 <!--通過value標簽注入直接量  -->
<property name="id">
<value type="java.lang.Integer">20</value>
</property>
 </bean>
 <!--案例二:注入引用bean  -->
 <bean id="dao" class="cn.wgy.day01.dao.impl.UserDao"/>
 <bean id="biz" class="cn.wgy.day01.biz.impl.UserBiz" >
 <property name="dao">
 <ref bean="dao"/>
 </property>
 </bean>
注入不同數據類型:
1.注入直接量
2.引用bean組件
3.使用內部bean
4.注入集合類型的屬性
5.注入null和空字符串
    <!--p命名空間注入屬性值 -->
    <!-- 案例一:普通的屬性 -->
    <bean id="user" class="cn.wgy.day01.entity.User" p:username="Promise"></bean>
    <!-- 案例二:引用Bean的屬性 -->
    <bean id="dao" class="cn.wgy.day01.dao.impl.UserDao" />
    <!--p命名空間注入的方式 -->
    <bean id="biz" class="cn.wgy.day01.biz.impl.UserBiz" p:dao-ref="dao"></bean>
    <!--案例三:注入集合類型的屬性 -->
    <!--01.List集合 -->
    <bean id="list" class="cn.wgy.day01.entity.CollectionBean">
        <property name="names">
            <list>
                <value>Promise</value>
                <value>Promise2</value>
            </list>
        </property>
    </bean>
    <!--02.Set集合 配置文件 -->
    <bean id="set" class="cn.wgy.day01.entity.CollectionBean">
        <property name="address">
            <set>
                <value>北京</value>
                <value>上海</value>
            </set>
        </property>
    </bean>
    <!--03.Map集合 -->
    <bean id="map" class="cn.wgy.day01.entity.CollectionBean">
        <property name="map">
            <map>
                <entry key="nh">
                    <key>
                        <value>1</value>
                    </key>
                    <value>12</value>

                </entry>
                <entry>
                    <key>
                        <value>2</value>
                    </key>
                    <value>20</value>

                </entry>
            </map>
        </property>
    </bean>

    <bean id="props" class="cn.wgy.day01.entity.CollectionBean">
        <property name="hobbies">
            <props>
                <prop key="f">足球</prop>
                <prop key="b">籃球</prop>
            </props>
        </property>
    </bean>
    <!--注入空字符串  -->
    <bean id="user2" class="cn.wgy.day01.entity.User">
    <property name="email"><value></value></property>
    </bean>
    <!-- 注入null值 -->
    <bean id="user3" class="cn.wgy.day01.entity.User">
    <property name="email"><null/></property>
    </bean>
話不多說,我們直接來代碼,加強理解
我們先看一個簡單的例子:Spring AOP實現日志的輸出,即後置增強和前置增強
我們看看代碼
aop包下
我們要實現AfterReturningAdvice 接口


public class LoggerAfter implements AfterReturningAdvice {
    //save()之後執行它
    public void afterReturning(Object returnValue, Method method, Object[] arguments    ,
            Object target) throws Throwable {
        System.out.println("===========後置增強代碼==========");

    }

}
前置,我們要實現MethodBeforeAdvice接口


 */
public class LoggerBefore implements MethodBeforeAdvice {
    //獲取日志對象
    private static final Logger log = Logger.getLogger(LoggerBefore.class);
    //save()之前執行它
    public void before(Method method, Object[] arguments, Object target)
            throws Throwable {
        log.info("==========前置增強代碼==========");

    }

}
實現類:
biz:
public class UserBiz implements IUserBiz {
     //實例化所依賴的UserDao對象,植入接口對象
      private IDao dao;
        public void save2(User user) {
            //調用UserDao的方法保存信息
            dao.save(user);
        }
        //dao 屬性的setter訪問器,會被Spring調用,實現設值注入
        public IDao getDao() {
            return dao;
        }
        public void setDao(IDao dao) {
            this.dao = dao;
        }
dao:
public class UserDao implements IDao {
    /**
     * 保存用戶信息的方法
     * @param user
     */
    public void save(User user) {
        System.out.println("save success!");
    }

}
src下的applicationContext.xml
     <!--配置實現類  -->
   <bean id="dao" class="cn.wgy.day01.dao.impl.UserDao"/>
   <bean id="biz" class="cn.wgy.day01.biz.impl.UserBiz">
      <property name="dao" ref="dao"></property>
   </bean>
   <!-- 定義前置增強組件 -->
   <bean id="loggerBefore" class="cn.wgy.day01.aop.LoggerBefore"/>
   <!-- 定義後置增強組件 -->
   <bean id="loggerAfter" class="cn.wgy.day01.aop.LoggerAfter"/>
      <!-- 代理對象 ProxyFactoryBean 代理工廠bean-->
     <bean id="serviceProxy" class="org.springframework.aop.framework.ProxyFactoryBean">
     <property name="targetName" value="biz"></property>
     <property name="interceptorNames" value="loggerBefore,loggerAfter"></property>
     </bean>
<!-- 針對AOP的配置
<aop:config>
execution:調用那個方法
<aop:pointcut id="pointcut" expression="execution(public void save2(cn.wgy.day01.entity.User))"/>
將增強處理和切入點結合在一起,在切入點處插入增強處理,完成"織入"
<aop:advisor pointcut-ref="pointcut" advice-ref="loggerBefore"/>
<aop:advisor pointcut-ref="pointcut" advice-ref="loggerAfter"/>
</aop:config> -->
test
public static void main(String[] args) {

    ApplicationContext ctx = new ClassPathXmlApplicationContext("applicationContext.xml");
    //獲取到biz對象,即業務邏輯層對象

    IUserBiz biz=(IUserBiz)ctx.getBean("serviceProxy");
    User user=new User();
    /**
     * 執行這個方法時,先走前置增強,before(),然後走中間的方法,最後走後置增強
     */
    biz.save2(user);
    System.out.println("success!");
}
這個簡單的例子就很好的體現出了Spring AOP的力量
順便我們一起來看看其他增強類型
環繞增強:可以把前置增強和後置增強結合起來,spring吧目標的方法的控制權全部交給了它。我們要實現MethodInterceptor接口


aop:
public class AroundLog implements MethodInterceptor {
    private static final Logger log = Logger.getLogger(AroundLog.class);

    public Object invoke(MethodInvocation arg0) throws Throwable {
        /*Object target = arg0.getThis(); // 獲取被代理對象
        Method method = arg0.getMethod(); // 獲取被代理方法
        Object[] args = arg0.getArguments(); // 獲取方法參數
        log.info("調用 " + target + " 的 " + method.getName() + " 方法。方法入參:"
            + Arrays.toString(args));
        try {    Object result = arg0.proceed(); // 調用目標方法,獲取目標方法返回值
            log.info("調用 " + target + " 的 " + method.getName() + " 方法。 "
                + "方法返回值:" + result);
            return result;
        } catch (Throwable e) {
            log.error(method.getName() + " 方法發生異常:" + e);        throw e;
        }*/
        //環繞增強
                System.out.println("===before=====");

                //調用目標對象的方法
                Object result = arg0.proceed();
                System.out.println("===after=====");


        return result;
    }
applicationContext.xml:
 <bean id="service" class="cn.wgy.day01.service.UserService"/>
<!--環繞增強  -->
<bean id="around" class="cn.wgy.day01.aop.AroundLog"/>
<!-- 方式一 -->
<!-- <aop:config>
切點
<aop:pointcut expression="execution(public void delete())" id="pointcut"/>
 異常拋出增強
<aop:advisor advice-ref="around" pointcut-ref="pointcut"/>
</aop:config> -->

<!--方式二  -->
 <!-- 代理對象 ProxyFactoryBean 代理工廠bean-->
     <bean id="serviceProxy" class="org.springframework.aop.framework.ProxyFactoryBean">
     <property name="target" ref="service"></property>
     <property name="interceptorNames" value="around"></property>
     </bean>
</beans>
異常增強,我們要實現ThrowsAdvice接口


你注意看沒有,都沒有實現方法,怎麼辦呢?你別急,其實已經給我們規定了方法名稱,而且必須是它才能。就是 void AfterThrowing()它提供了一個參數,三個參數的。
aop:
public class ErrorLog implements ThrowsAdvice {
  private static final Logger log=Logger.getLogger(ErrorLog.class);


@SuppressWarnings("unused")
private void AfterThrowing(Method method, Object[] args, Object target,
            RuntimeException e) {
    log.error(method.getName()+"方法發生異常"+e);

}
service
public class UserService {
 public void delete() {

    int result=5/0;
    System.out.println(result);

}
}
applicationContext.xml
 <bean id="service" class="cn.wgy.day01.service.UserService"/>
<bean id="error" class="cn.wgy.day01.aop.ErrorLog"/>


<!--方式二  -->
 <!-- 代理對象 ProxyFactoryBean 代理工廠bean-->

     <bean id="serviceProxy" class="org.springframework.aop.framework.ProxyFactoryBean">
     <property name="target" ref="service"></property>
     <property name="interceptorNames" value="error"></property>
     </bean>

<!-- <aop:config>
<aop:pointcut expression="execution(public void delete())" id="pointcut"/>
 異常拋出增強
<aop:advisor advice-ref="error" pointcut-ref="pointcut"/>
</aop:config> -->
到這裡我要思考一下,我們可以applicationContext.xml裡面的bean組件修改修改,我們用了顧問(Advisor)要包裝通知(Advice),比較靈活,可以只針對某一個方法進行處理。
對於環繞增強:
 <bean id="service" class="cn.wgy.day01.service.UserService"/>
<!--環繞增強  -->
<bean id="around" class="cn.wgy.day01.aop.AroundLog"/>

<!-- 方式一 -->
<!-- <aop:config>
切點
<aop:pointcut expression="execution(public void delete())" id="pointcut"/>
 異常拋出增強
<aop:advisor advice-ref="around" pointcut-ref="pointcut"/>
</aop:config> -->

<!--顧問(Advisor)要包裝通知(Advice),比較靈活,可以只針對某一個方法進行處理  -->
<bean id="advisor" class="org.springframework.aop.support.NameMatchMethodPointcutAdvisor">
<property name="advice" ref="around"></property>
<property name="mappedNames" value="delete"></property>
</bean>

<!--方式二  -->
 <!-- 代理對象 ProxyFactoryBean 代理工廠bean-->
     <bean id="serviceProxy" class="org.springframework.aop.framework.ProxyFactoryBean">
     <property name="target" ref="service"></property>
     <property name="interceptorNames" value="advisor"></property>
     </bean>
</beans>
還有一個知識點,我們可以更方便的寫bean組件,正則表達式
<bean id="service" class="cn.wgy.day01.service.UserService"/>
<!--環繞增強  -->
<bean id="around" class="cn.wgy.day01.aop.AroundLog"/>

<!-- 方式一 -->
<!-- <aop:config>
切點
<aop:pointcut expression="execution(public void delete())" id="pointcut"/>
 異常拋出增強
<aop:advisor advice-ref="around" pointcut-ref="pointcut"/>
</aop:config> -->

<bean id="regex" class="org.springframework.aop.support.RegexpMethodPointcutAdvisor">
<property name="advice" ref="around"></property>
<property name="pattern" value=".*do.*"></property>

</bean>

<!--方式二  -->
 <!-- 代理對象 ProxyFactoryBean 代理工廠bean-->
     <!-- <bean id="serviceProxy" class="org.springframework.aop.framework.ProxyFactoryBean">
     <property name="target" ref="service"></property>
     <property name="interceptorNames" value="regex"></property>
     </bean> -->
     <!-- 默認 -->
    <!--  <bean class="org.springframework.aop.support.DefaultBeanFactoryPointcutAdvisor"></bean>-->
   <bean class="org.springframework.aop.framework.autoproxy.BeanNameAutoProxyCreator">
   <property name="beanNames" value="service"></property>
   <property name="interceptorNames" value="regex"></property>
   </bean>
到這裡呢,算是差不多了,但是我們缺少了分析下源代碼
我們知道,實現aop,其實源代碼裡面通過了動態代理來實現
我們來了解一下 代理模式的定義:
為其他對象提供一種代理以控制對這個對象的訪問。在某些情況下,一個對象不適合或者不能直接引用另一個對象,而代理對象可以在客戶端和目標對象之間起到中介的作用。
代理模式使用代理對象完成用戶請求,屏蔽用戶對真實對象的訪問。
在軟件設計中,使用代理模式的意圖也很多,比如因為安全原因需要屏蔽客戶端直接訪問真實對象,或者在遠程調用中需要使用代理類處理遠程方法調用的技術細節 (如 RMI),也可能為了提升系統性能,對真實對象進行封裝,從而達到延遲加載的目的。
代理模式角色分為 4 種:
主題接口:定義代理類和真實主題的公共對外方法,也是代理類代理真實主題的方法;
真實主題:真正實現業務邏輯的類;
代理類:用來代理和封裝真實主題;
Main:客戶端,使用代理類和主題接口完成一些工作。
1.什麼是動態代理?
答:動態代理可以提供對另一個對象的訪問,同時隱藏實際對象的具體事實。代理一般會實現它所表示的實際對象的接口。代理可以訪問實際對象,但是延遲實現實際對象的部分功能,實際對象實現系統的實際功能,代理對象對客戶隱藏了實際對象。客戶不知道它是與代理打交道還是與實際對象打交道。
2.為什麼使用動態代理?
答:因為動態代理可以對請求進行任何處理
3.哪些地方需要動態代理?
答:不允許直接訪問某些類;對訪問要做特殊處理等
JAVA 動態代理的作用是什麼?
主要用來做方法的增強,讓你可以在不修改源碼的情況下,增強一些方法,在方法執行前後做任何你想做的事情(甚至根本不去執行這個方法),因為在InvocationHandler的invoke方法中,你可以直接獲取正在調用方法對應的Method對象,具體應用的話,比如可以添加調用日志,做事務控制等。
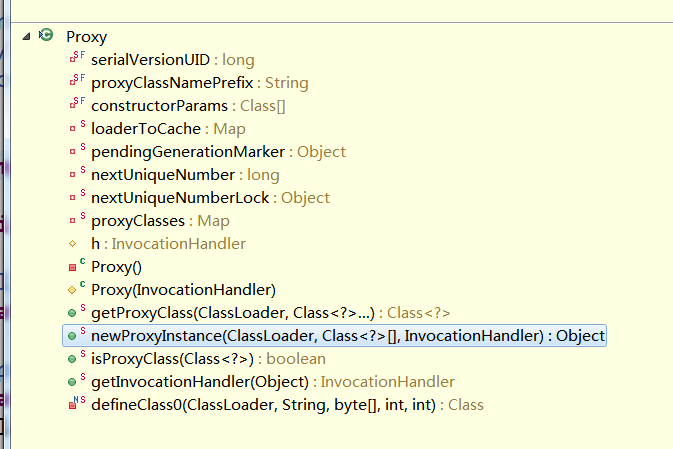
還有一個有趣的作用是可以用作遠程調用,比如現在有Java接口,這個接口的實現部署在其它服務器上,在編寫客戶端代碼的時候,沒辦法直接調用接口方法,因為接口是不能直接生成對象的,這個時候就可以考慮代理模式(動態代理)了,通過Proxy.newProxyInstance代理一個該接口對應的InvocationHandler對象,然後在InvocationHandler的invoke方法內封裝通訊細節就可以了。具體的應用,最經典的當然是Java標准庫的RMI,其它比如hessian,各種webservice框架中的遠程調用,大致都是這麼實現的。
動態代理我們分之為jdk動態代理和cglib動態代理
JDK實現動態代理需要實現類通過接口定義業務方法,對於沒有接口的類,如何實現動態代理呢,這就需要CGLib了。CGLib采用了非常底層的字節碼技術,其原理是通過字節碼技術為一個類創建子類,並在子類中采用方法攔截的技術攔截所有父類方法的調用,順勢織入橫切邏輯。JDK動態代理與CGLib動態代理均是實現Spring AOP的基礎。
CGLib創建的動態代理對象性能比JDK創建的動態代理對象的性能高不少,但是CGLib在創建代理對象時所花費的時間卻比JDK多得多,所以對於單例的對象,因為無需頻繁創建對象,用CGLib合適,反之,使用JDK方式要更為合適一些。同時,由於CGLib由於是采用動態創建子類的方法,對於final方法,無法進行代理。
1.JDK動態代理
·
此時代理對象和目標對象實現了相同的接口,目標對象作為代理對象的一個屬性,具體接口實現中,可以在調用目標對象相應方法前後加上其他業務處理邏輯。
代理模式在實際使用時需要指定具體的目標對象,如果為每個類都添加一個代理類的話,會導致類很多,同時如果不知道具體類的話,怎樣實現代理模式呢?這就引出動態代理。
JDK動態代理只能針對實現了接口的類生成代理。
看看代碼:

dao實現類
public class UserDaoImpl implements UserDao {

    public void add() {
        System.out.println("add success");
    }


}
public class ProxySubject implements Subject {
 private Subject realSubject;
    public String request() {
        System.out.println("代理增強");
        return realSubject.request();
    }
    public Subject getRealSubject() {
        return realSubject;
    }
    public void setRealSubject(Subject realSubject) {
        this.realSubject = realSubject;
    }
public class RealSubject implements Subject {

    public String request() {
        // TODO Auto-generated method stub
        return "真實主題";
    }

}
 */
public interface Subject {
public String request();
}
test
    public static void main(String[] args) {
    /**
     * 靜態代理
     */
        /*Subject sub=new RealSubject();//被代理對象
        System.out.println(sub.toString());
        ProxySubject ps=new ProxySubject();//代理對象
        System.out.println(ps.toString());
        ps.setRealSubject(sub);
        String request = ps.request();//走真實代理對象  RealSubject
        System.out.println(request);*/

        /**
         * 動態代理
         */
    final UserDao dao=new UserDaoImpl();
    //代理對象
    //第一個參數:獲取和dao一樣的類加載器,通過反射機制獲取類加載器
    //new InvocationHandler()叫匿名內部類,拿到了接口的實現類
    UserDao newProxyInstance = (UserDao) Proxy.newProxyInstance(dao.getClass().getClassLoader(), dao.getClass().getInterfaces(), new InvocationHandler() {
        //newProxyInstance 被代理對象
        public Object invoke(Object newProxyInstance, Method method, Object[] args)
                throws Throwable {
            System.out.println("增強");
            //原始對象  dao     真正的dao
            Object invoke = method.invoke(dao, args);
            System.out.println("記錄日志");
            return invoke;
        }

    });
    //增強代理對象,方法
    newProxyInstance.add();
    }
對代碼的剖析:
Proxy

InvocationHandler

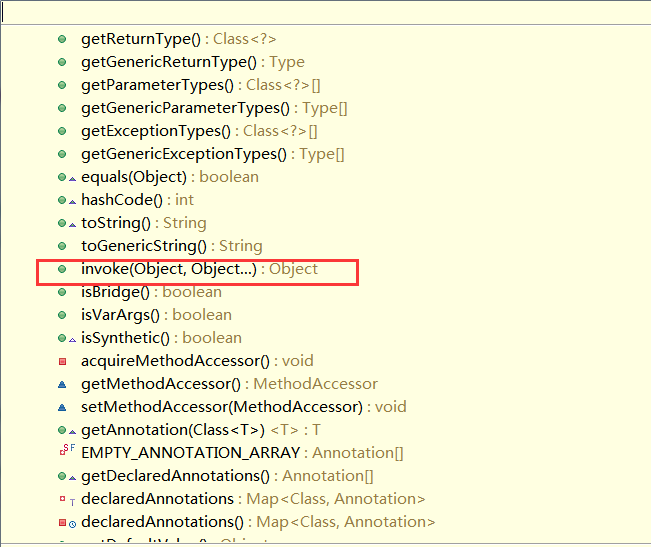
實現了invoke()

Method

applicationContext.xml
 <bean id="service" class="cn.wgy.day01.service.UserService"></bean>
<bean id="error" class="cn.wgy.day01.aop.ErrorLog"/>
<aop:config>
<aop:pointcut expression="execution(public void delete())" id="pointcut"/>
 <!-- 異常拋出增強 -->
<aop:advisor advice-ref="error" pointcut-ref="pointcut"/>
</aop:config>
</beans>
2.CGLIB代理
CGLIB(CODE GENERLIZE LIBRARY)代理是針對類實現代理,主要是對指定的類生成一個子類,覆蓋其中的所有方法,所以該類或方法不能聲明稱final的。
如果目標對象沒有實現接口,則默認會采用CGLIB代理;
如果目標對象實現了接口,可以強制使用CGLIB實現代理(添加CGLIB庫,並在spring配置中加入<aop:aspectj-autoproxy proxy-target-class="true"/>)
public class CglibProxy implements MethodInterceptor {
    private Enhancer enhancer = new Enhancer();
     public Object getProxy(Class clazz){
      //設置需要創建子類的類
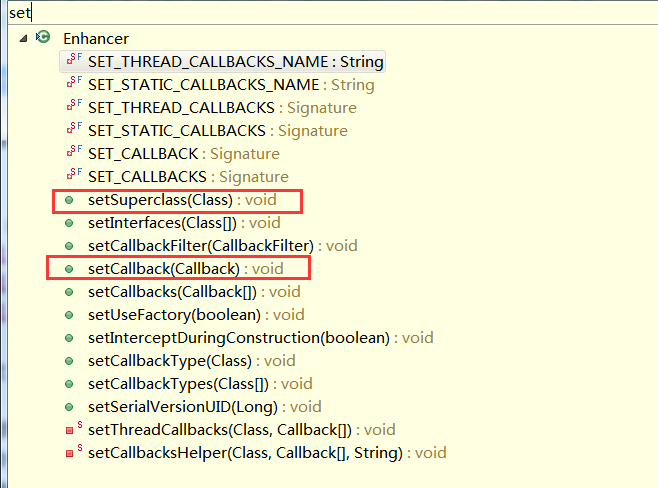
      enhancer.setSuperclass(clazz);
      enhancer.setCallback(this);
      //通過字節碼技術動態創建子類實例
      return enhancer.create();
     }
    public Object intercept(Object obj, Method method, Object[] args,
            MethodProxy proxy) throws Throwable {
        System.out.println("前置代理");
          //通過代理類調用父類中的方法
          Object result = proxy.invokeSuper(obj, args);
          System.out.println("後置代理");
          return result;
    }
Enhancer


test
public class Test {
    public static void main(String[] args) {
        final UserService service=new UserService();
        //1.創建
        Enhancer enhancer=new Enhancer();
        //2.設置根據哪個類生成子類
        enhancer.setSuperclass(service.getClass());
        //3.指定回調函數
        enhancer.setCallback(new MethodInterceptor() {
             //實現MethodInterceptor接口方法
            public Object intercept(Object proxy, Method method, Object[] object,
                    MethodProxy methodproxy) throws Throwable {
             //System.out.println("代碼增強");
             System.out.println("前置代理");
            //通過代理類調用父類中的方法
            Object invoke = method.invoke(service, object);
            System.out.println("後置代理");
            return invoke;
            }
        });
        //通過字節碼技術動態創建子類實例
        UserService proxy = (UserService) enhancer.create();
        proxy.delete();
    }
}
applicationContext.xml
 <bean id="service" class="cn.wgy.day01.service.UserService"></bean>
<bean id="error" class="cn.wgy.day01.aop.ErrorLog"/>
<aop:config>
<aop:pointcut expression="execution(public void delete())" id="pointcut"/>
 <!-- 異常拋出增強 -->
<aop:advisor advice-ref="error" pointcut-ref="pointcut"/>
</aop:config>
<aop:aspectj-autoproxy proxy-target-class="true"/>