在Spring MVC的基礎框架搭建起來後,我們測試了spring mvc中的返回值類型,如果你還沒有搭建好springmvc的架構請參考博文->http://www.cnblogs.com/qixiaoyizhan/p/5819392.html
今天我們來講講spring mvc中的文件上傳和下載的幾種方法。
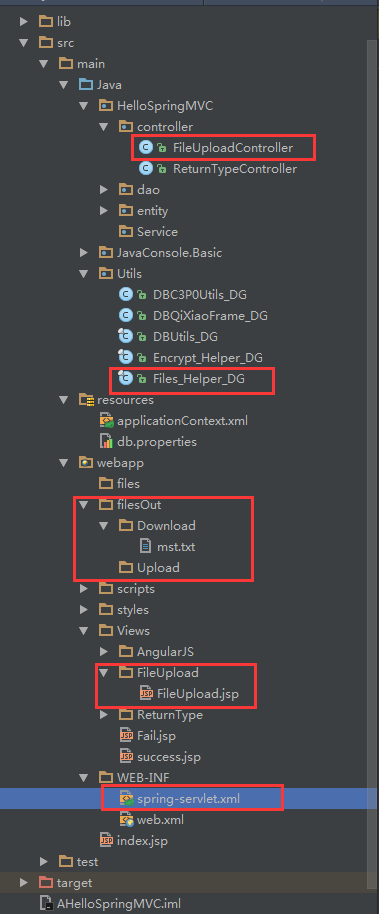
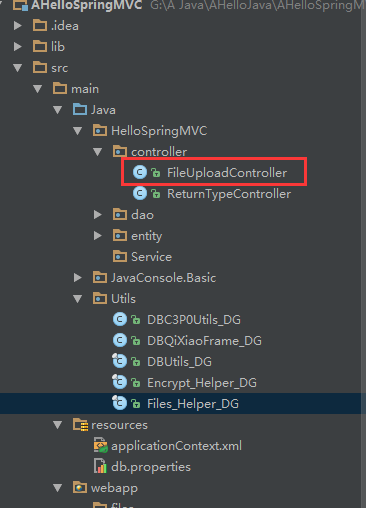
首先附上文件目錄->我們需要配置的我做了記號->
一、文件上傳
首先為了方便後續的操作,以及精簡代碼,我們在Utils包下封裝一個文件上傳下載的幫助類: Files_Helper_DG

 1 package Utils;
 2
 3 import org.springframework.web.multipart.MultipartFile;
 4
 5 import javax.servlet.http.HttpServletRequest;
 6 import javax.servlet.http.HttpServletResponse;
 7 import java.io.*;
 8 import java.text.SimpleDateFormat;
 9 import java.util.Date;
10 import java.util.UUID;
11
12 /**
13  * Author:qixiao
14  * Time:2016年9月2日23:47:51
15  */
16 public final class Files_Helper_DG {
17     /**
18      * 私有構造方法,限制該類不能被實例化
19      */
20     private Files_Helper_DG() {
21         throw new Error("The class Cannot be instance !");
22     }
23
24     /**
25      * spring mvc files Upload method (transferTo method)
26      * spring mvc 中的文件上傳方法 trasferTo 的方式上傳,參數為MultipartFile
27      *
28      * @param request       HttpServletRequest
29      * @param multipartFile MultipartFile(spring)
30      * @param filePath      filePath example "/files/Upload"
31      * @return
32      */
33     public static String FilesUpload_transferTo_spring(HttpServletRequest request, MultipartFile multipartFile, String filePath) {
34         //get Date path
35         String DatePath = new SimpleDateFormat("yyyyMMdd").format(new Date());
36         //get server path (real path)
37         String savePath = request.getSession().getServletContext().getRealPath(filePath) + File.separator + DatePath;
38         // if dir not exists , mkdir
39         System.out.println(savePath);
40         File saveDir = new File(savePath);
41         if (!saveDir.exists() || !saveDir.isDirectory()) {
42             //create dir
43             saveDir.mkdir();
44         }
45         if (multipartFile != null) {
46             //get files suffix
47             String suffix = multipartFile.getOriginalFilename().substring(multipartFile.getOriginalFilename().lastIndexOf("."));
48             //use UUID get uuid string
49             String uuidName = UUID.randomUUID().toString() + suffix;// make new file name
50             //filePath+fileName the complex file Name
51             String fileName = savePath + File.separator + uuidName;
52             //return relative Path
53             String relativePath = filePath + File.separator + DatePath + File.separator + uuidName;
54             try {
55                 //save file
56                 multipartFile.transferTo(new File(fileName));
57                 //return relative Path
58                 return relativePath;
59             } catch (IOException e) {
60                 e.printStackTrace();
61                 return null;
62             }
63         } else
64             return null;
65     }
66
67     /**
68      * @param request  HttpServletRequest
69      * @param response HttpServletResponse
70      * @param filePath example "/filesOut/Download/mst.txt"
71      * @return
72      */
73     public static void FilesDownload_servlet(HttpServletRequest request, HttpServletResponse response, String filePath) {
74         //get server path (real path)
75         String realPath = request.getSession().getServletContext().getRealPath(filePath);
76         File file = new File(realPath);
77         String filenames = file.getName();
78         InputStream inputStream;
79         try {
80             inputStream = new BufferedInputStream(new FileInputStream(file));
81             byte[] buffer = new byte[inputStream.available()];
82             inputStream.read(buffer);
83             inputStream.close();
84             response.reset();
85             // 先去掉文件名稱中的空格,然後轉換編碼格式為utf-8,保證不出現亂碼,這個文件名稱用於浏覽器的下載框中自動顯示的文件名
86             response.addHeader("Content-Disposition", "attachment;filename=" + new String(filenames.replaceAll(" ", "").getBytes("utf-8"), "iso8859-1"));
87             response.addHeader("Content-Length", "" + file.length());
88             OutputStream os = new BufferedOutputStream(response.getOutputStream());
89             response.setContentType("application/octet-stream");
90             os.write(buffer);// 輸出文件
91             os.flush();
92             os.close();
93         } catch (Exception e) {
94             e.printStackTrace();
95         }
96     }
97 }
然後我們新建一個控制器類 FileUploadController
首先我們先展示出全部的代碼,然後我們進行分步說明--->

方式一:采用 fileUpload_multipartFile , file.transferTo 來保存上傳的文件
 1 /*
 2      * 方式一
 3      * 采用 fileUpload_multipartFile , file.transferTo 來保存上傳的文件
 4      */
 5     @RequestMapping(value = "fileUpload_multipartFile")
 6     @ResponseBody
 7     public String fileUpload_multipartFile(HttpServletRequest request, @RequestParam("file_upload") MultipartFile multipartFile) {
 8         //調用保存文件的幫助類進行保存文件,並返回文件的相對路徑
 9         String filePath = Files_Helper_DG.FilesUpload_transferTo_spring(request, multipartFile, "/filesOut/Upload");
10         return "{\"TFMark\":\"true\",\"Msg\":\"upload success !\",\"filePath\":\"" + filePath + "\"}";
11     }
方式二:采用 fileUpload_multipartRequest file.transferTo 來保存上傳文件
 1  @RequestMapping(value = "fileUpload_multipartRequest")
 2     @ResponseBody
 3     public String fileUpload_multipartRequest(HttpServletRequest request) {
 4         //將request轉成MultipartHttpServletRequest
 5         MultipartHttpServletRequest multipartRequest = (MultipartHttpServletRequest) request;
 6         //頁面控件的文件流,對應頁面控件 input file_upload
 7         MultipartFile multipartFile = multipartRequest.getFile("file_upload");
 8         //調用保存文件的幫助類進行保存文件,並返回文件的相對路徑
 9         String filePath = Files_Helper_DG.FilesUpload_transferTo_spring(request, multipartFile, "/filesOut/Upload");
10         return "{\"TFMark\":\"true\",\"Msg\":\"upload success !\",\"filePath\":\"" + filePath + "\"}";
11     }
方式三:采用 CommonsMultipartResolver file.transferTo 來保存上傳文件---自動掃描全部的input表單
 1  @RequestMapping(value = "fileUpload_CommonsMultipartResolver")
 2     @ResponseBody
 3     public String fileUpload_CommonsMultipartResolver(HttpServletRequest request) {
 4         //將當前上下文初始化給  CommonsMultipartResolver (多部分解析器)
 5         CommonsMultipartResolver multipartResolver = new CommonsMultipartResolver(request.getSession().getServletContext());
 6         //檢查form中是否有enctype="multipart/form-data"
 7         if (multipartResolver.isMultipart(request)) {
 8             //將request變成多部分request
 9             MultipartHttpServletRequest multipartRequest = (MultipartHttpServletRequest) request;
10             //獲取multiRequest 中所有的文件名
11             Iterator iter = multipartRequest.getFileNames();
12             while (iter.hasNext()) {
13                 //一次遍歷所有文件
14                 MultipartFile multipartFile = multipartRequest.getFile(iter.next().toString());
15                 //調用保存文件的幫助類進行保存文件,並返回文件的相對路徑
16                 String fileName = Files_Helper_DG.FilesUpload_transferTo_spring(request, multipartFile, "/filesOut/Upload");
17                 System.out.println(fileName);
18             }
19         }
20         return "upload success ! ";
21     }
方式四:通過流的方式上傳文件(這種方法和servlet裡面上傳文件的方法類似,但本人這種方法存在上傳文件損壞的問題,希望大神們能幫本人解決,感激不盡!~~~)
 1  @RequestMapping(value = "fileUpload_stream")
 2     @ResponseBody
 3     public String fileUpload_stream(HttpServletRequest request) {
 4         //得到上傳文件的保存目錄,將上傳的文件存放於WEB-INF目錄下,不允許外界直接訪問,保證上傳文件的安全
 5         String savePath = request.getSession().getServletContext().getRealPath("/filesOut/Upload");
 6         File file = new File(savePath);
 7         //判斷上傳文件的保存目錄是否存在
 8         if (!file.exists() && !file.isDirectory()) {
 9             //創建目錄
10             file.mkdir();
11         }
12         try {
13             //使用Apache文件上傳組件處理文件上傳步驟:
14             //1、創建一個DiskFileItemFactory工廠
15             DiskFileItemFactory factory = new DiskFileItemFactory();
16             //2、創建一個文件上傳解析器
17             ServletFileUpload upload = new ServletFileUpload(factory);
18             //解決上傳文件名的中文亂碼
19             upload.setHeaderEncoding("UTF-8");
20             //3、判斷提交上來的數據是否是上傳表單的數據
21             if (!ServletFileUpload.isMultipartContent(request)) {
22                 //按照傳統方式獲取數據
23                 return "is not form upload data ";
24             }
25             //4、使用ServletFileUpload解析器解析上傳數據,解析結果返回的是一個List<FileItem>集合,每一個FileItem對應一個Form表單的輸入項
26             List<FileItem> list = upload.parseRequest(request);
27             System.out.println("start---------");
28             System.out.println(list);
29             for (FileItem item : list) {
30                 System.out.println("begin ----");
31                 //如果fileitem中封裝的是普通輸入項的數據
32                 if (item.isFormField()) {
33                     String name = item.getFieldName();
34                     //解決普通輸入項的數據的中文亂碼問題
35                     String value = item.getString("UTF-8");
36                     //value = new String(value.getBytes("iso8859-1"),"UTF-8");
37                     System.out.println(name + "=" + value);
38                 } else {//如果fileitem中封裝的是上傳文件
39                     //得到上傳的文件名稱,
40                     String filename = item.getName();
41                     System.out.println(filename);
42                     if (filename == null || filename.trim().equals("")) {
43                         continue;
44                     }
45                     //注意:不同的浏覽器提交的文件名是不一樣的,有些浏覽器提交上來的文件名是帶有路徑的,如:  c:\a\b\1.txt,而有些只是單純的文件名,如:1.txt
46                     //處理獲取到的上傳文件的文件名的路徑部分,只保留文件名部分
47                     String suffix = item.getName().substring(item.getName().lastIndexOf("."));
48                     //獲取item中的上傳文件的輸入流
49                     InputStream in = item.getInputStream();
50                     //創建一個文件輸出流
51                     FileOutputStream out = new FileOutputStream(savePath + "/123" + suffix);
52                     //創建一個緩沖區
53                     byte buffer[] = new byte[1024];
54                     //判斷輸入流中的數據是否已經讀完的標識
55                     int len = 0;
56                     //循環將輸入流讀入到緩沖區當中,(len=in.read(buffer))>0就表示in裡面還有數據
57                     while ((len = in.read(buffer)) > 0) {
58                         //使用FileOutputStream輸出流將緩沖區的數據寫入到指定的目錄(savePath + "\\" + filename)當中
59                         out.write(buffer, 0, len);
60                     }
61                     //關閉輸入流
62                     in.close();
63                     //關閉輸出流
64                     out.close();
65                     //刪除處理文件上傳時生成的臨時文件
66                     item.delete();
67                 }
68             }
69             return "upload success !";
70         } catch (Exception e) {
71             e.printStackTrace();
72         }
73         return "upload fail";
74     }
多文件上傳(其實是將上面的 MultipartFile 寫成數組形式)
 1 @RequestMapping(value = "fileUpload_spring_list")
 2     @ResponseBody
 3     public String fileUpload_spring_list(HttpServletRequest request, @RequestParam("file_upload") MultipartFile[] multipartFile) {
 4         //判斷file數組不能為空並且長度大於0
 5         if (multipartFile != null && multipartFile.length > 0) {
 6             //循環獲取file數組中得文件
 7             try {
 8                 for (int i = 0; i < multipartFile.length; i++) {
 9                     MultipartFile file = multipartFile[i];
10                     //保存文件
11                     String fileName = Files_Helper_DG.FilesUpload_transferTo_spring(request, file, "/filesOut/Upload");
12                     System.out.println(fileName);
13                 }
14                 return "{\"TFMark\":\"true\",\"Msg\":\"upload success !\"}";
15             } catch (Exception ee) {
16                 return "{\"TFMark\":\"false\",\"Msg\":\"參數傳遞有誤!\"}";
17             }
18         }
19         return "{\"TFMark\":\"false\",\"Msg\":\"參數傳遞有誤!\"}";
20     }
下面我們進行測試:
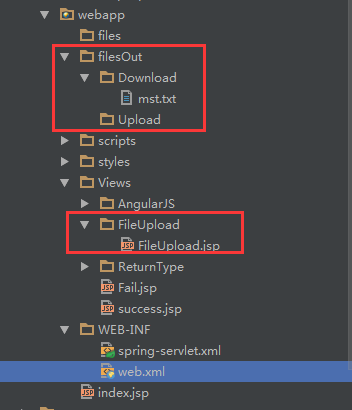
首先在webapp下新建文件夾目錄/filesOut/Upload,並且新建一個/FileUpload/FileUpload.jsp
FileUpload.jsp代碼如下
 1 <%@ page contentType="text/html;charset=UTF-8" language="java" %>
 2 <%
 3     String path = request.getContextPath();
 4     String basePath = request.getScheme()+"://"+request.getServerName()+":"+request.getServerPort()+path+"/";
 5 %>
 6 <html>
 7 <head>
 8     <base href="<%=basePath%>">
 9     <title>fileUpload</title>
10 </head>
11 <body>
12 <h3>文件上傳</h3><br>
13
14 <h3>采用 fileUpload_multipartFile , file.transferTo 來保存上傳的文件</h3>
15 <form name="form1" action="/FileUpload/fileUpload_multipartFile" method="post" enctype="multipart/form-data">
16     <input type="file" name="file_upload">
17     <input type="submit" value="upload"/>
18 </form>
19 <hr>
20
21 <h3>采用 fileUpload_multipartRequest file.transferTo 來保存上傳文件</h3>
22 <form name="form2" action="/FileUpload/fileUpload_multipartRequest" method="post" enctype="multipart/form-data">
23     <input type="file" name="file_upload">
24     <input type="submit" value="upload"/>
25 </form>
26 <hr>
27
28 <h3>采用 CommonsMultipartResolver file.transferTo 來保存上傳文件</h3>
29 <form name="form3" action="/FileUpload/fileUpload_CommonsMultipartResolver" method="post" enctype="multipart/form-data">
30     <input type="file" name="file_upload">
31     <input type="submit" value="upload"/>
32 </form>
33 <hr>
34
35 <h3>使通過流的方式上傳文件--存在上傳後無法使用的問題</h3>
36 <form name="form4" action="/FileUpload/fileUpload_stream" method="post" enctype="multipart/form-data">
37     <input type="file" name="file_upload">
38     <input type="submit" value="upload"/>
39 </form>
40 <hr>
41
42 <h3>多文件上傳 采用 MultipartFile[] multipartFile 上傳文件方法</h3>
43 <form name="form5" action="/FileUpload/fileUpload_spring_list" method="post" enctype="multipart/form-data">
44     <input type="file" name="file_upload">
45     <input type="file" name="file_upload">
46     <input type="file" name="file_upload">
47     <input type="submit" value="upload"/>
48 </form>
49 <hr>
50
51 <h3>通過 a 標簽的方式進行文件下載</h3><br>
52 <a href="<%=basePath%>filesOut/Download/mst.txt">通過 a 標簽下載文件 mst.txt</a>
53 <hr>
54 <h3>通過 Response 文件流的方式下載文件</h3>
55 <a href="/FileUpload/fileDownload_servlet">通過 文件流 的方式下載文件 mst.txt</a>
56
57 </body>
58 </html>
這裡一定要記得在spring-servlet.xml裡面配置訪問靜態路徑方法->下面我附上spring-servlet.xml
 1 <?xml version="1.0" encoding="UTF-8"?>
 2 <beans xmlns="http://www.springframework.org/schema/beans"
 3        xmlns:xsi="http://www.w3.org/2001/XMLSchema-instance"
 4        xmlns:context="http://www.springframework.org/schema/context"
 5        xmlns:mvc="http://www.springframework.org/schema/mvc"
 6        xsi:schemaLocation="http://www.springframework.org/schema/beans
 7 http://www.springframework.org/schema/beans/spring-beans-3.1.xsd
 8 http://www.springframework.org/schema/context
 9 http://www.springframework.org/schema/context/spring-context-3.1.xsd
10 http://www.springframework.org/schema/mvc
11 http://www.springframework.org/schema/mvc/spring-mvc-3.1.xsd">
12
13     <!-- 啟動注解驅動的Spring MVC功能,注冊請求url和注解POJO類方法的映射-->
14     <mvc:annotation-driven >
15
16     </mvc:annotation-driven>
17
18     <!-- 啟動包掃描功能,以便注冊帶有@Controller、@service、@repository、@Component等注解的類成為spring的bean -->
19     <context:component-scan base-package="HelloSpringMVC.controller" />
20     <!-- 對模型視圖名稱的解析,在請求時模型視圖名稱添加前後綴 -->
21      <bean class="org.springframework.web.servlet.view.InternalResourceViewResolver">
22          <property name="viewClass" value="org.springframework.web.servlet.view.JstlView"/>
23          <property name="prefix" value="/"/>    <!-- 前綴 -->
24          <property name="suffix" value=".jsp"/>    <!-- 後綴 -->
25      </bean>
26     <!-- 訪問靜態文件(jpg,js,css)的方法 -->
27     <mvc:resources location="/files/" mapping="/files/**" />
28     <mvc:resources location="/filesOut/" mapping="/filesOut/**" />
29     <mvc:resources location="/scripts/" mapping="/scripts/**" />
30     <mvc:resources location="/styles/" mapping="/styles/**" />
31     <mvc:resources location="/Views/" mapping="/Views/**" />
32
33     <!-- 多部分文件上傳 -->
34     <bean id="multipartResolver" class="org.springframework.web.multipart.commons.CommonsMultipartResolver">
35         <property name="maxUploadSize" value="104857600" />
36         <property name="maxInMemorySize" value="4096" />
37         <property name="defaultEncoding" value="UTF-8"></property>
38     </bean>
39 </beans>
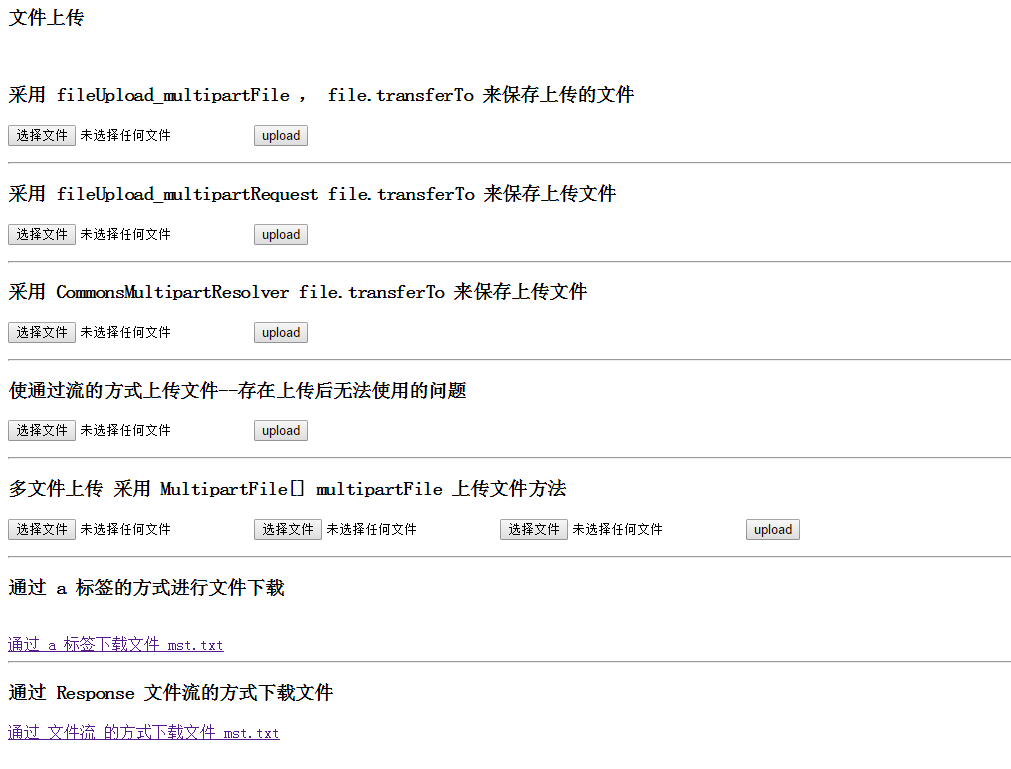
然後我們運行tomcat進入http://localhost:8080/Views/FileUpload/FileUpload.jsp
打開後,頁面如下:
我們依次選擇文件->
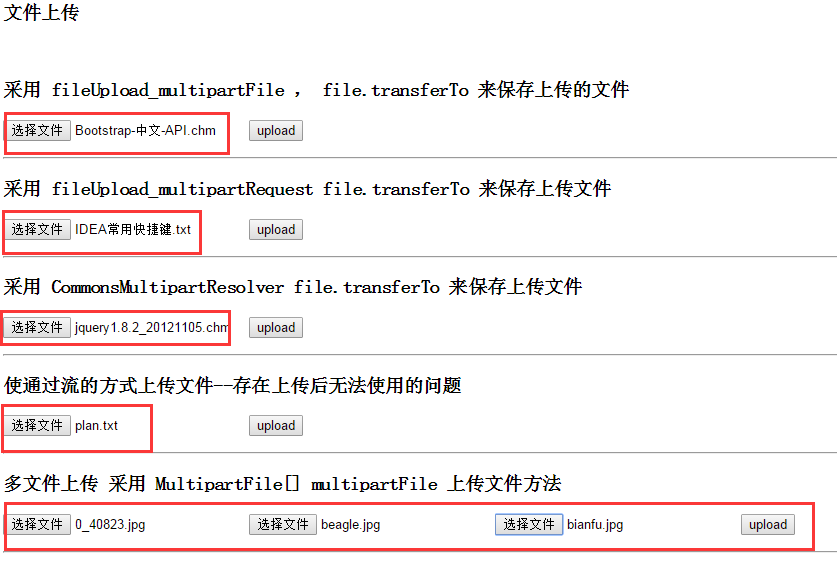
然後依次點擊upload按鈕,進行文件的上傳->


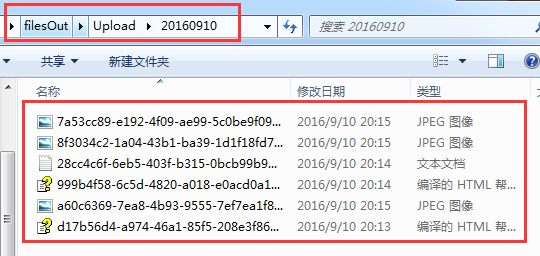

可見,5種上傳都已經執行成功!下面我們打開文件目錄查看一下上傳的文件->
細心的同志們會發現使用流上傳的並沒有成功,這種方式仍然存在bug待調試,有成功的記得聯系我哦~
那麼我們其他的方式執行已經都成功了!
二、文件下載
在控制器類 FileUploadController裡面繼續添加代碼->
1 @RequestMapping(value = "fileDownload_servlet")
2     public void fileDownload_servlet(HttpServletRequest request, HttpServletResponse response) {
3         Files_Helper_DG.FilesDownload_servlet(request,response,"/filesOut/Download/mst.txt");
4     }
這裡調用了幫助類 Files_Helper_DG.FilesDownload_servlet(request,response,"/filesOut/Download/mst.txt");
然後我們進行測試->
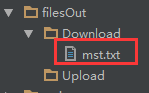
前面我們新建的文件夾/filesOut/Download,在裡面放一個文件mst.txt,代碼訪問的就是這個文件!
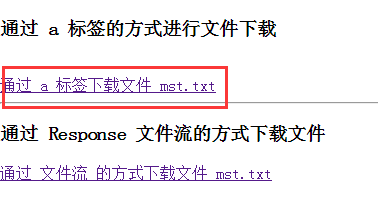
然後是我們FileUpload.jsp,前面已經拷貝過了這段代碼->
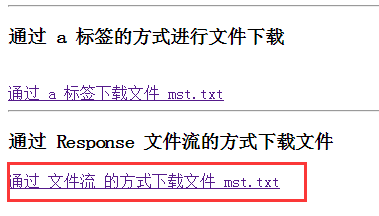
1 <h3>通過 a 標簽的方式進行文件下載</h3><br>
2 <a href="<%=basePath%>filesOut/Download/mst.txt">通過 a 標簽下載文件 mst.txt</a>
3 <hr>
4 <h3>通過 Response 文件流的方式下載文件</h3>
5 <a href="/FileUpload/fileDownload_servlet">通過 文件流 的方式下載文件 mst.txt</a>
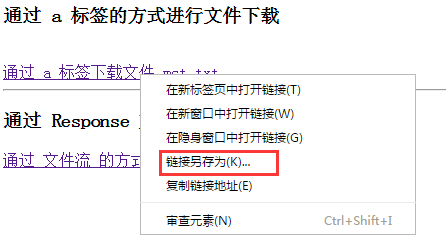
首先是第一種直接訪問文件目錄,此方式有缺陷,暴露了項目文件結構,造成安全隱患!
點擊便可下載!(如果浏覽器可以讀取文件,則會直接浏覽器打開,我們可以右鍵->鏈接另存為選擇路徑保存)
然後我們點擊第二種下載方式->實際項目中,我們應該優先選擇第二種方式,提高了安全性!
從服務器直接下載到浏覽器默認的保存文件目錄!(本人在F:)

到此,我們的 spring mvc 文件上傳下載已經實現!
本文為七小站主原創作品,轉載請注明出處:http://www.cnblogs.com/qixiaoyizhan/ 且在文章頁面明顯位置給出原文鏈接,否則保留追究法律責任的權利。