上一篇博客中,我們將簡單的路由解析和執行,從入口文件public/index.php中移入到框架中。入口文件頓時變得清爽無比~~
但是,去我們的controller裡看一下,會看到如下的code:
    public function actionView()
    {
        $body = 'Test body information';
        require '../views/site/view.php';
    }
難道我們每寫一個要去渲染頁面的action,都要去找相應路徑的view,然後把它require進來。肯定不能這樣,所以我們要抽象出一個Controller的基類,實現一個渲染頁面的方法,讓其他的controller繼承,就可以使用相應的方法。
不用說,這個controller的基類肯定要寫到框架裡。而且也要寫兩個,一個放在base中,一個放在web中,web中的Controller繼承base中的。
先來看在base中的
<?php
namespace sf\base;

/**
 * Controller is the base class for classes containing controller logic.
 * @author Harry Sun <[email protected]>
 */
class Controller
{
}
只有一個空類,等待添加內容。
再來看web中的
<?php
namespace sf\web;

/**
 * Controller is the base class for classes containing controller logic.
 * @author Harry Sun <[email protected]>
 */
class Controller extends \sf\base\Controller
{
    /**
     * Renders a view
     * @param string $view the view name.
     * @param array $params the parameters (name-value pairs) that should be made available in the view.
     */
    public function render($view, $params = [])
    {
        extract($params);
        return require '../views/' . $view . '.php';
    }
}
可以看到,我們首先從數組中把變量導入到當前的符號表中,然後引入相應的view頁面。
然後,在SiteController,我們只需要這麼寫就可以了。
<?php
namespace app\controllers;

use sf\web\Controller;

class SiteController extends Controller
{
    public function actionTest()
    {
        echo 'success!';
    }

    public function actionView()
    {
        $this->render('site/view', ['body' => 'Test body information']);
    }
}
然後,訪問http://localhost/simple-framework/public/index.php?r=site/view,就可以看到跟之前一樣的頁面了。
我們來完善一下base中的Controller
<?php
namespace sf\base;

/**
 * Controller is the base class for classes containing controller logic.
 * @author Harry Sun <[email protected]>
 */
class Controller
{
    /**
     * @var string the ID of this controller.
     */
    public $id;
    /**
     * @var Action the action that is currently being executed.
     */
    public $action;
}
添加了兩個屬性,分別來記錄當前的controller和action。
然後,我們要在解析router之後,將其賦值,code如下:
<?php
namespace sf\web;

/**
 * Application is the base class for all application classes.
 * @author Harry Sun <[email protected]>
 */
class Application extends \sf\base\Application
{
    /**
     * Handles the specified request.
     * @return Response the resulting response
     */
    public function handleRequest()
    {
        $router = $_GET['r'];
        list($controllerName, $actionName) = explode('/', $router);
        $ucController = ucfirst($controllerName);
        $controllerNameAll = $this->controllerNamespace . '\\' . $ucController . 'Controller';
        $controller = new $controllerNameAll();
        $controller->id = $controllerName;
        $controller->action = $actionName;
        return call_user_func([$controller, 'action'. ucfirst($actionName)]);
    }
}
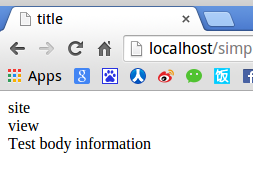
然後我們就可以在controller和view中拿到相應的controller名字和action名字了,將view.php修改如下:
<html>
    <head>
        <title>title</title>
    <head>
    <body>
        <?php echo $this->id;?><br/>
        <?php echo $this->action;?><br/>
        <?php echo $body;?>
    </body>
</html>
然後我們就可以看到如下的頁面了

有人覺得現在大家都前後端分離了,我們不需要用PHP去render一個頁面,只需要返回一個josn字符串就好了,這個就更簡單了,在web的Controller中添加一個toJson方法即可
    /**
     * Convert a array to json string
     * @param string $data
     */
    public function toJson($data)
    {
        if (is_string($data)) {
            return $data;
        }
        return json_encode($data);
    }
將SiteController中的actionTest,修改如下:
    public function actionTest()
    {
        $data = ['first' => 'awesome-php-zh_CN', 'second' => 'simple-framework'];
        echo $this->toJson($data);
    }
訪問http://localhost/simple-framework/public/index.php?r=site/view,你就可以看到相應的json字符串了。
好了,今天就先到這裡。項目內容和博客內容也都會放到Github上,歡迎大家提建議。
code:https://github.com/CraryPrimitiveMan/simple-framework/tree/0.3
blog project:https://github.com/CraryPrimitiveMan/create-your-own-php-framework