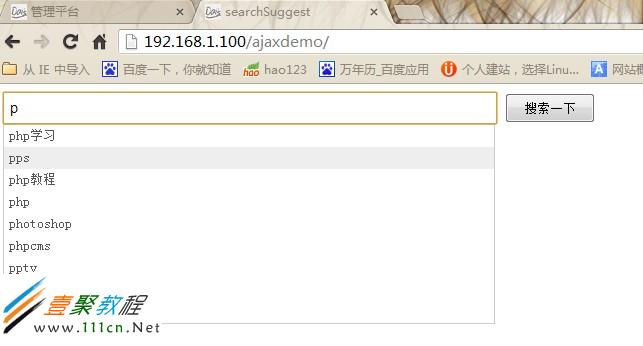
使用百度google時我們都會發現只要輸入一個字就會有相關提示內容了,這個很好的提升了網站的體驗了,下面我來與大家一起學習一個php+mysql+ajax仿百度谷歌搜索下拉自動提示框效果實例。
很久以前就寫了,現在拿到博客給大家分享一下。仿百度谷歌搜索下拉自動提示原理並不是很復雜,主要就是通過ajax這座橋梁。沒有百度那麼強大,它可以匹配拼音等,我目前水平確實做不到,我只是實現一下這個效果。
我們一起看看源碼後面有分析與源碼下載
數據庫,我們把它保存導入到mysql數據庫
代碼如下 復制代碼/*
Navicat MySQL Data Transfer
Source Server : localhost
Source Server Version : 50528
Source Host : localhost:3306
Source Database : ajaxdemo1
Target Server Type : MYSQL
Target Server Version : 50528
File Encoding : 65001
Date: 2013-07-23 17:52:48
*/
SET FOREIGN_KEY_CHECKS=0;
-- ----------------------------
-- Table structure for `article`
-- ----------------------------
DROP TABLE IF EXISTS `article`;
CREATE TABLE `article` (
`id` int(10) unsigned NOT NULL AUTO_INCREMENT,
`title` varchar(64) NOT NULL,
`click` int(11) NOT NULL,
PRIMARY KEY (`id`),
UNIQUE KEY `title` (`title`)
) ENGINE=MyISAM AUTO_INCREMENT=13 DEFAULT CHARSET=gbk;
-- ----------------------------
-- Records of article
-- ----------------------------
INSERT INTO `article` VALUES ('1', 'php', '58');
INSERT INTO `article` VALUES ('2', 'pps', '99');
INSERT INTO `article` VALUES ('3', 'pdf閱讀器下載', '32');
INSERT INTO `article` VALUES ('4', 'pptv', '52');
INSERT INTO `article` VALUES ('5', 'photoshop', '58');
INSERT INTO `article` VALUES ('6', 'photoshop cs5 序列號', '26');
INSERT INTO `article` VALUES ('7', 'phpcms', '56');
INSERT INTO `article` VALUES ('8', 'phpnow', '10');
INSERT INTO `article` VALUES ('9', 'php文件如何打開', '18');
INSERT INTO `article` VALUES ('10', 'php發展', '6');
INSERT INTO `article` VALUES ('11', 'php學習', '158');
INSERT INTO `article` VALUES ('12', 'php教程', '88');
index.html
<!DOCTYPE html PUBLIC "-//W3C//DTD XHTML 1.0 Transitional//EN" "http://www.w3.org/TR/xhtml1/DTD/xhtml1-transitional.dtd">
<html xmlns="http://www.w3.org/1999/xhtml">
<head>
<meta http-equiv="Content-Type" content="text/html; charset=gb2312" />
<title>searchSuggest</title>
<link href="css/searchSuggest.css" type="text/css" rel="stylesheet" />
<script type="text/javascript" src="js/jquery-1.7.2.min.js"></script>
<script type="text/javascript" src="js/searchSuggest.js"></script>
</head>
<body>
<div id="searchSuggest">
<form action="deal.php" method="get" id="suggest_form">
<input type="text" name="keywords" id="suggest_input" autocomplete="off"/>
<input type="submit" value="搜索一下" id="suggest_submit" />
</form>
<ul id="suggest_ul">
</ul>
</div>
</body>
</html>
getdata.php文件
<?php
header("Content-type:text/html;charset=gb2312");
//數據庫配置信息(用戶名,密碼,數據庫名,表前綴等)
$cfg_dbhost = "localhost";
$cfg_dbuser = "root";
$cfg_dbpwd = "dddddd";
$cfg_dbname = "ajaxdemo1";
$cfg_dbprefix = "";
$link = mysql_connect($cfg_dbhost,$cfg_dbuser,$cfg_dbpwd);
mysql_select_db($cfg_dbname);
mysql_query("set names gbk");
//防止亂碼
$keywords = iconv("utf-8","gb2312//IGNORE",$_POST['keywords']);
//匹配輸入的關鍵字相關的標題,並按點擊量排名,點擊越多的排最前面
$sql = "select title from ".$cfg_dbprefix."article where title like '%".$keywords."%' order by click desc limit 0,9;";
//echo $sql;
$res = mysql_query($sql,$link);
$mNums = mysql_num_rows($res);
//echo $mNums;
$row=mysql_fetch_array($res);
if($mNums<1){
echo "no";
exit();
}else if($mNums==1){
//返回json數據
echo "[{'keywords':'".iconv_substr($row['title'],0,14,"gbk")."'}]";
}else{
$result="[{'keywords':'".iconv_substr($row['title'],0,14,"gbk")."'}";
while($row=mysql_fetch_array($res)){
$result.=",{'keywords':'".iconv_substr($row['title'],0,14,"gbk")."'}";
}
$result.=']';
echo $result;
}
mysql_free_result($res);
?>
這些是核心代碼,後面有完整實例下載地址
先看一下效果吧(往下面走,有源碼下載^_^)

輸入一個“p”後的效果

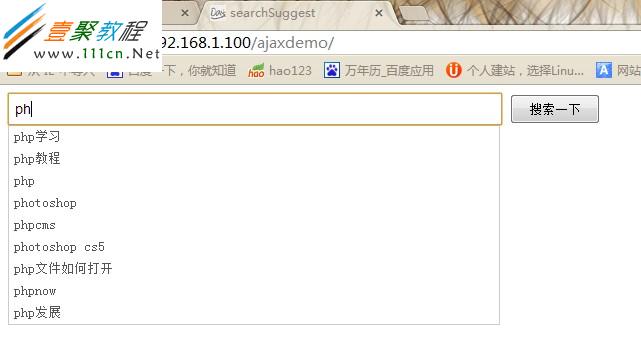
每輸入一個字符都會進行一次匹配
效果就這樣,如果覺得還行,可以下載下面的源碼來玩玩。
數據表裡面我只添加了10來條數據,如果有需要,可以自己添加。
整實例下載地址:源碼下載