在EM11g時,agent安裝是通過在被監制主機端下載agent代理並安裝,在EM12c版本上,可以在EM12c服務端,通過“推送”的方式把agent代理在遠程安裝到被監控的主機端,並且可以同時為多個主機安裝agent代理。
官方文檔:
http://www.gokhanatil.com/2011/10/how-to-deploy-oracle-management-agent.html
安裝方法:
首先登錄EM12c
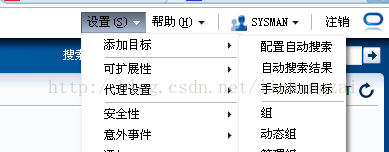
選擇: 設置 -> 添加目標 -> 手動添加目標
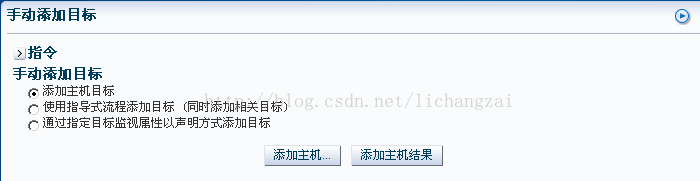
點擊:添加手動目標 –> 添加主機
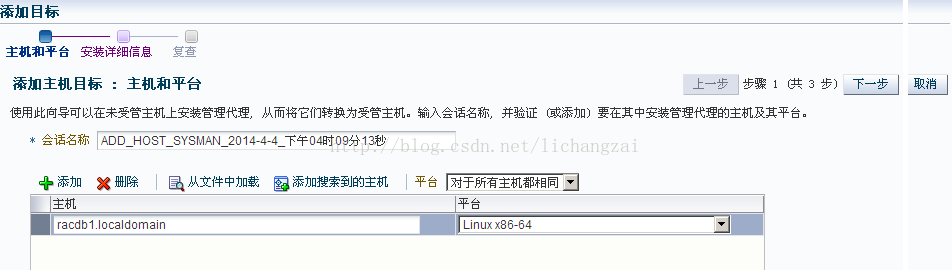
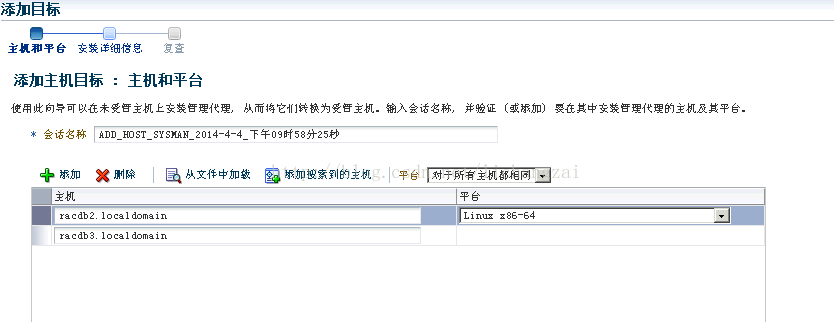
添加主機目標名稱和平台
#mkdir /u01/app/agent12c
#chown oracle:oinstall /u01/app/agent12c
#chmod g+w agent12c

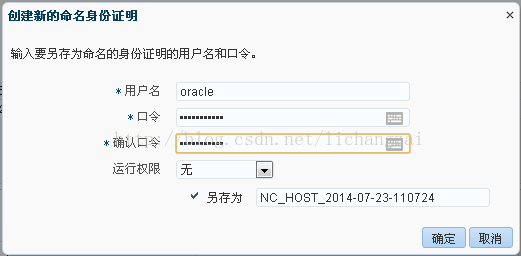
點 創建身份證明
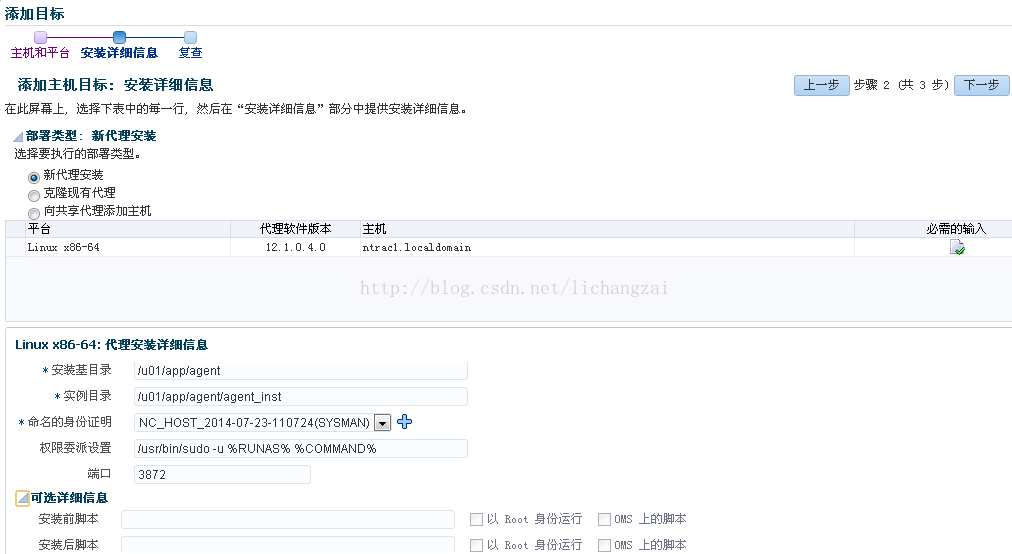
下一步
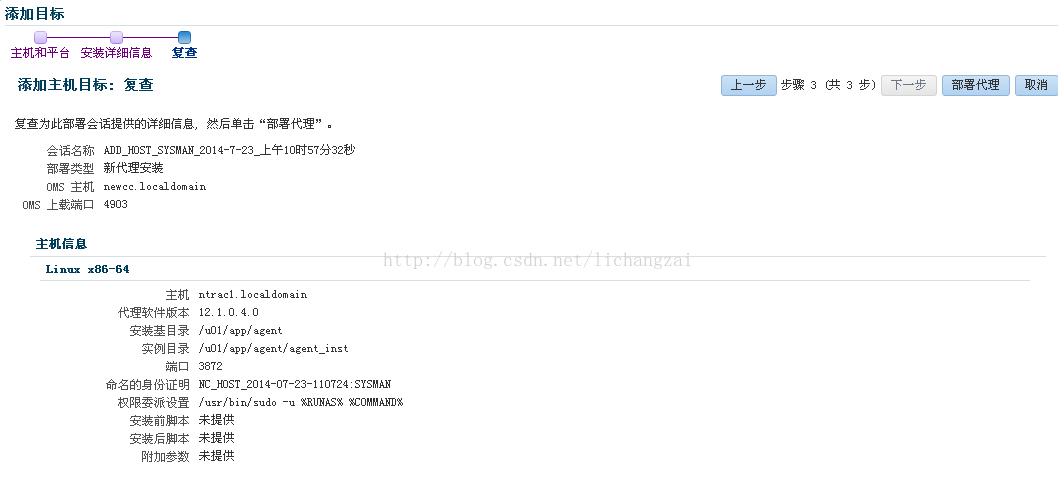
點擊“部署代理”

[oracle@racdb1bin]$ pwd
/u01/app/agent12c/agent_inst/bin
[oracle@racdb1bin]$ ./emctl status agent
OracleEnterprise Manager Cloud Control 12c Release 3
Copyright(c) 1996, 2013 Oracle Corporation. Allrights reserved.
---------------------------------------------------------------
AgentVersion : 12.1.0.3.0
OMSVersion : 12.1.0.3.0
ProtocolVersion : 12.1.0.1.0
AgentHome :/u01/app/agent12c/agent_inst
AgentBinaries :/u01/app/agent12c/core/12.1.0.3.0
AgentProcess ID : 9697
ParentProcess ID : 9612
AgentURL :https://racdb1.localdomain:3872/emd/main/
RepositoryURL :https://newcc.localdomain:4901/empbs/upload
Startedat : 2014-04-04 21:30:36
Startedby user : oracle
LastReload : (none)
Lastsuccessful upload :2014-04-04 21:31:51
Lastattempted upload :2014-04-04 21:31:51
TotalMegabytes of XML files uploaded so far : 0.24
Numberof XML files pending upload : 0
Sizeof XML files pending upload(MB) :0
Availabledisk space on upload filesystem :97.91%
CollectionStatus :Collections enabled
HeartbeatStatus : Ok
Lastattempted heartbeat to OMS :2014-04-04 21:33:40
Lastsuccessful heartbeat to OMS :2014-04-04 21:33:40
Nextscheduled heartbeat to OMS :2014-04-04 21:34:40
---------------------------------------------------------------
Agentis Running and Ready


http://blog.csdn.net/sunjiapeng/article/details/11036751
http://docs.oracle.com/cd/E24628_01/install.121/e24089/install_agent_usng_shrd_hm.htm
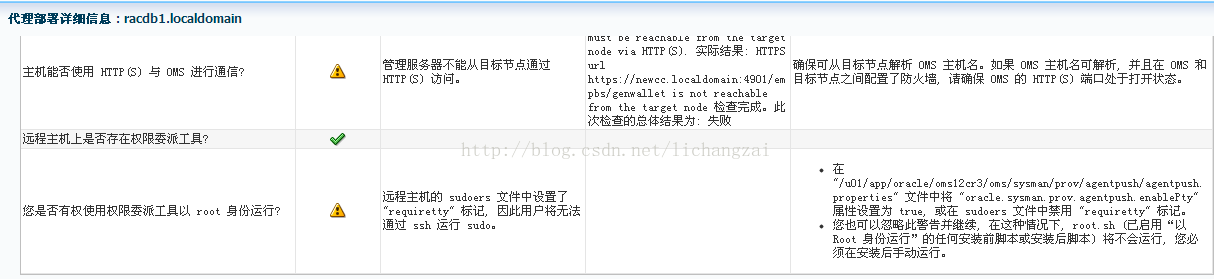
[oracle@newcc~]$ vi /u01/app/oracle/oms12cr3/oms/sysman/prov/agentpush/agentpush.properties
oracle.sysman.prov.agentpush.enablePty=true
[root@racdb1 app]# ll /etc/sudoers
-r--r-----1 root root 3381 2013-01-09 /etc/sudoers
或是
sudoers文件默認是只讀的
[root@racdb1app]# chmod 777 /etc/sudoers
[root@racdb1app]# vi /etc/sudoers
Defaults !requiretty
Defaults visiblepw
oracle ALL=(ALL) ALL
[root@racdb1app]# chmod 440 /etc/sudoers
[root@racdb1app]# ll /etc/sudoers
-r--r-----1 root root 3382 04-04 17:40 /etc/sudoers
或是:
如果通過上面的兩個設置不管用,或是忽略使用sudo執行root腳本
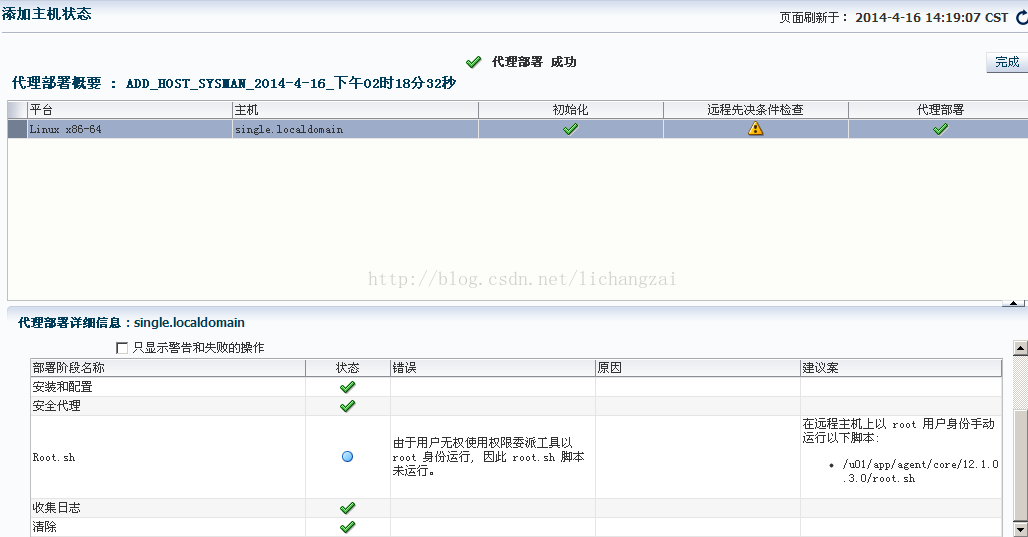
部署完成後,在目標端用root用戶登錄,執行
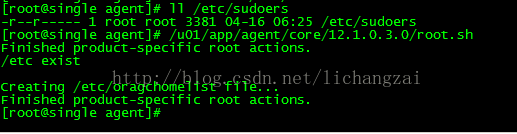
-r--r-----1 root root 3381 04-16 06:25 /etc/sudoers
[root@singleagent]# /u01/app/agent/core/12.1.0.3.0/root.sh
Finishedproduct-specific root actions.
/etcexist
Creating/etc/oragchomelist file...
Finishedproduct-specific root actions.
http://docs.oracle.com/cd/E24628_01/install.121/e24089/deinstall_agent.htm#CBBCADCD
[oracle@singlebin]$ pwd
/u01/app/agent12c/core/12.1.0.4.0/oui/bin
[oracle@singlebin]$ ./runInstaller -deinstall ORACLE_HOME=/u01/app/agent12c/agent_inst/core/12.1.0.4.0/-removeallfiles
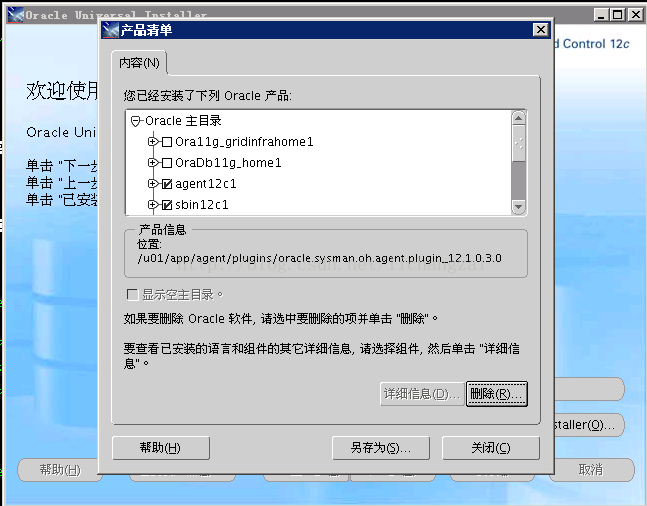
先選擇刪除OraHOME1- OraHOME6
再刪除sbin12c1
最後刪除agent12c1
最後刪除agent目錄內容
[oracle@singleagent]$ ls
agentimage.properties agent_inst core plugins plugins.txt plugins.txt.status
[oracle@singleagent]$ rm -rf *