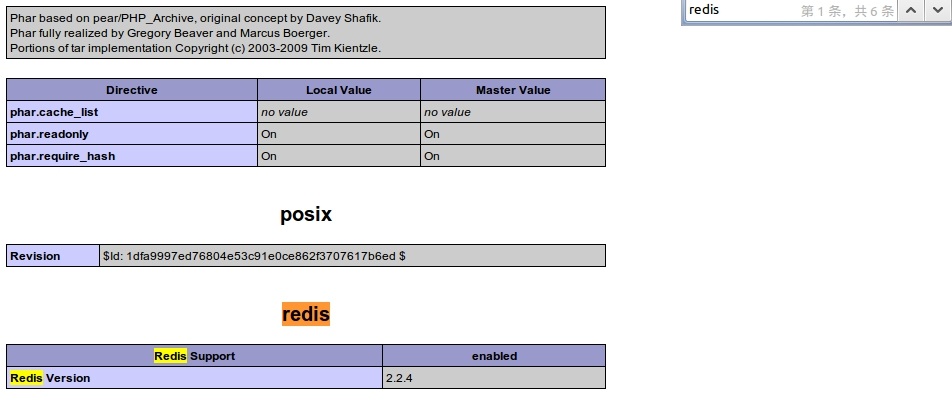
開始在 PHP 中使用 Redis 前, 我們需要確保已經安裝了 redis 服務及 PHP redis 驅動,且你的機器上能正常使用 PHP。 接下來讓我們安裝 PHP redis 驅動:下載地址為:https://github.com/phpredis/phpredis/releases。
以下操作需要在下載的 phpredis 目錄中完成:
$ wget https://github.com/phpredis/phpredis/archive/2.2.4.tar.gz
$ cd phpredis-2.2.7                      # 進入 phpredis 目錄
$ /usr/local/php/bin/phpize              # php安裝後的路徑
$ ./configure --with-php-config=/usr/local/php/bin/php-config
$ make && make install
如果你是 PHP7 版本,則需要下載指定分支:
git clone -b php7 https://github.com/phpredis/phpredis.git
vi /usr/local/php/lib/php.ini
增加如下內容:
extension_dir = "/usr/local/php/lib/php/extensions/no-debug-zts-20090626"

extension=redis.so
安裝完成後重啟php-fpm 或 apache。查看phpinfo信息,就能看到redis擴展。

<?php
    //連接本地的 Redis 服務
   $redis = new Redis();
   $redis->connect('127.0.0.1', 6379);
   echo "Connection to server sucessfully";
         //查看服務是否運行
   echo "Server is running: " . $redis->ping();
?>
執行腳本,輸出結果為:
Connection to server sucessfully
Server is running: PONG
<?php
   //連接本地的 Redis 服務
   $redis = new Redis();
   $redis->connect('127.0.0.1', 6379);
   echo "Connection to server sucessfully";
   //設置 redis 字符串數據
   $redis->set("tutorial-name", "Redis tutorial");
   // 獲取存儲的數據並輸出
   echo "Stored string in redis:: " . $redis->get("tutorial-name");
?>
執行腳本,輸出結果為:
Connection to server sucessfully
Stored string in redis:: Redis tutorial
<?php
   //連接本地的 Redis 服務
   $redis = new Redis();
   $redis->connect('127.0.0.1', 6379);
   echo "Connection to server sucessfully";
   //存儲數據到列表中
   $redis->lpush("tutorial-list", "Redis");
   $redis->lpush("tutorial-list", "Mongodb");
   $redis->lpush("tutorial-list", "Mysql");
   // 獲取存儲的數據並輸出
   $arList = $redis->lrange("tutorial-list", 0 ,5);
   echo "Stored string in redis";
   print_r($arList);
?>
執行腳本,輸出結果為:
Connection to server sucessfully
Stored string in redis
Redis
Mongodb
Mysql
<?php
   //連接本地的 Redis 服務
   $redis = new Redis();
   $redis->connect('127.0.0.1', 6379);
   echo "Connection to server sucessfully";
   // 獲取數據並輸出
   $arList = $redis->keys("*");
   echo "Stored keys in redis:: ";
   print_r($arList);
?>
執行腳本,輸出結果為:
Connection to server sucessfully
Stored string in redis::
tutorial-name
tutorial-list